
Mill Tool Library and Tool Offsets
TouchDRO's tool library (also called tool offset memory) provides a way to save the diameter, flute count, and optionally the Z offset of any number of milling cutters. It is the manual-mill version of a CNC tool table. If you use quick-change holders, you probably already understand the value of swapping tools without having to re-find the Z zero after each change. That said, the library is surprisingly useful even with plain collets and endmill holders. Being able to recall the diameter and flute count of your commonly used cutters by name saves time when milling slots and pockets, and even complex profiles in the Graphical View display.
For example, when you are milling a slot or a pocket to size, you can recall the cutter from the library and TouchDRO will shift the X and Y readouts by half its diameter, so they show the position of the cutting edge. With a guide line on each wall, the readout reads zero when that wall is at size, and you don't need to add or subtract half the cutter diameter. This is covered in "Tool Compensation", and there are worked examples for a slot and a rectangular pocket in "Working with Guides".
The same idea extends to a complex contour. You can import a CAD drawing of the part, or overlay a photo of it, and TouchDRO will draw the recalled cutter to scale against the outline, so you can see how much material each pass covers. The full workflow is covered in "Machining to a CAD Drawing" and "Machining a Part from a Photo".
The flute count has one use. Together with the diameter, the feed rate, and the spindle speed, TouchDRO calculates the chip load (feed per tooth) and shows it live in the "Axis Details" dialog. Recalling the tool supplies the two numbers that don't change, so the chip load is shown on every job without entering the cutter's size again.
Opening the Tool Library
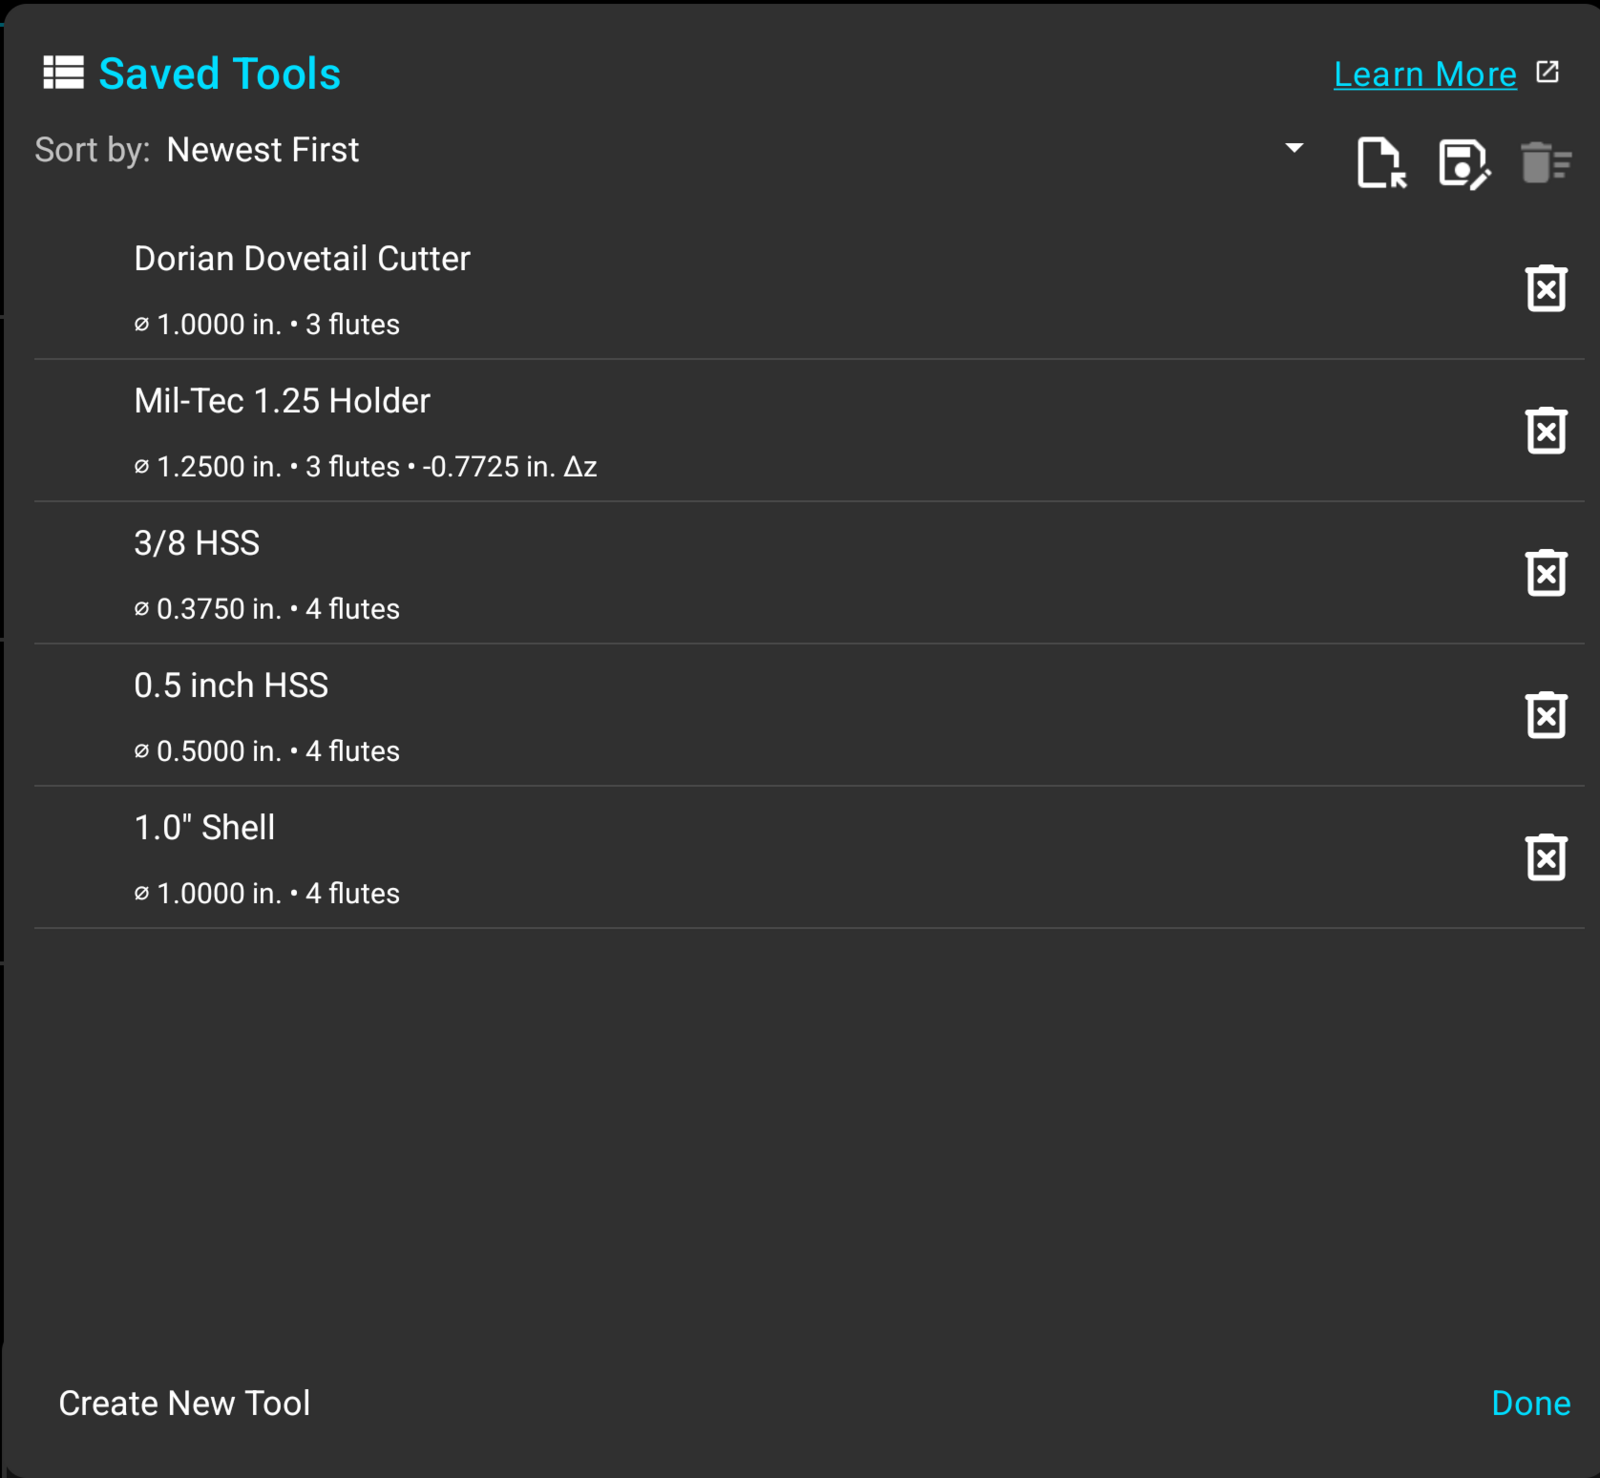
To open the tool library, select "Tool Library" from the application menu drawer. This will bring up the "Saved Tools" dialog. The tool that is currently in use is shown in italics and in green, and its row has no delete button.
The Tool List
Each row shows the tool's name and, under it, the values stored for it: the flute diameter, the flute count, and the Z offset where the tool has one. For a tool with no Z offset, the row shows only the diameter and flute count.
The "Sort by" selector at the top orders the list by "Newest First", "Oldest First", "Name A-Z", or "Name Z-A". The order applies to this dialog only.
This dialog is where tools are entered, edited and deleted. To recall a tool to the readout, use the "Tool Offsets" panel described below, or the "Tool Compensation" dialog, which also opens from the cutter icon in the toolbar. The toolbar shows the name of the active tool in amber next to that icon, so you can tell which tool TouchDRO assumes is in the spindle from any screen.
The Tool Offsets Panel
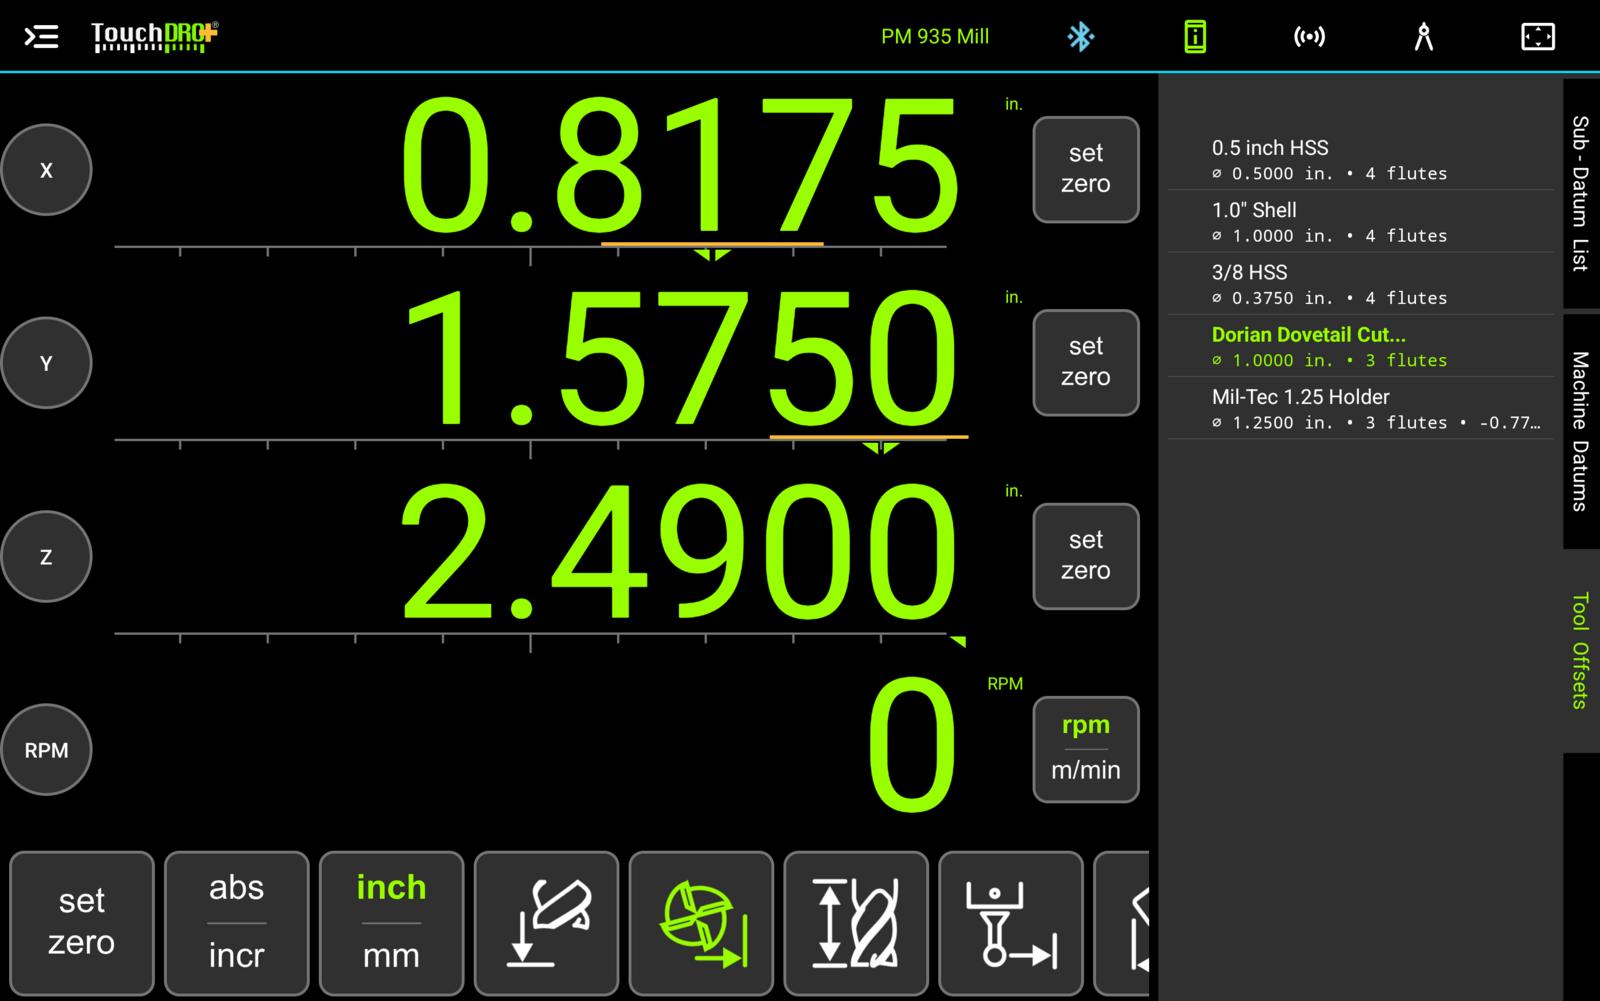
The "Tool Offsets" tab on the panel at the right of the main screen, beside "Sub-Datum List" and "Machine Datums", lists the same tools sorted by name. Tools are recalled from this panel, so a tool change takes one tap, without opening a dialog.
Recalling a Tool
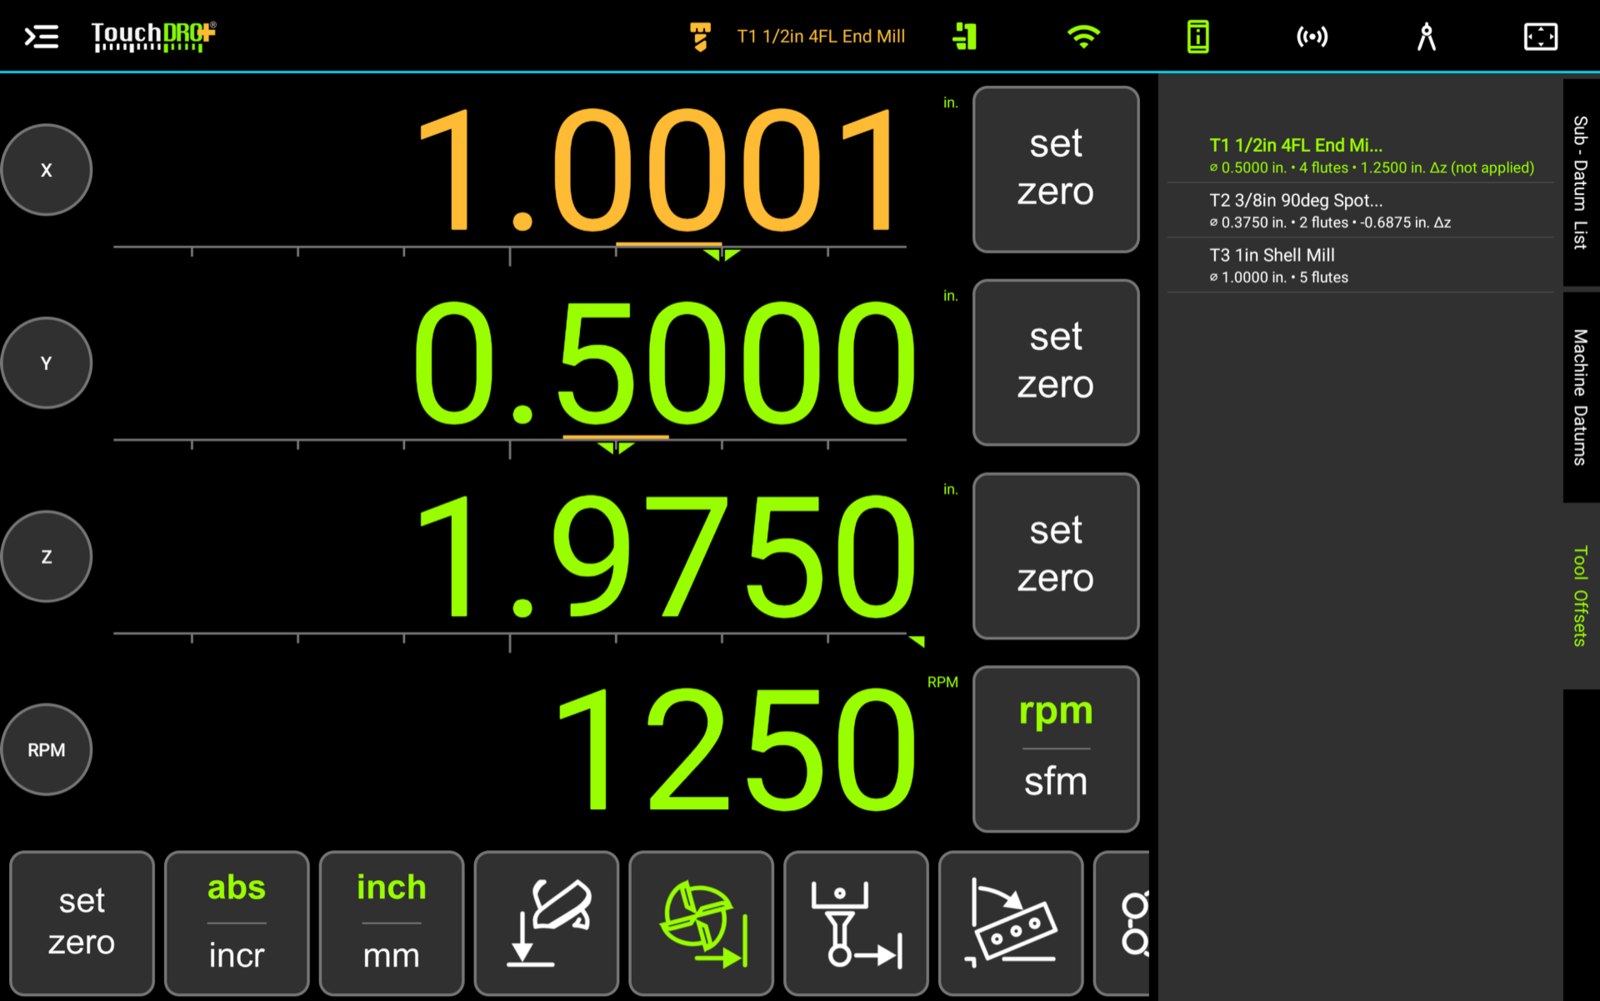
To recall a tool, tap its row in the "Tool Offsets" panel. TouchDRO will load the flute diameter and count for cutter radius compensation, put the stored Z offset on the Z readout, show the row in green to mark the tool as active, and show the tool's name in amber in the toolbar. Tapping the green row removes the tool and clears both offsets.
A tool change keeps the radius compensation direction that is in force, recalculated for the new diameter. When no direction has been chosen yet, the tool is recalled in the center position, so the X and Y readouts don't shift until you choose one. TouchDRO draws the cutter in the Graphical View display as soon as the tool is recalled, centered on the spindle position until a direction is selected. Directions are covered in "Tool Compensation".
The Z offset is used only while the "Z Offset" switch in the "Tool Compensation" dialog is on, which is the default. With the switch off, the active tool's row reads "(not applied)" after its Z offset, and the Z readout stays uncompensated. TouchDRO remembers the switch for each machine profile, along with the active tool.
Adding a Tool
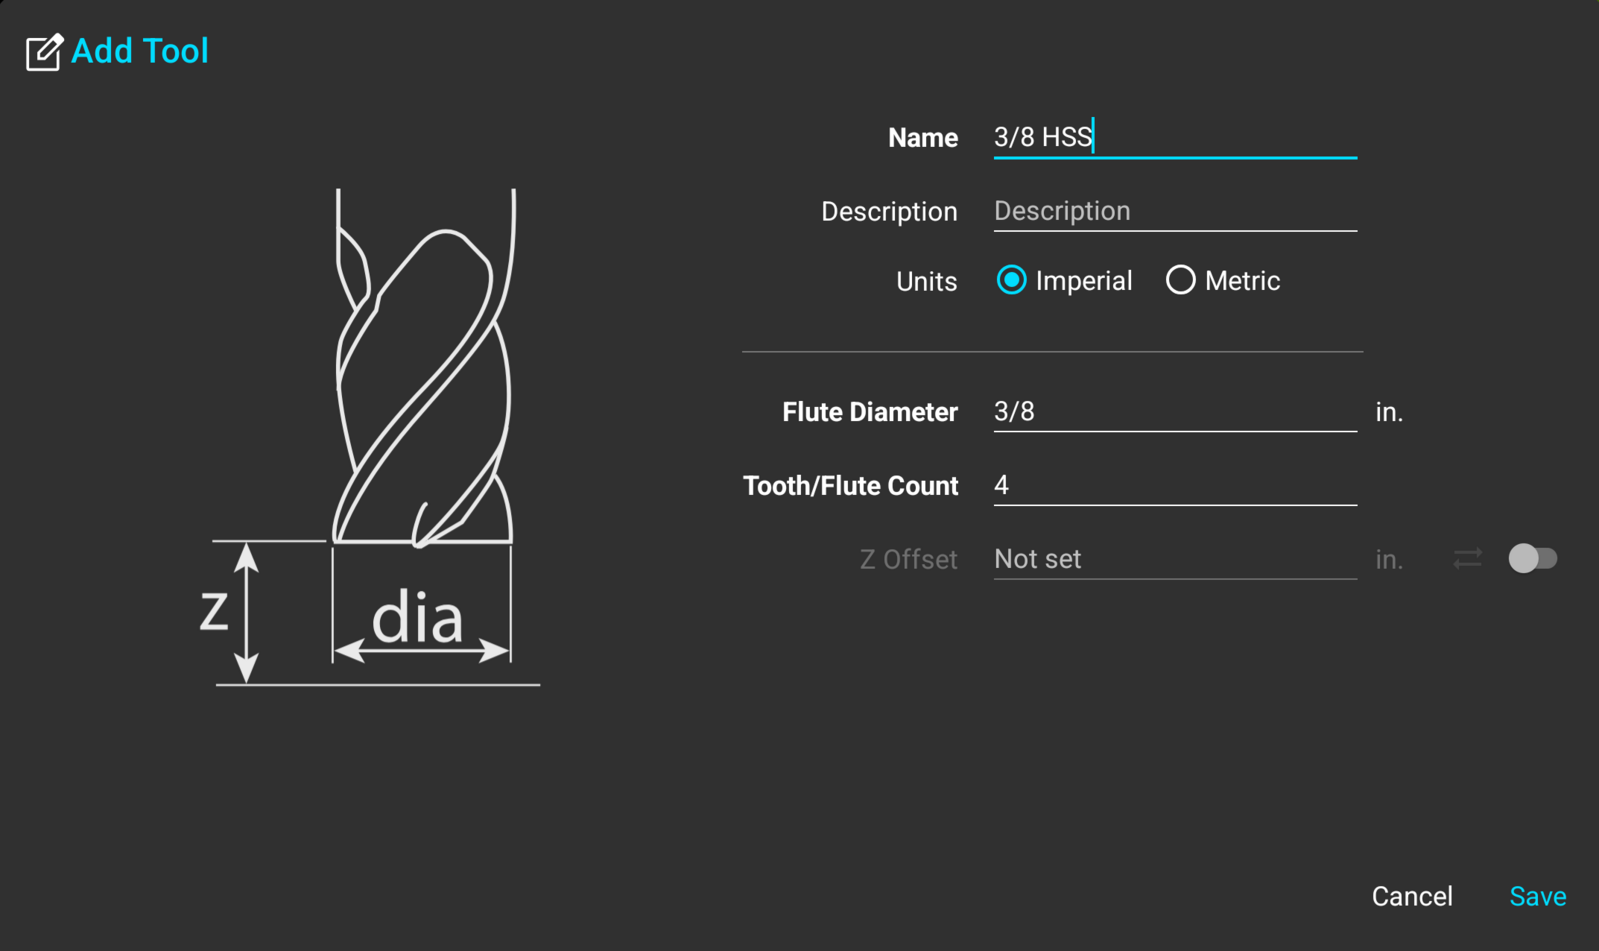
To add a tool, press "Create New Tool" in the lower-left corner of the "Saved Tools" dialog. This will bring up the "Add Tool" dialog, where the drawing on the left shows what each value means.
A cutter typed into the "Tool Compensation" dialog can be saved to the library from there as well, using the save icon beside the "Tool" dropdown. This will open the same "Add Tool" dialog with the diameter and units already filled in, as described in "Tool Compensation".
Name and Description
The name is required, and it's what identifies the tool everywhere else in the application: the tool list, the "Tool Offsets" panel, and the "Tool" dropdown in the "Tool Compensation" dialog. Something along the lines of "1/2 4FL Carbide" reads better in those places than a catalog number. The "Tool Offsets" panel is narrow, so a name longer than about 20 characters is shown truncated there.
The description is optional and appears in this dialog and in an exported CSV file. It is a good place for the things that don't fit in a name, such as the holder a tool is set in or the material it is ground for.
Units
Each tool has its own units, set by the "Imperial" and "Metric" selection. A metric endmill can be entered in millimeters and stored that way on a readout you work in inches, and TouchDRO converts the values when the tool is recalled.
Switching the selection while entering a tool converts whatever is already in the "Flute Diameter" and "Z Offset" fields, so a diameter typed in inches isn't reinterpreted as millimeters.
Flute Diameter
The flute diameter is required and has to be greater than zero; a negative value is refused with "Please enter a valid tool diameter". Enter the diameter of the cutter rather than its radius; TouchDRO halves it when it applies radius compensation.
The field accepts arithmetic and fractions, so a 3/8" endmill can be entered as "3/8".
Flute Count
The "Tooth/Flute Count" field is required. TouchDRO uses it for the chip load value in the "Axis Details" dialog, which calculates feed per tooth from the feed rate, the spindle speed, and this number.
Z Offset
The Z offset is optional; the switch at the right of the row turns it on and off. Switched off, the field is greyed out and reads "Not set", and the tool is stored with no height offset, which is what the "Tool Compensation" dialog shows for it as well. Switched on, the field is the distance between the tip of the cutter and the tip of the reference tool, which is the tool the Z zero was set with. On a CNC control this number is the tool length offset, and some DRO consoles call it the tool height offset.
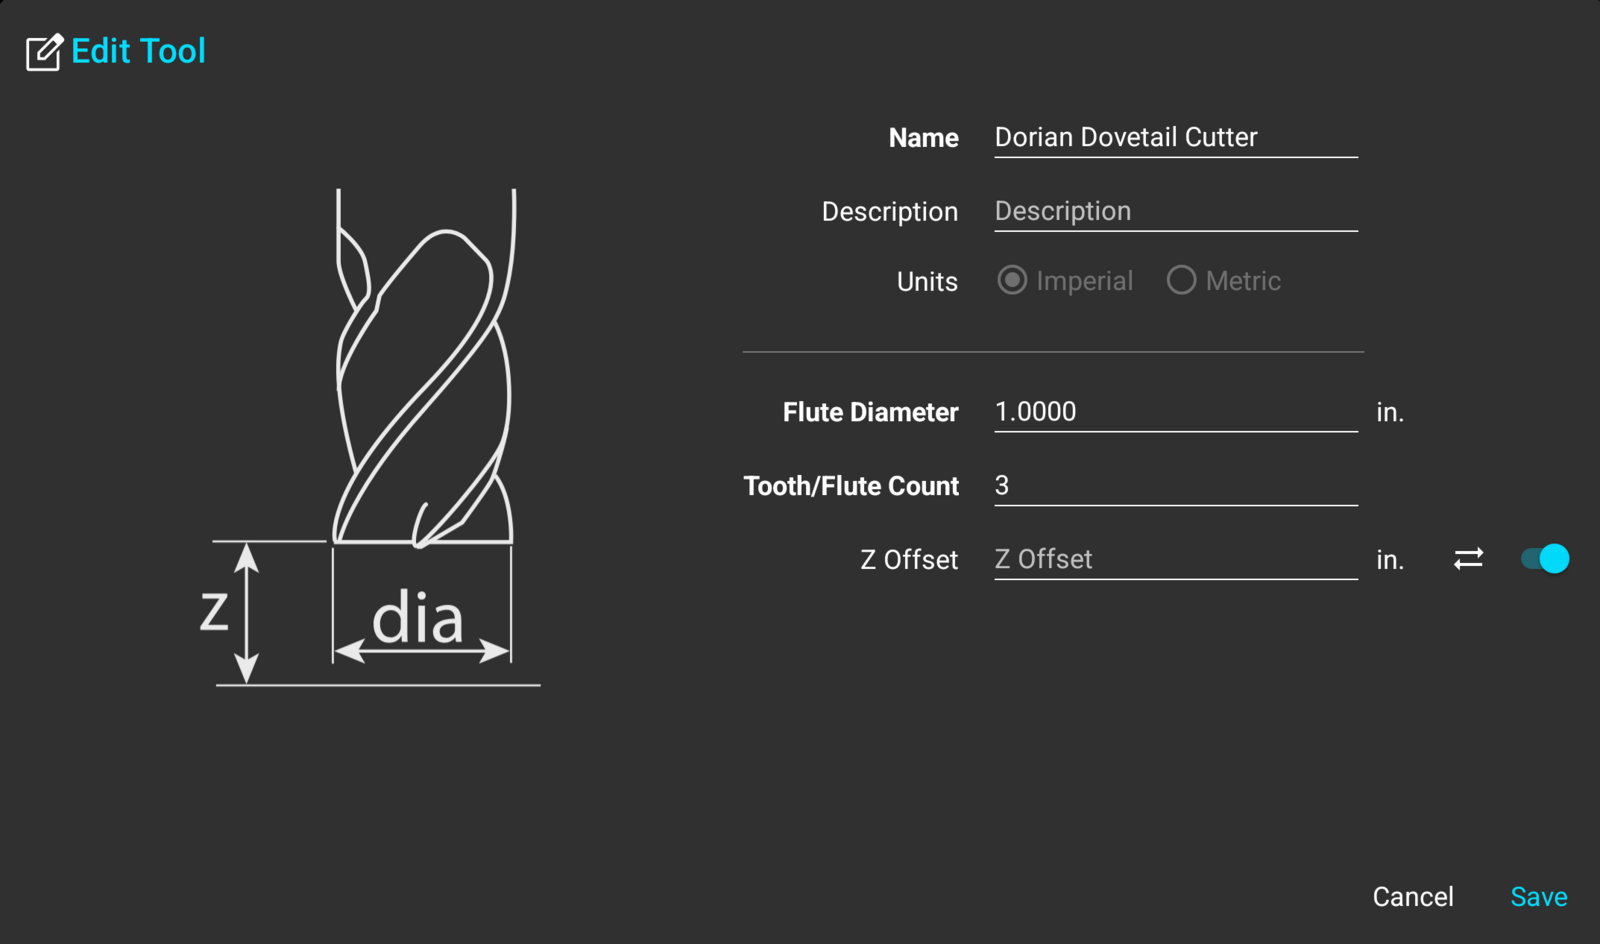
The "Sync" button next to the field fills it in from the current position. Touch the tool off against the surface where Z reads 0, then press "Sync". TouchDRO will take the current Z reading, subtract any tool offset that is already in force, flip the sign, and enter the result. Because the active tool's offset is subtracted, a tool synced while another library tool is in the spindle is still measured from the reference tool.
"Sync" works with the switch off as well. Pressing it turns the switch on and fills in the value, which saves a tap when a tool is being entered for the first time.
"Sync" needs a live reading. It will show a message instead of filling in a number when TouchDRO is not connected to the adapter, when a sub-datum is selected (the readout is showing the distance to it rather than the position), or in measurement mode.
Editing and Deleting Tools
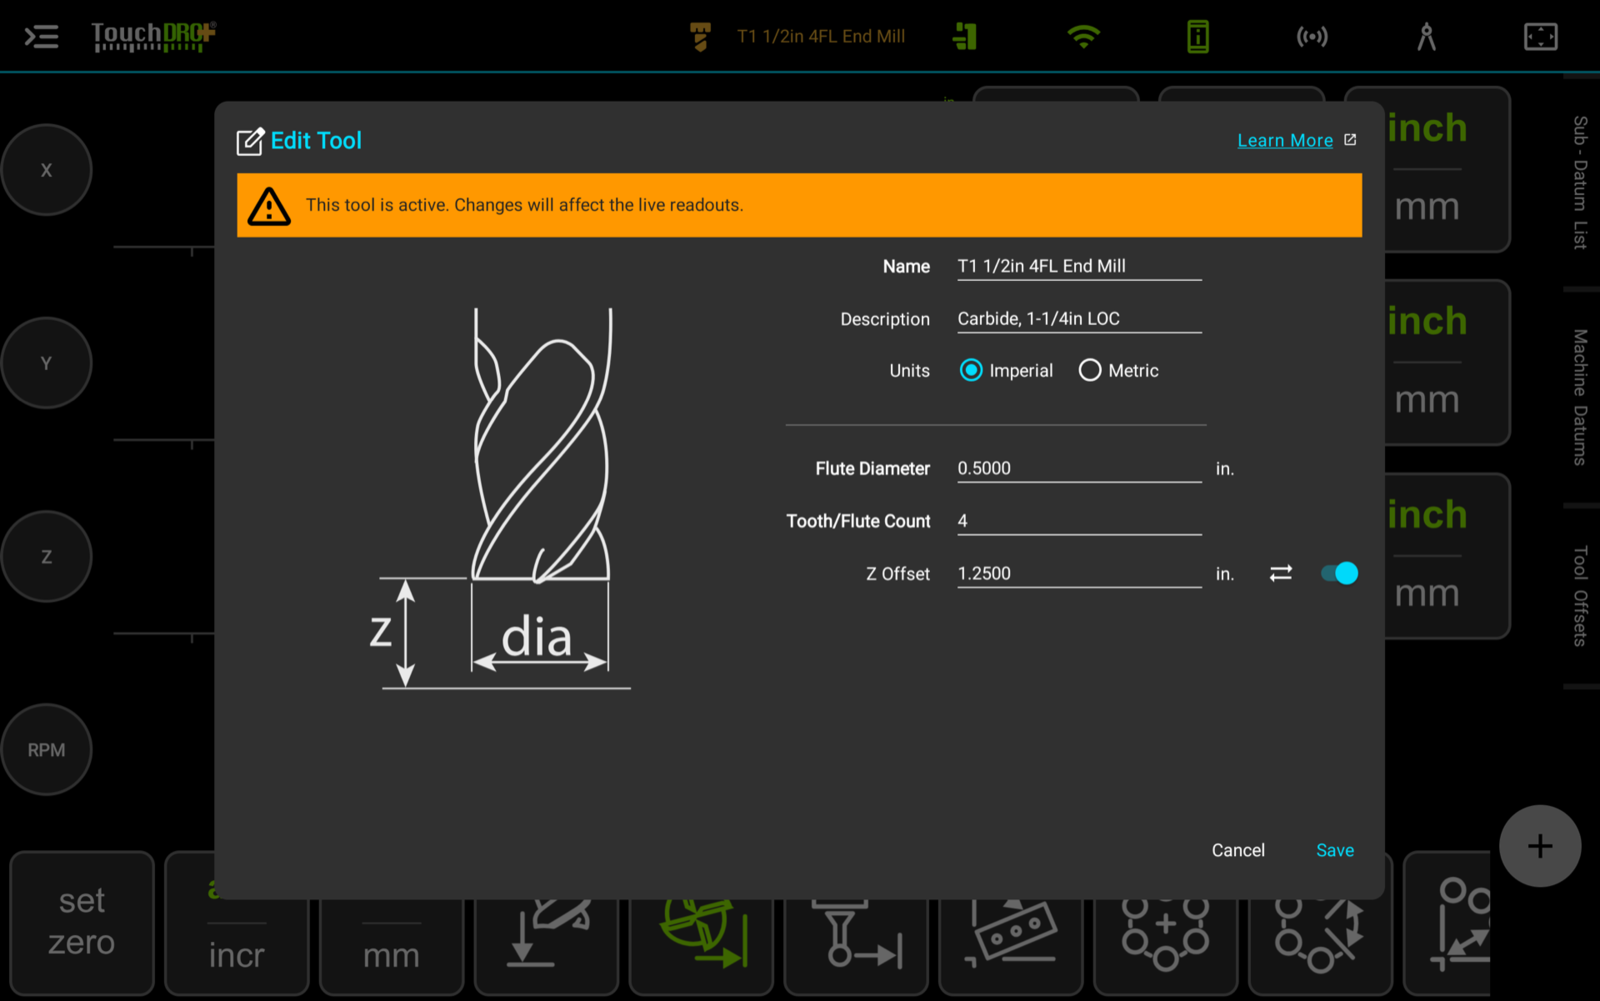
To edit a tool, tap its row in the "Saved Tools" dialog. The "Edit Tool" dialog is the same form as "Add Tool" with the stored values filled in.
There are two ways to delete tools:
- To delete a single tool, press the delete icon on its row. TouchDRO will ask for confirmation before removing it, naming the tool in the question
- To delete several tools at once, long-press one of the rows. This will switch the list into multi-select mode, where more rows can be checked; the delete button at the top of the dialog removes everything that is checked, after a confirmation that names the count
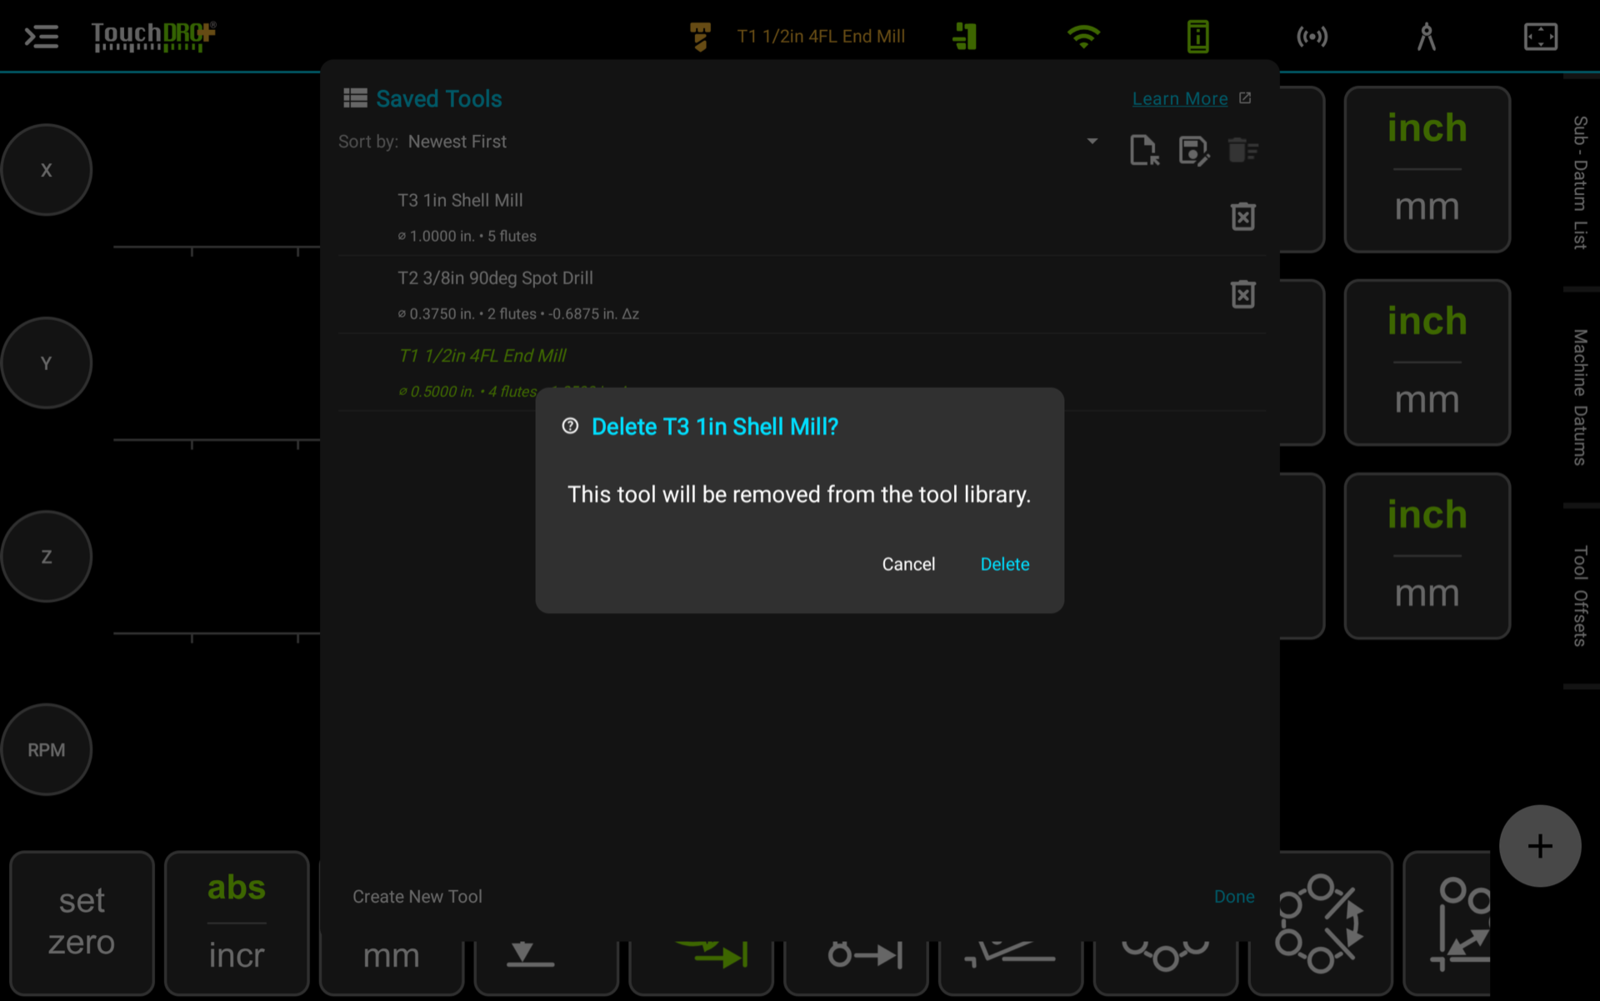
The active tool can't be deleted while it is in use. To remove it, clear the compensation first, from the "Tool Compensation" dialog or by tapping its green row in the "Tool Offsets" panel.
If you open the tool that is currently active, a notice at the top of the "Edit Tool" dialog says "This tool is active. Changes will affect the live readouts." Pressing "Save" recalculates the offsets on the readout from the new values, keeping the compensation direction and the Z switch as they were. The active tool belongs to the machine profile, so it stays active when you switch workspaces, and the edit is in force in every one of them.
Importing and Exporting Tools
The Z offset is the only value in a tool record that has to be measured at the machine. The diameter and flute count can be read off the packaging or measured with calipers, so a set of tools can be entered in a spreadsheet, saved as a CSV file, and imported into TouchDRO in one go, using the "Import" button at the top of the "Saved Tools" dialog. This is the quickest way to enter a drawer full of endmills. Z offsets can be filled in afterwards from the tool editor, on the tools that need them.
A mill file has one row per tool. The file below is a small library straight out of "Export":
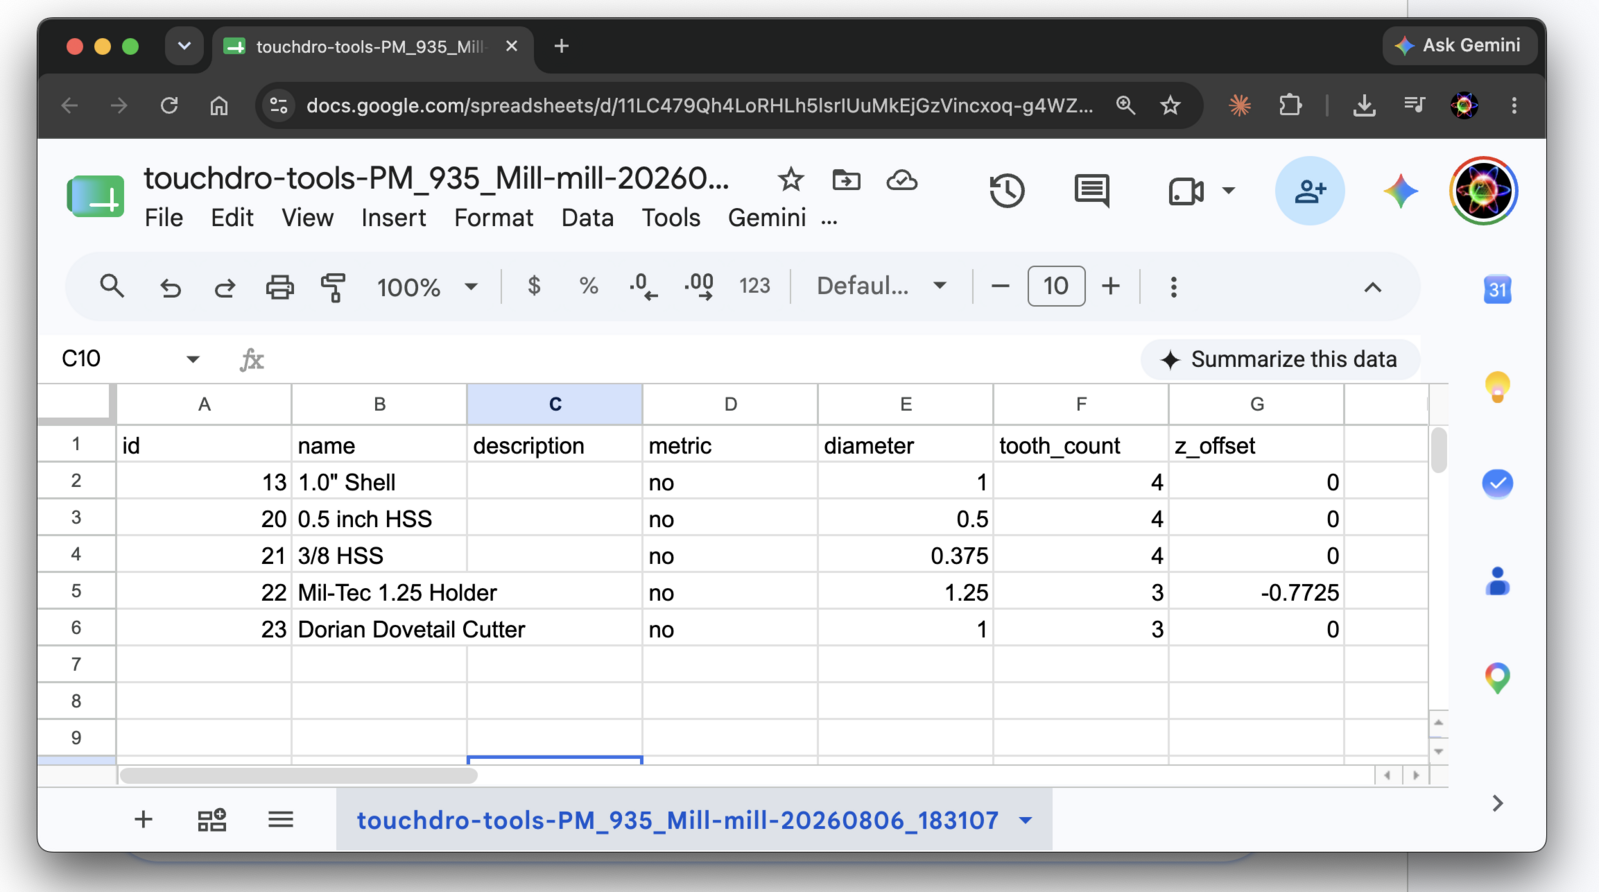
id,  name,                    description,  metric,  diameter,  tooth_count,  z_offset
13,  "1.0"" Shell",           ,             no,      1.0,       4,            0.0
20,  0.5 inch HSS,            ,             no,      0.5,       4,            0.0
21,  3/8 HSS,                 ,             no,      0.375,     4,            0.0
22,  Mil-Tec 1.25 Holder,     ,             no,      1.25,      3,            -0.7725
23,  Dorian Dovetail Cutter,  ,             no,      1.0,       3,            0.0
The metric column records the units each tool was entered in, so inch and millimeter tools can be in the same file. A tool with no height offset writes 0.0 in the z_offset column, and imports back as a tool with the Z offset switched off.
A sheet built from scratch needs four columns: name, metric, diameter, and tooth_count. The id column belongs to records that already exist, so leave it out and TouchDRO will enter every row as a new tool. The description and z_offset columns can be left out as well. A file with no z_offset column is accepted, and every tool in it imports with the Z offset switched off.
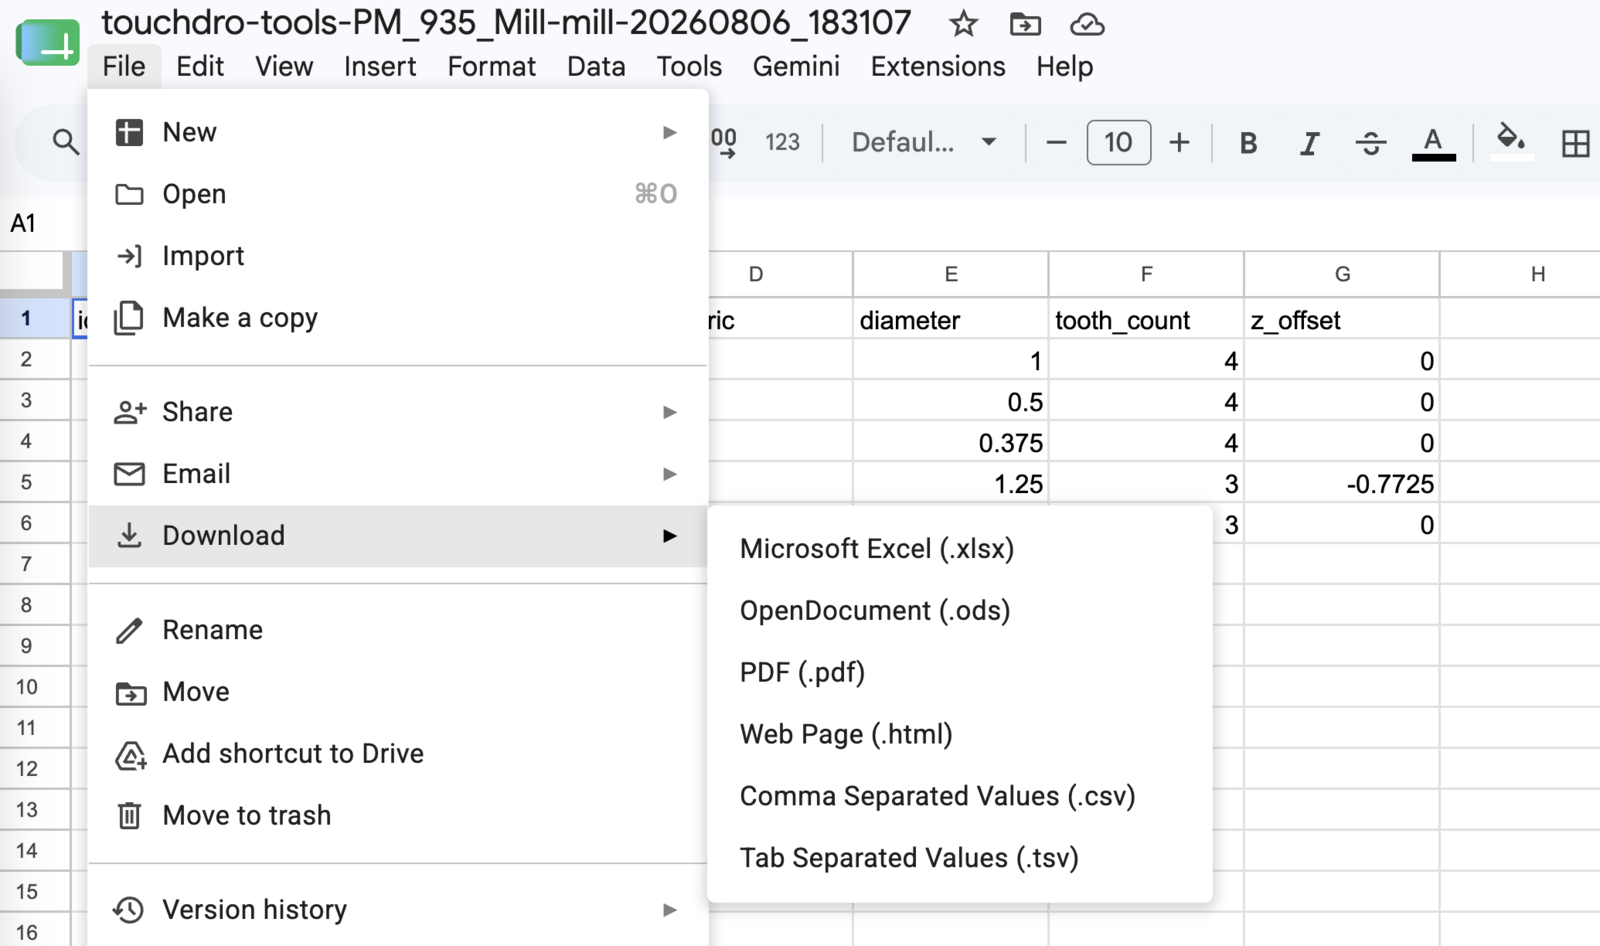
To save the sheet as a CSV file in Google Sheets, use "File", then "Download", then "Comma Separated Values (.csv)". A spreadsheet on the desktop has the same option under "Save As".
Export writes the whole library, or only the checked rows when the list is in multi-select mode.
The Import Preview
Import shows the file in a preview grid first. Nothing is written to the library until you press the import button at the bottom of the dialog. The grid scrolls sideways when the columns run wider than the dialog.
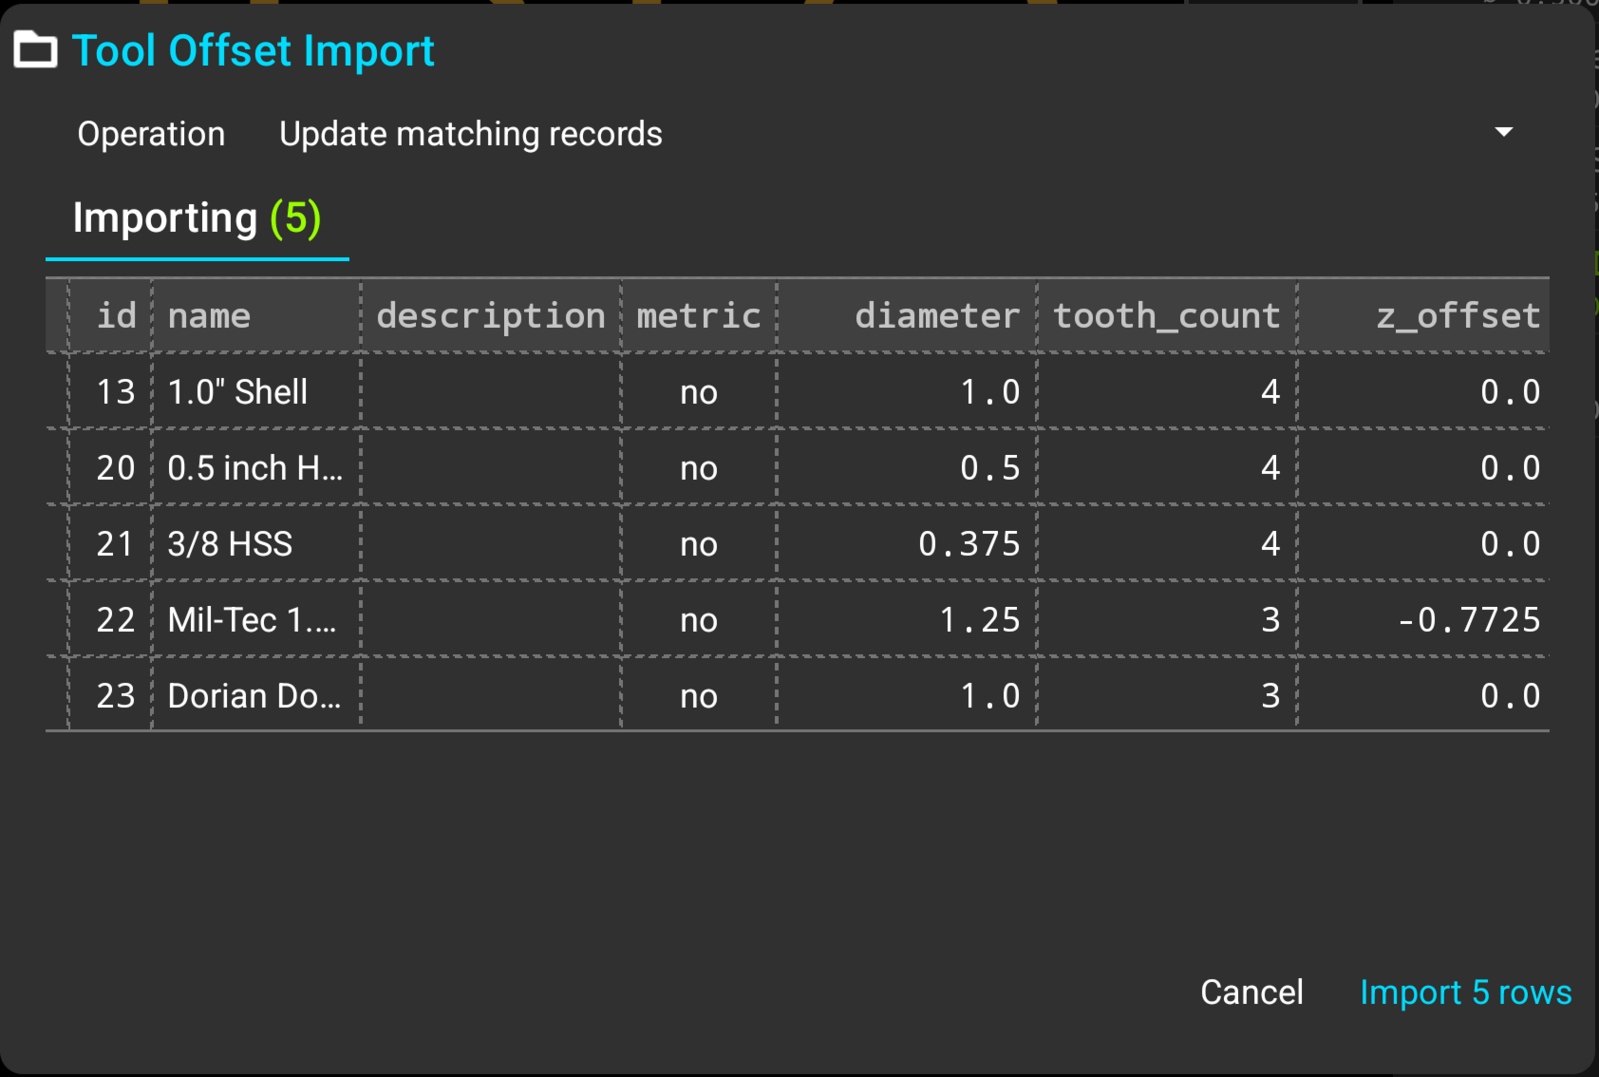
The "Operation" selection at the top decides what the file does to the library. "Add as new records" enters every row as a new tool, and "Replace all existing records" clears the library first. "Update matching records" is offered when the file was exported from this device, and rewrites the tools the ids belong to rather than duplicating them. If a tool is active at the time, "Update matching records" recalls it again with its new values and "Replace all existing records" removes it from the readout.
A row with a negative diameter is marked as an error in the preview, "Value in "diameter" can't be negative.", and is not imported. A zero diameter is accepted, for a tool that has only a Z offset.
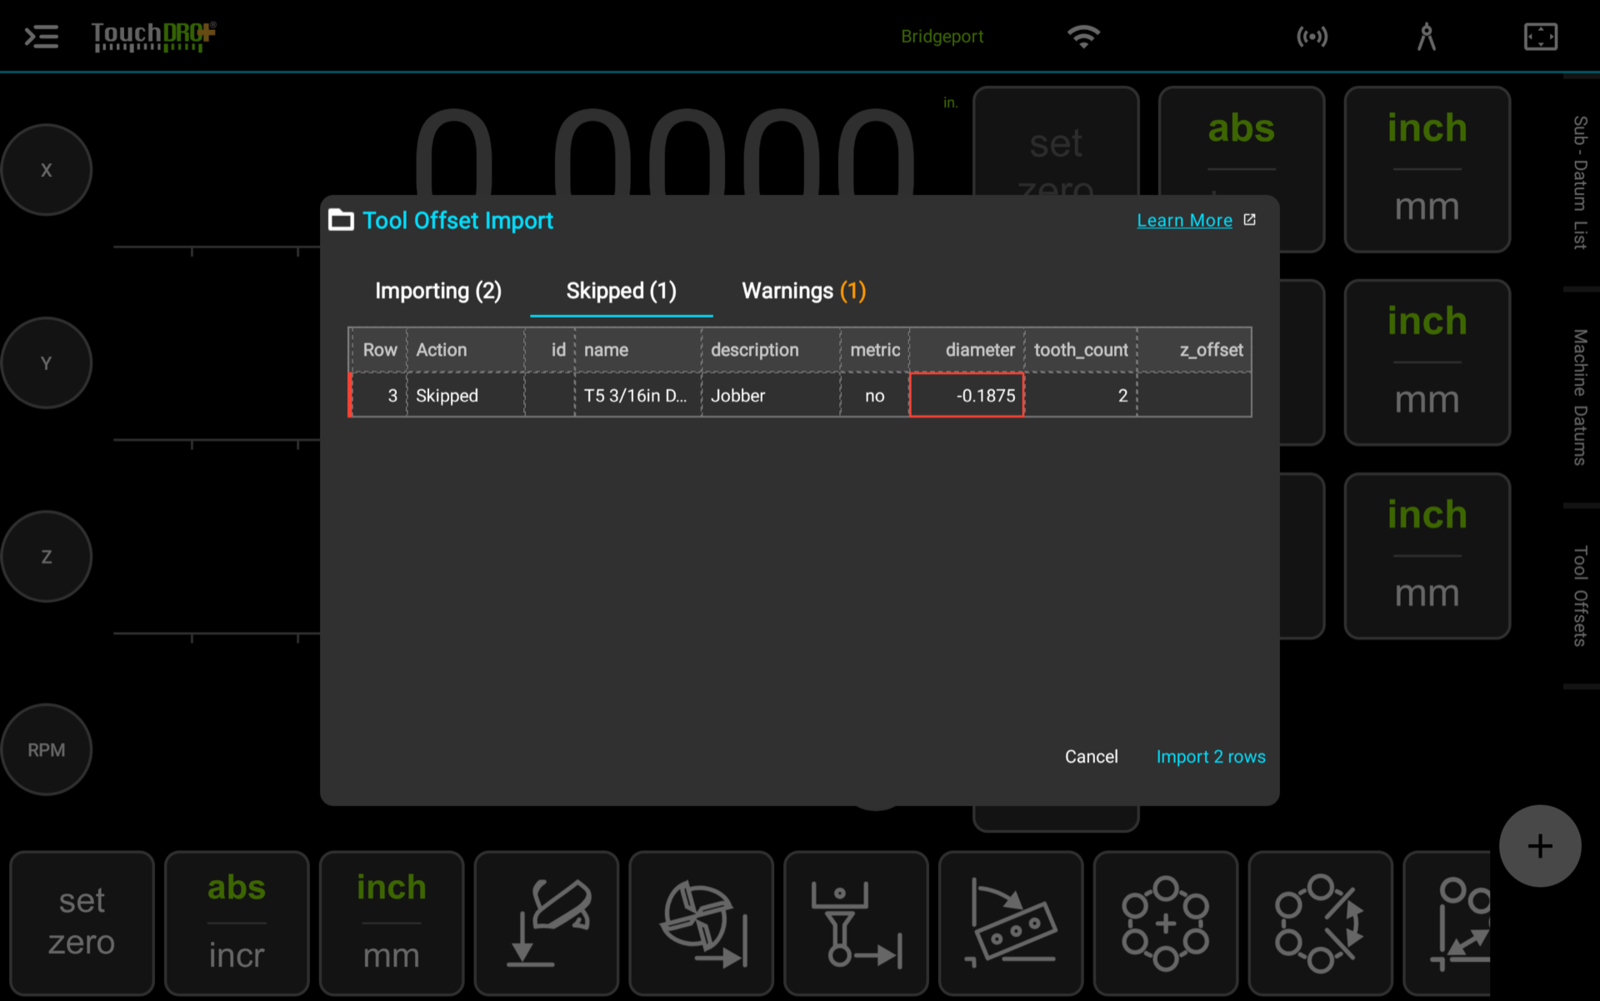
The preview and its error markings work the same way as they do for the sub-datum import, covered in "Importing and Exporting Sub-Datum Coordinates".
Where the Library Is Stored
The tool library belongs to the machine profile, so each profile keeps its own set of tools and a new profile starts empty. Turning on "Use Shared Tool Library" in the application settings keeps one set across every profile instead. This is useful when the same cutters are used on more than one machine.
The active tool and the "Z Offset" switch setting are kept with the machine profile as well, so they stay as they are when you switch workspaces.
Deleting a machine profile deletes the tools stored under it. Profiles are covered in "Machine Profiles".