
TouchDRO Quick Start Guide
Going from a box of parts to a working digital readout takes about an hour. This guide walks through the process in six steps, in order. Each step ends with what you should see when it worked, and links to a detailed guide for that stage.
No step here can damage the hardware. The worst case is a number that doesn't move, and each step says where to look when that happens.
Step 1: Gather What You Need
A complete TouchDRO setup has four parts:
- DRO scales mounted on your machine (or ready to be mounted), one per axis. TouchDRO works with most new and legacy scales, including the ones left behind by a dead DRO console; "DRO Scale Compatibility" covers the supported brands and signal types.
- A TouchDRO adapter. The adapter reads the scales and sends their position to the tablet over Bluetooth. Adapters for milling machines and lathes are available in the TouchDRO store.
- An Android tablet. Any reasonably recent Samsung, Lenovo, or Amazon Fire tablet will work; the "Recommended Android Tablets" guide covers specific models.
- A USB power source for the adapter. A common USB phone charger works.
You will also need a way to connect your tablet to your Wi-Fi network for Step 4. The DRO itself does not need internet once it is set up.
Step 2: Mount the Hardware
The scales mount to the machine axes, the adapter mounts somewhere out of the way of chips and coolant, and the tablet mounts where you can see and reach it. If your scales came with the machine or are already installed, skip ahead to Step 3.
Scale installation is the most machine-specific part of the whole setup, and it is covered separately. For the tablet, the "How to Mount TouchDRO" guide shows the mounting approach we use in our own shop, built from an inexpensive monitor arm.
Step 3: Plug In the Scales and Power
Each scale plugs into one of the labeled inputs on the adapter, and the adapter gets power over its USB cable. Which scale goes into which input determines which on-screen readout it drives, so plug the X-axis scale into the input labeled X, and so on.
Plug the USB cable into the adapter and into your power source last. There is no power switch. The green "Power" light comes on at once, and about a second later the blue "Data" light gives three quick blinks and settles into one brief flash every two seconds.
You will know this step worked when the "Data" light is doing that slow flash: the adapter is running and waiting for the tablet. The scales get checked in Step 6, when you crank a handle and the matching number moves. If a plug does not fit or your scales have an unusual connector, see "Connecting DRO Scales to TouchDRO".
Step 4: Put TouchDRO on Your Tablet
TouchDRO installs from the Google Play Store like any other Android application (or from the Amazon Appstore on Fire tablets). Installing takes a couple of minutes; the one prerequisite that trips people up is that the Play Store requires a Google account, so if you don't have one, plan for a ten-minute detour to create it.
- Connect the tablet to your Wi-Fi network and sign in to your Google account.
- To find the app, open the Play Store and type "TouchDRO" into the search box.
- Tap "Install". The application will download and install in the background.
The "TouchDRO App Installation" guide covers this step in detail, including creating a Google account, the Amazon Appstore differences on Fire tablets, and three tablet settings worth changing for shop use (the screen timeout in particular).
TouchDRO opens on its main screen, set up for a vertical mill. If that is your machine, there is nothing to change yet. For a lathe or a horizontal mill, tell the application what it is on:
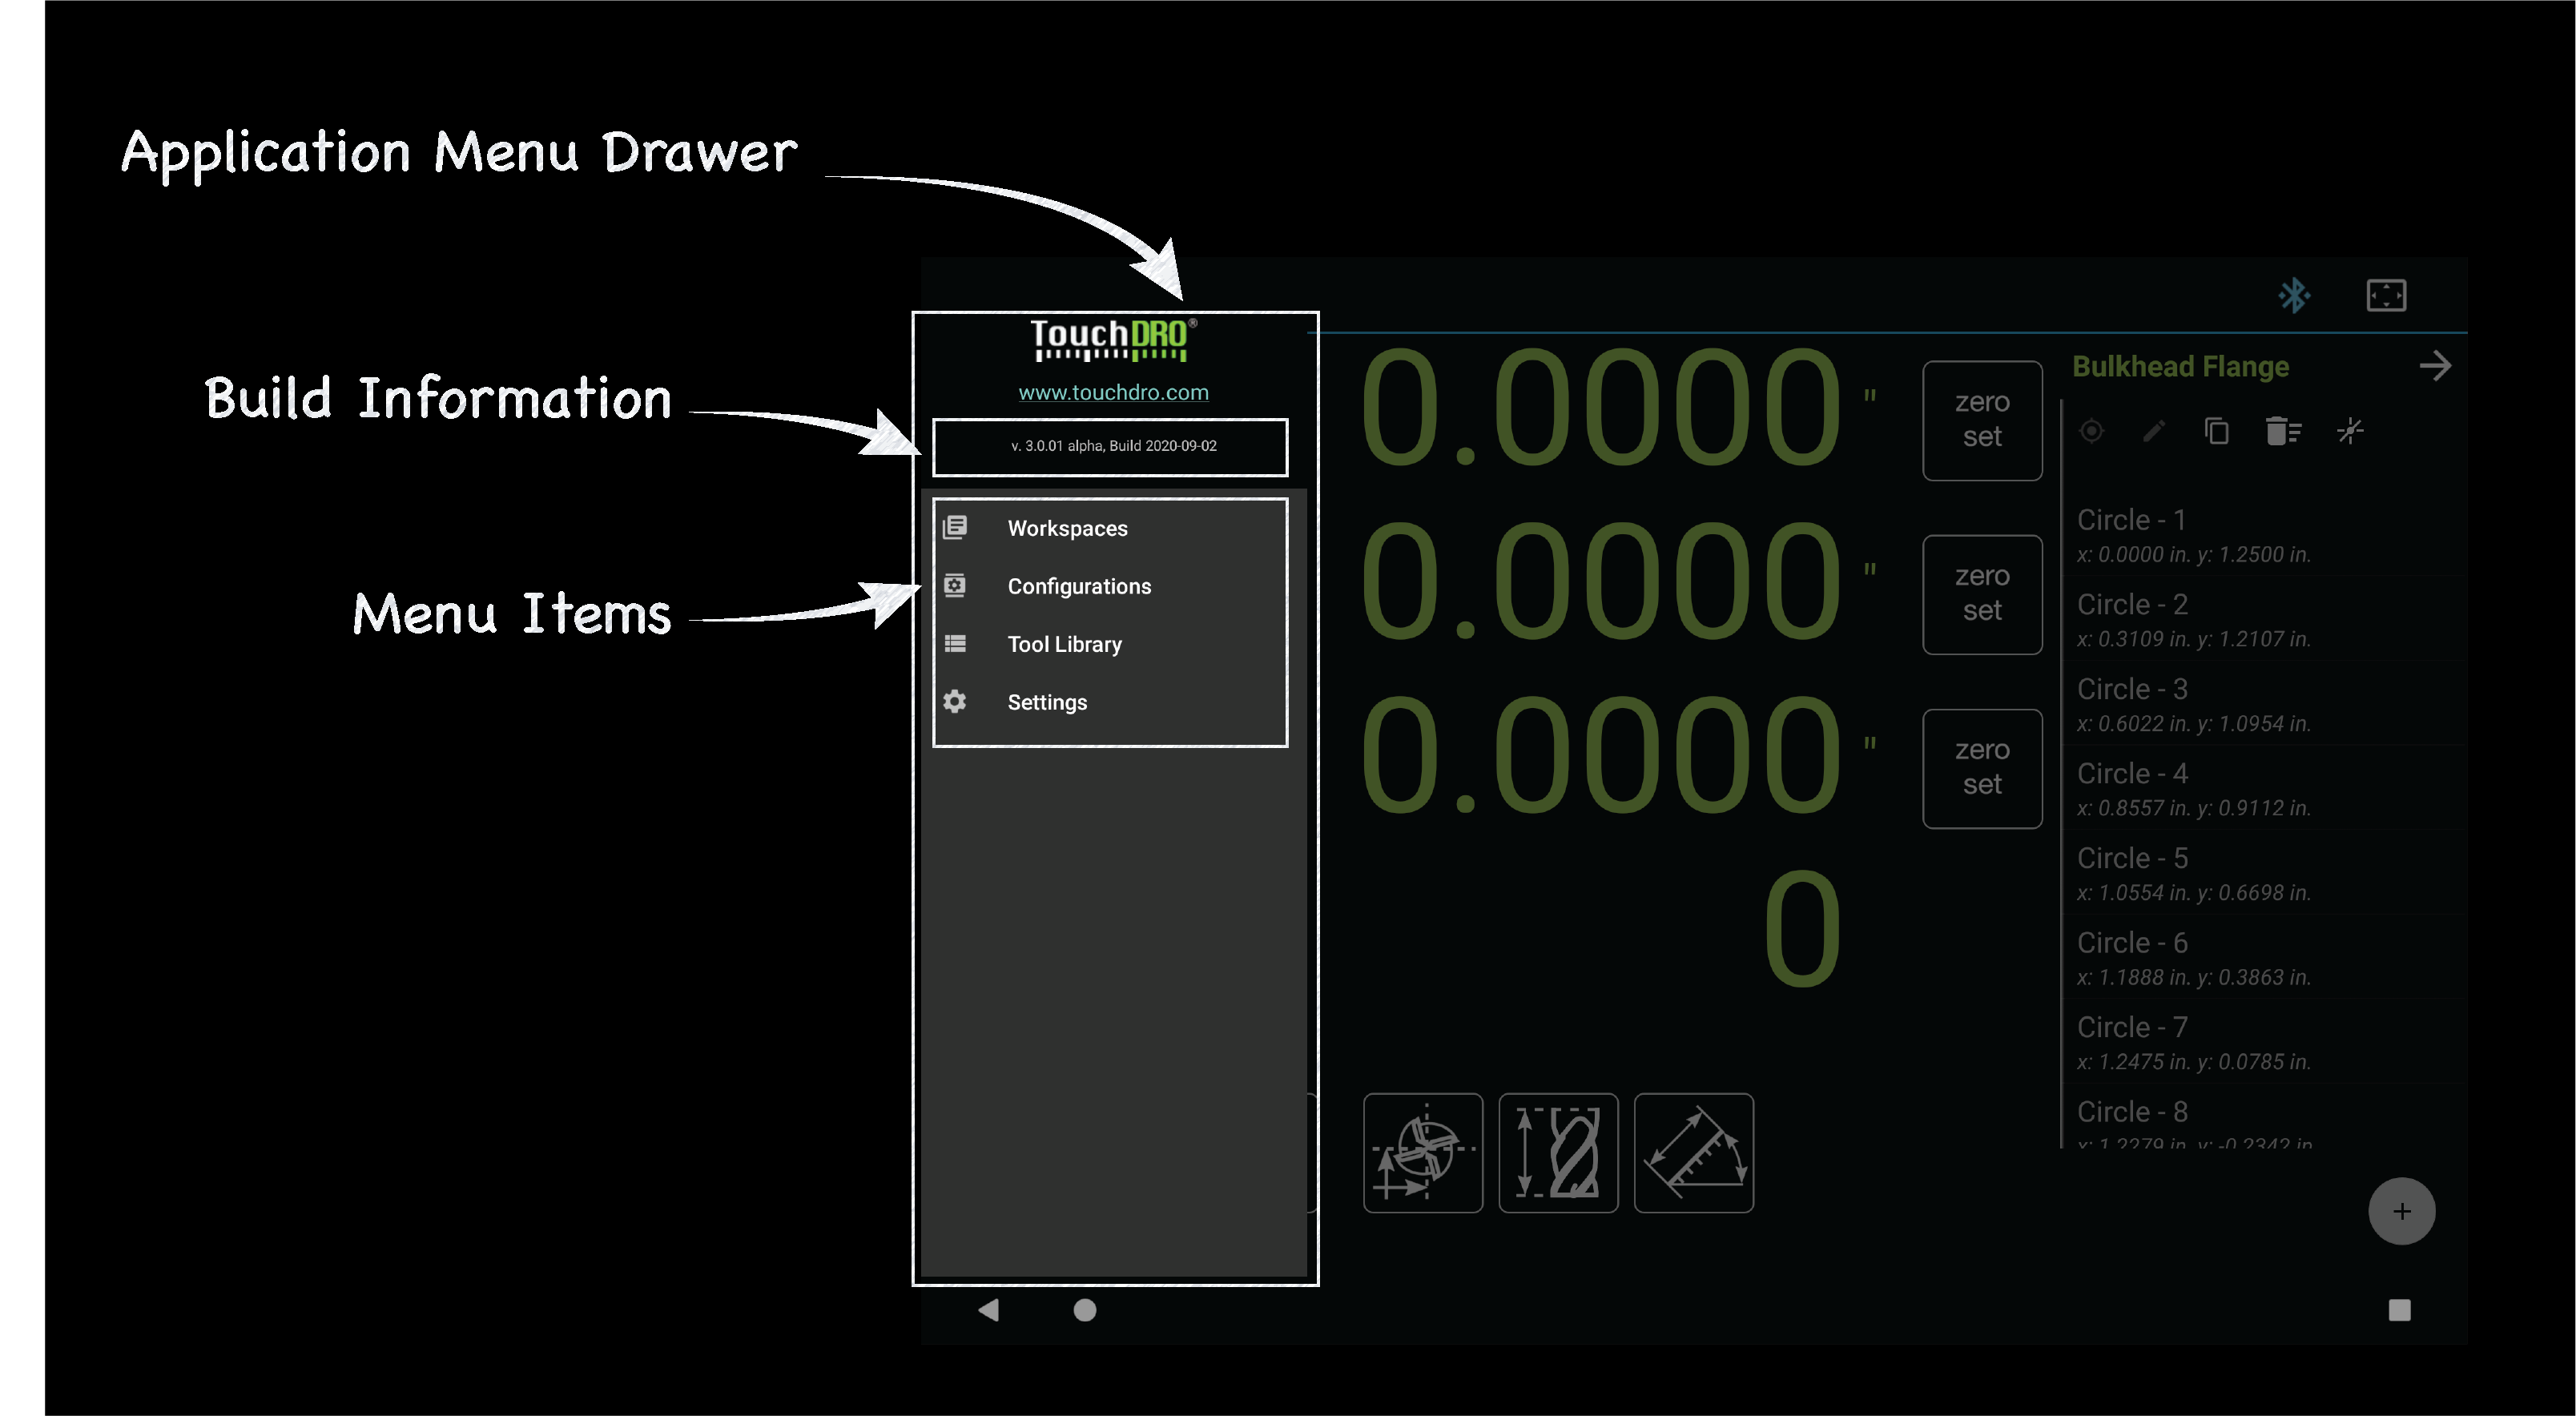
- Open the application menu. Tap the menu button in the top corner of the screen, or swipe in from the right edge.
- Tap "Settings". The "Application Settings" screen will open.
- Under "General Settings", tap "Machine Type" and pick "Lathe" or "Horizontal Mill". If you work in millimeters, turn on "Metric Mode" while you are here.
- On a lathe, open "Y Axis Settings" and switch off "Enable Y Axis". By convention the long axis on a lathe is Z and the cross slide is X, so Y has no scale.
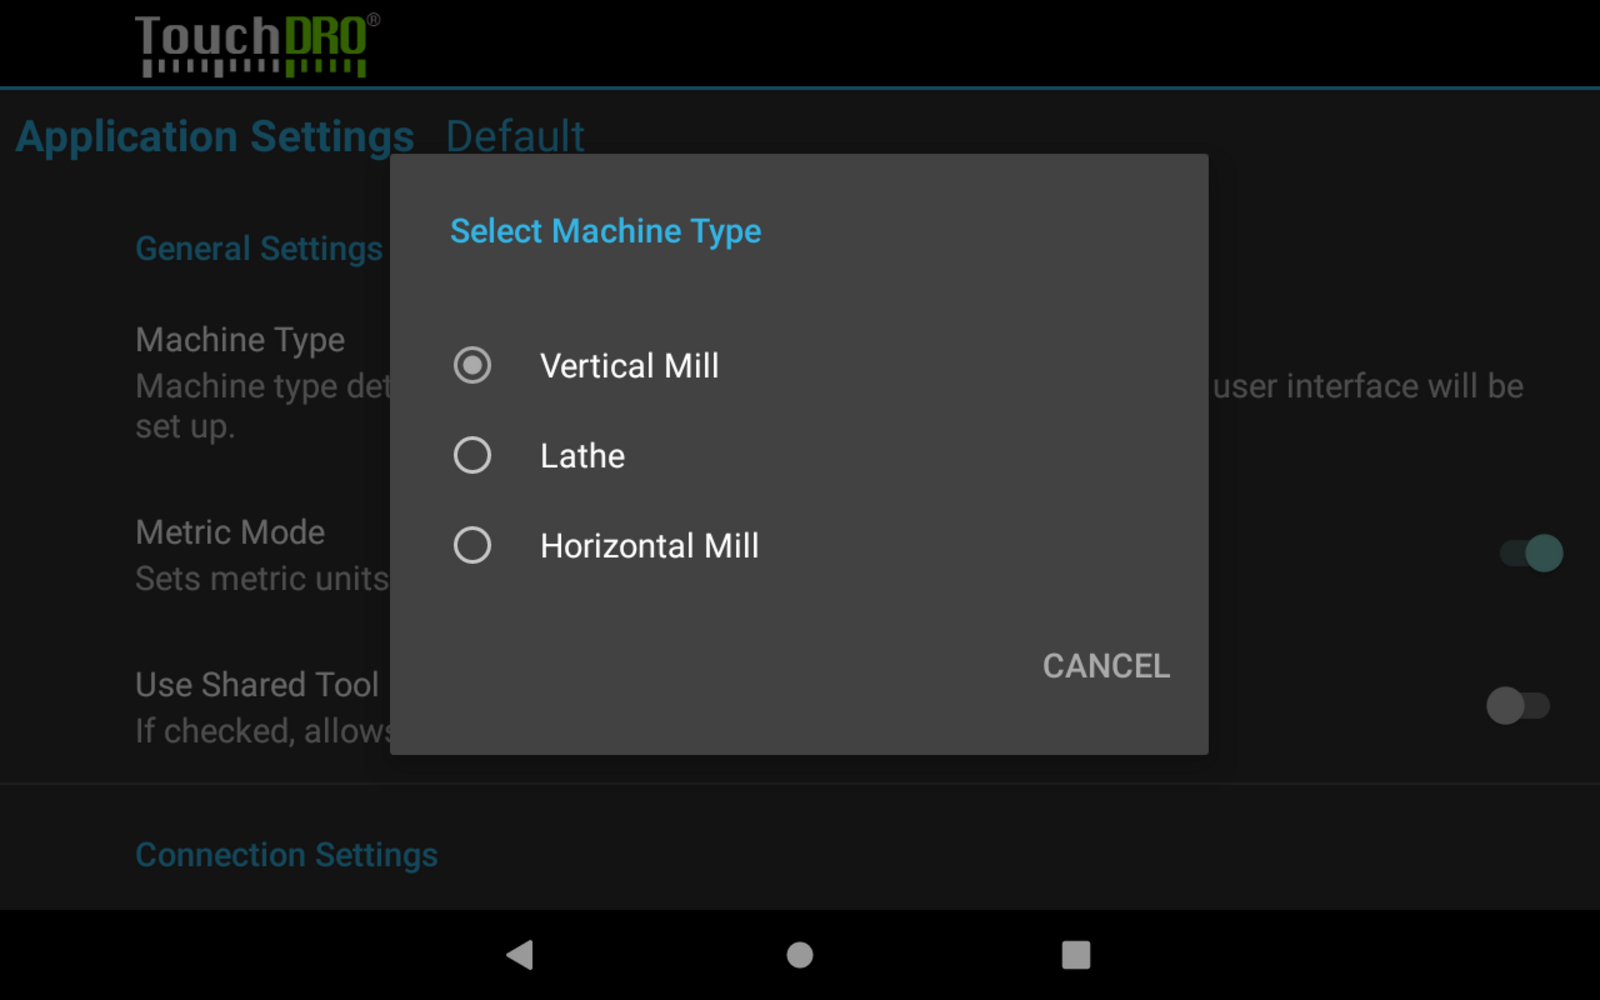
You will know this step worked when the main screen shows a readout for each of your axes, labeled the way your machine is labeled, and a set of grayed-out zeros. Gray digits are correct at this point; they mean the application is not connected to an adapter yet.
Step 5: Pair the Tablet with the Adapter
The tablet and the adapter talk over Bluetooth. Getting them talking is two separate jobs, done in two different places. Pairing is done once, in the tablet's own Bluetooth settings, and tells the tablet that the adapter exists. Connecting is done inside TouchDRO, and it is what actually starts the readout. Make sure the adapter is powered up, then pair first:
- Swipe down from the top of the screen and press and hold the Bluetooth button. The tablet's Bluetooth settings will open. If Bluetooth is off, turn it on.
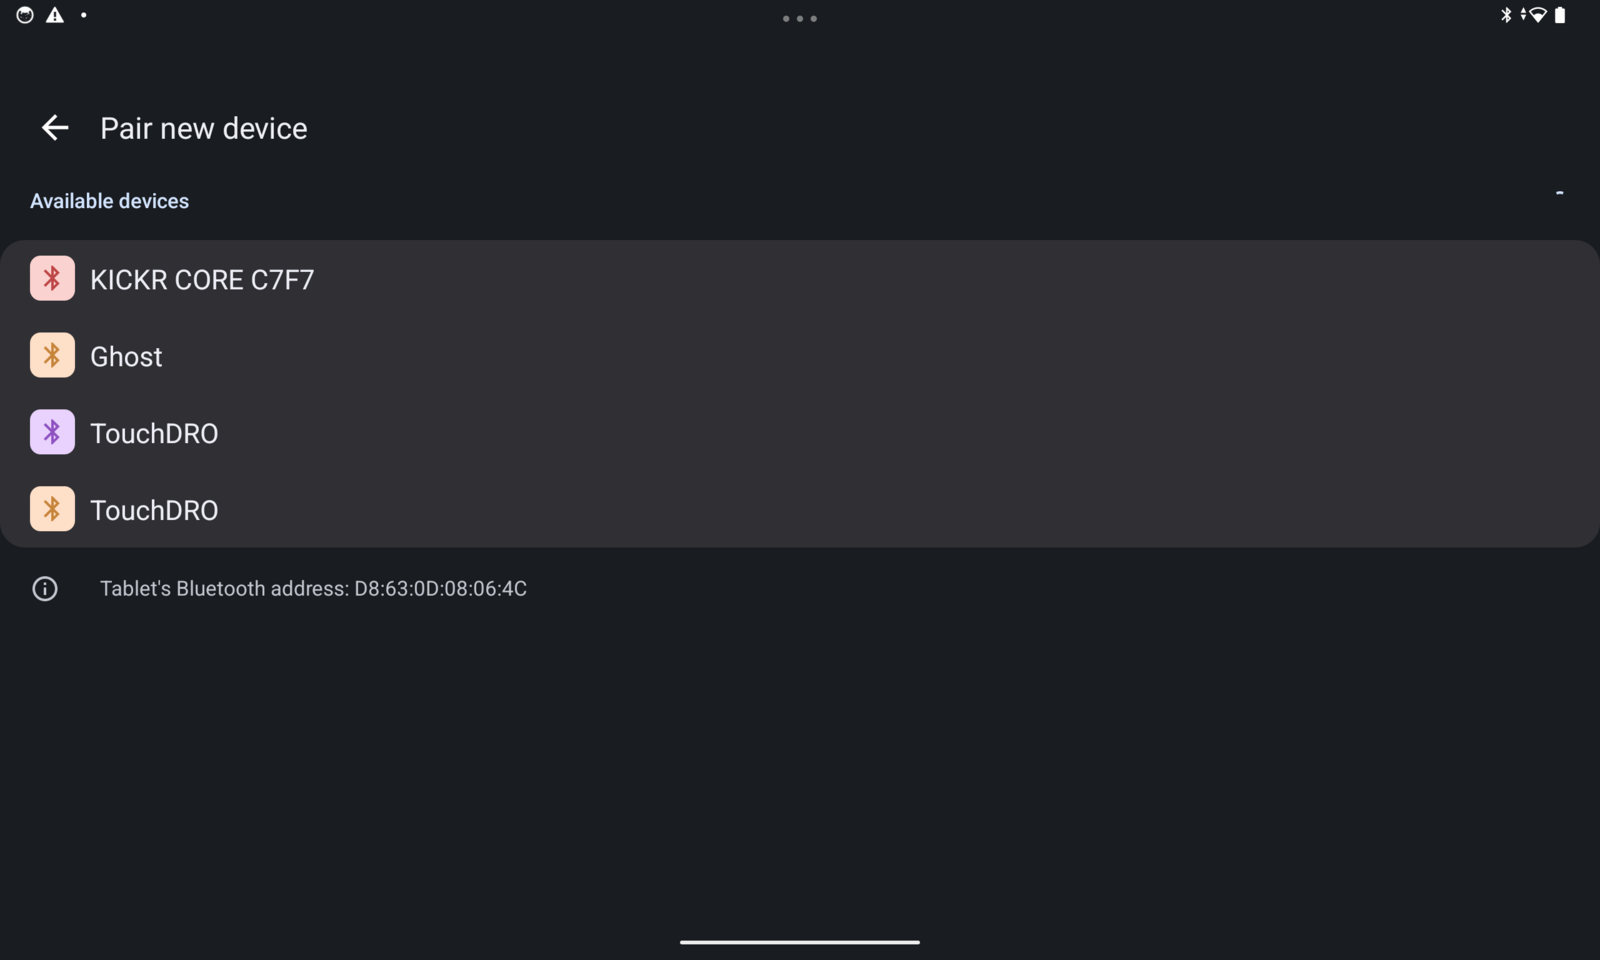
- Tap "Pair new device" (on some tablets, "Scan"). The tablet will start looking for nearby devices.
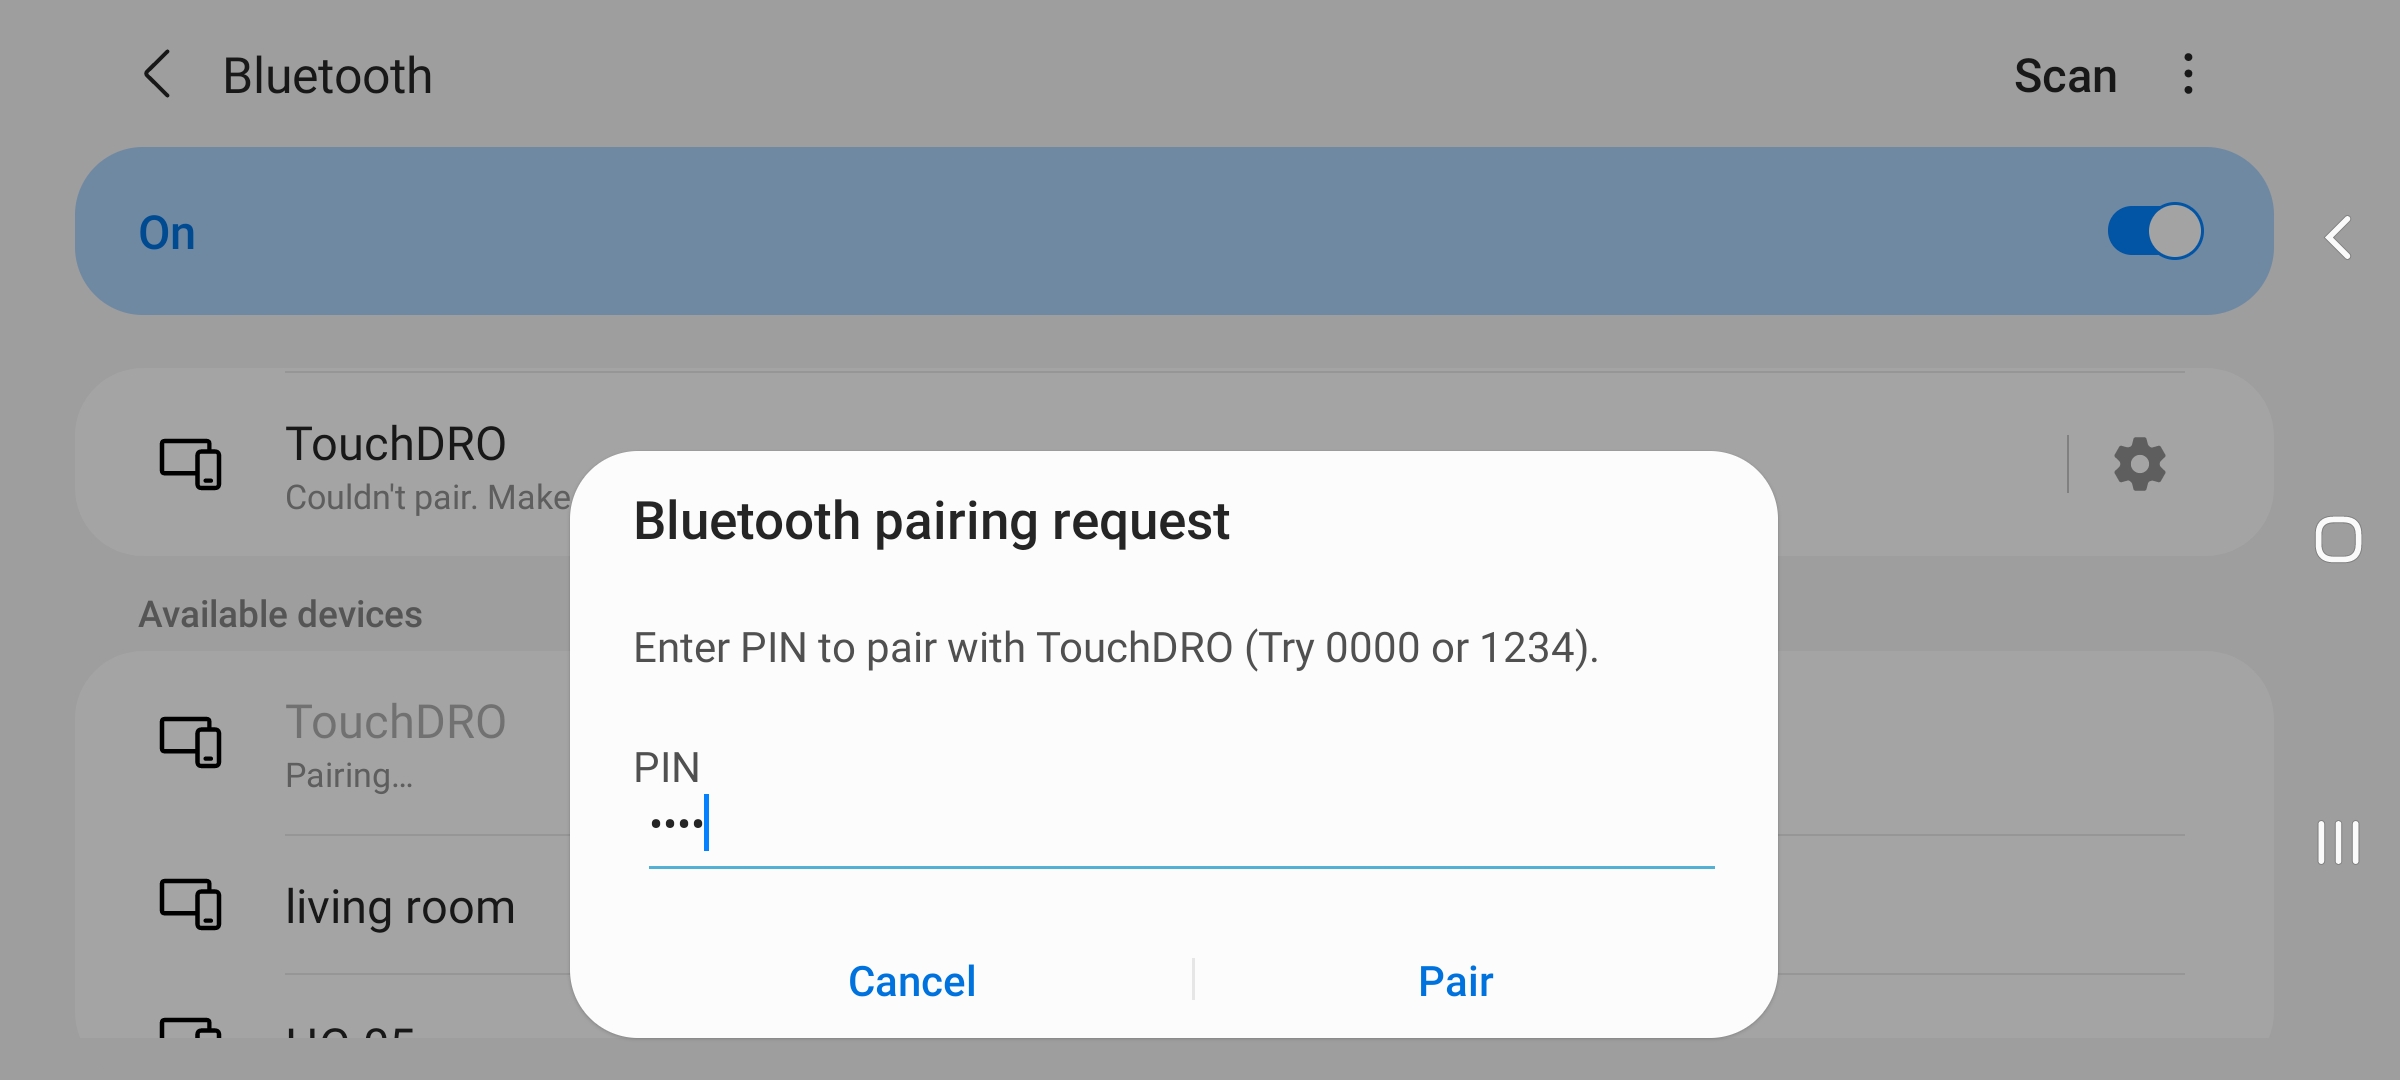
- Wait for "TouchDRO" to appear in the list of available devices, and tap it. If the pairing dialog asks for a pass code, enter "1234" (without the quotes) and confirm.
- "TouchDRO" will move to the list of paired devices. That is the end of the tablet's part. Press the tablet's "Back" button to leave the settings.
Now connect from inside the application:
- Open TouchDRO and tap the white Bluetooth icon in the top corner of the screen. The "Select a Device" dialog will open and list the adapter you just paired.
- If the tablet asks for permission to use Bluetooth or to find nearby devices, allow it. Without that permission, Android will not let the application talk to the adapter.
- Tap "TouchDRO" in the list. The icon will animate while the application connects.
- The first time you connect to a TDA adapter, TouchDRO will ask "Activate TouchDRO Plus?". Answer "Yes"; the adapter includes the license.
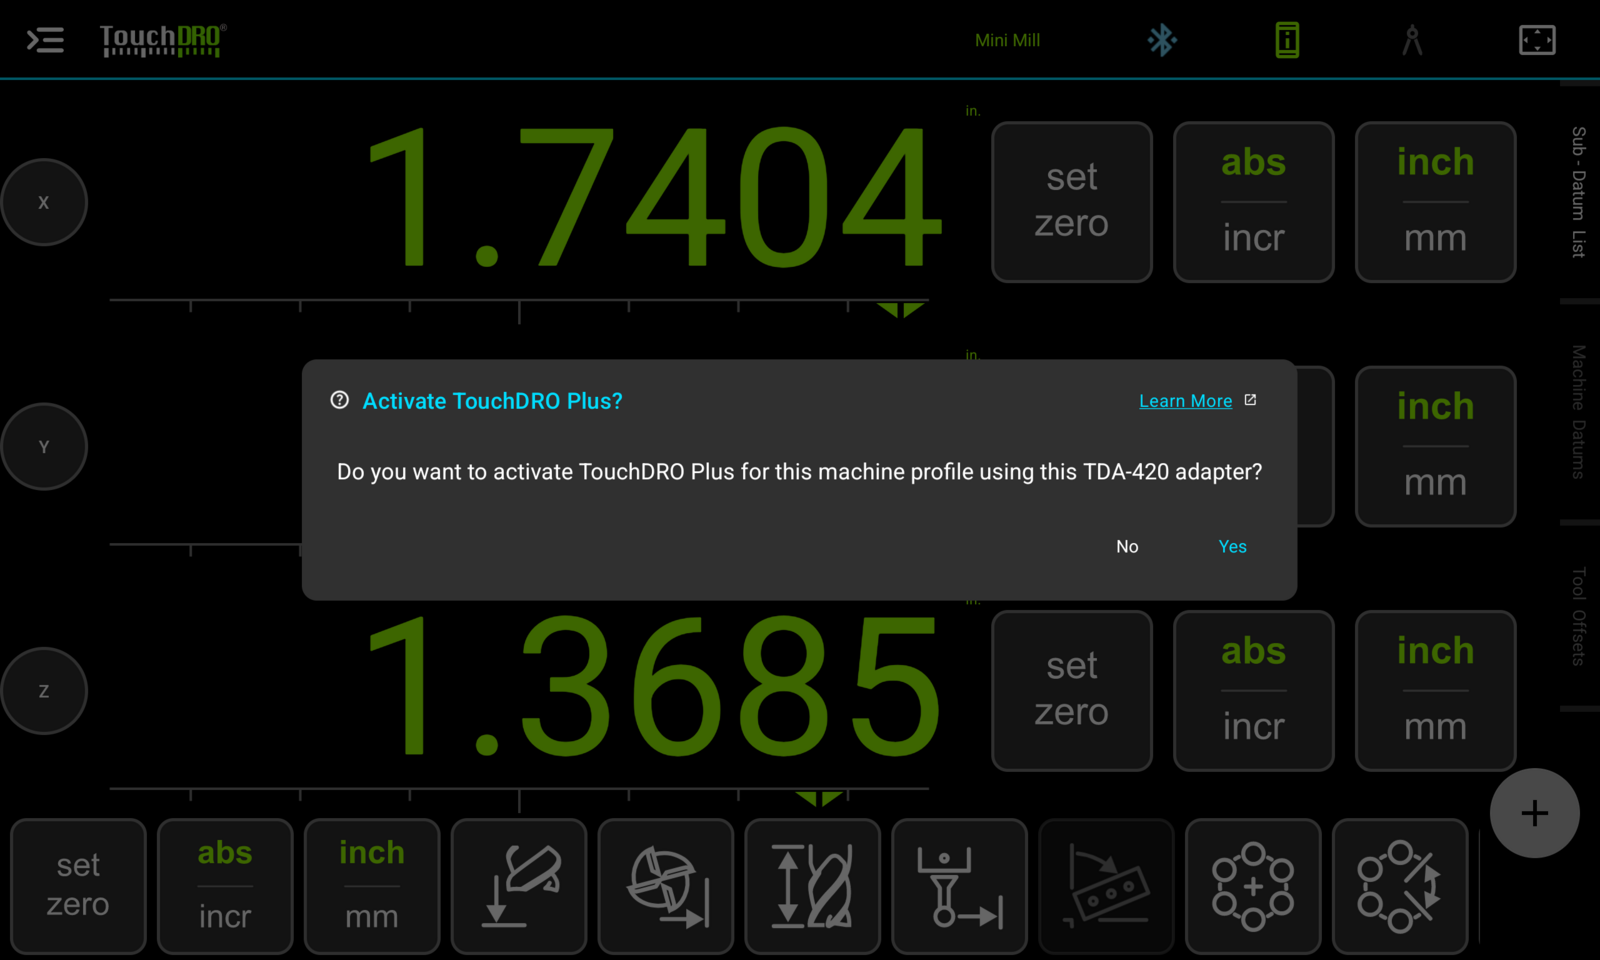
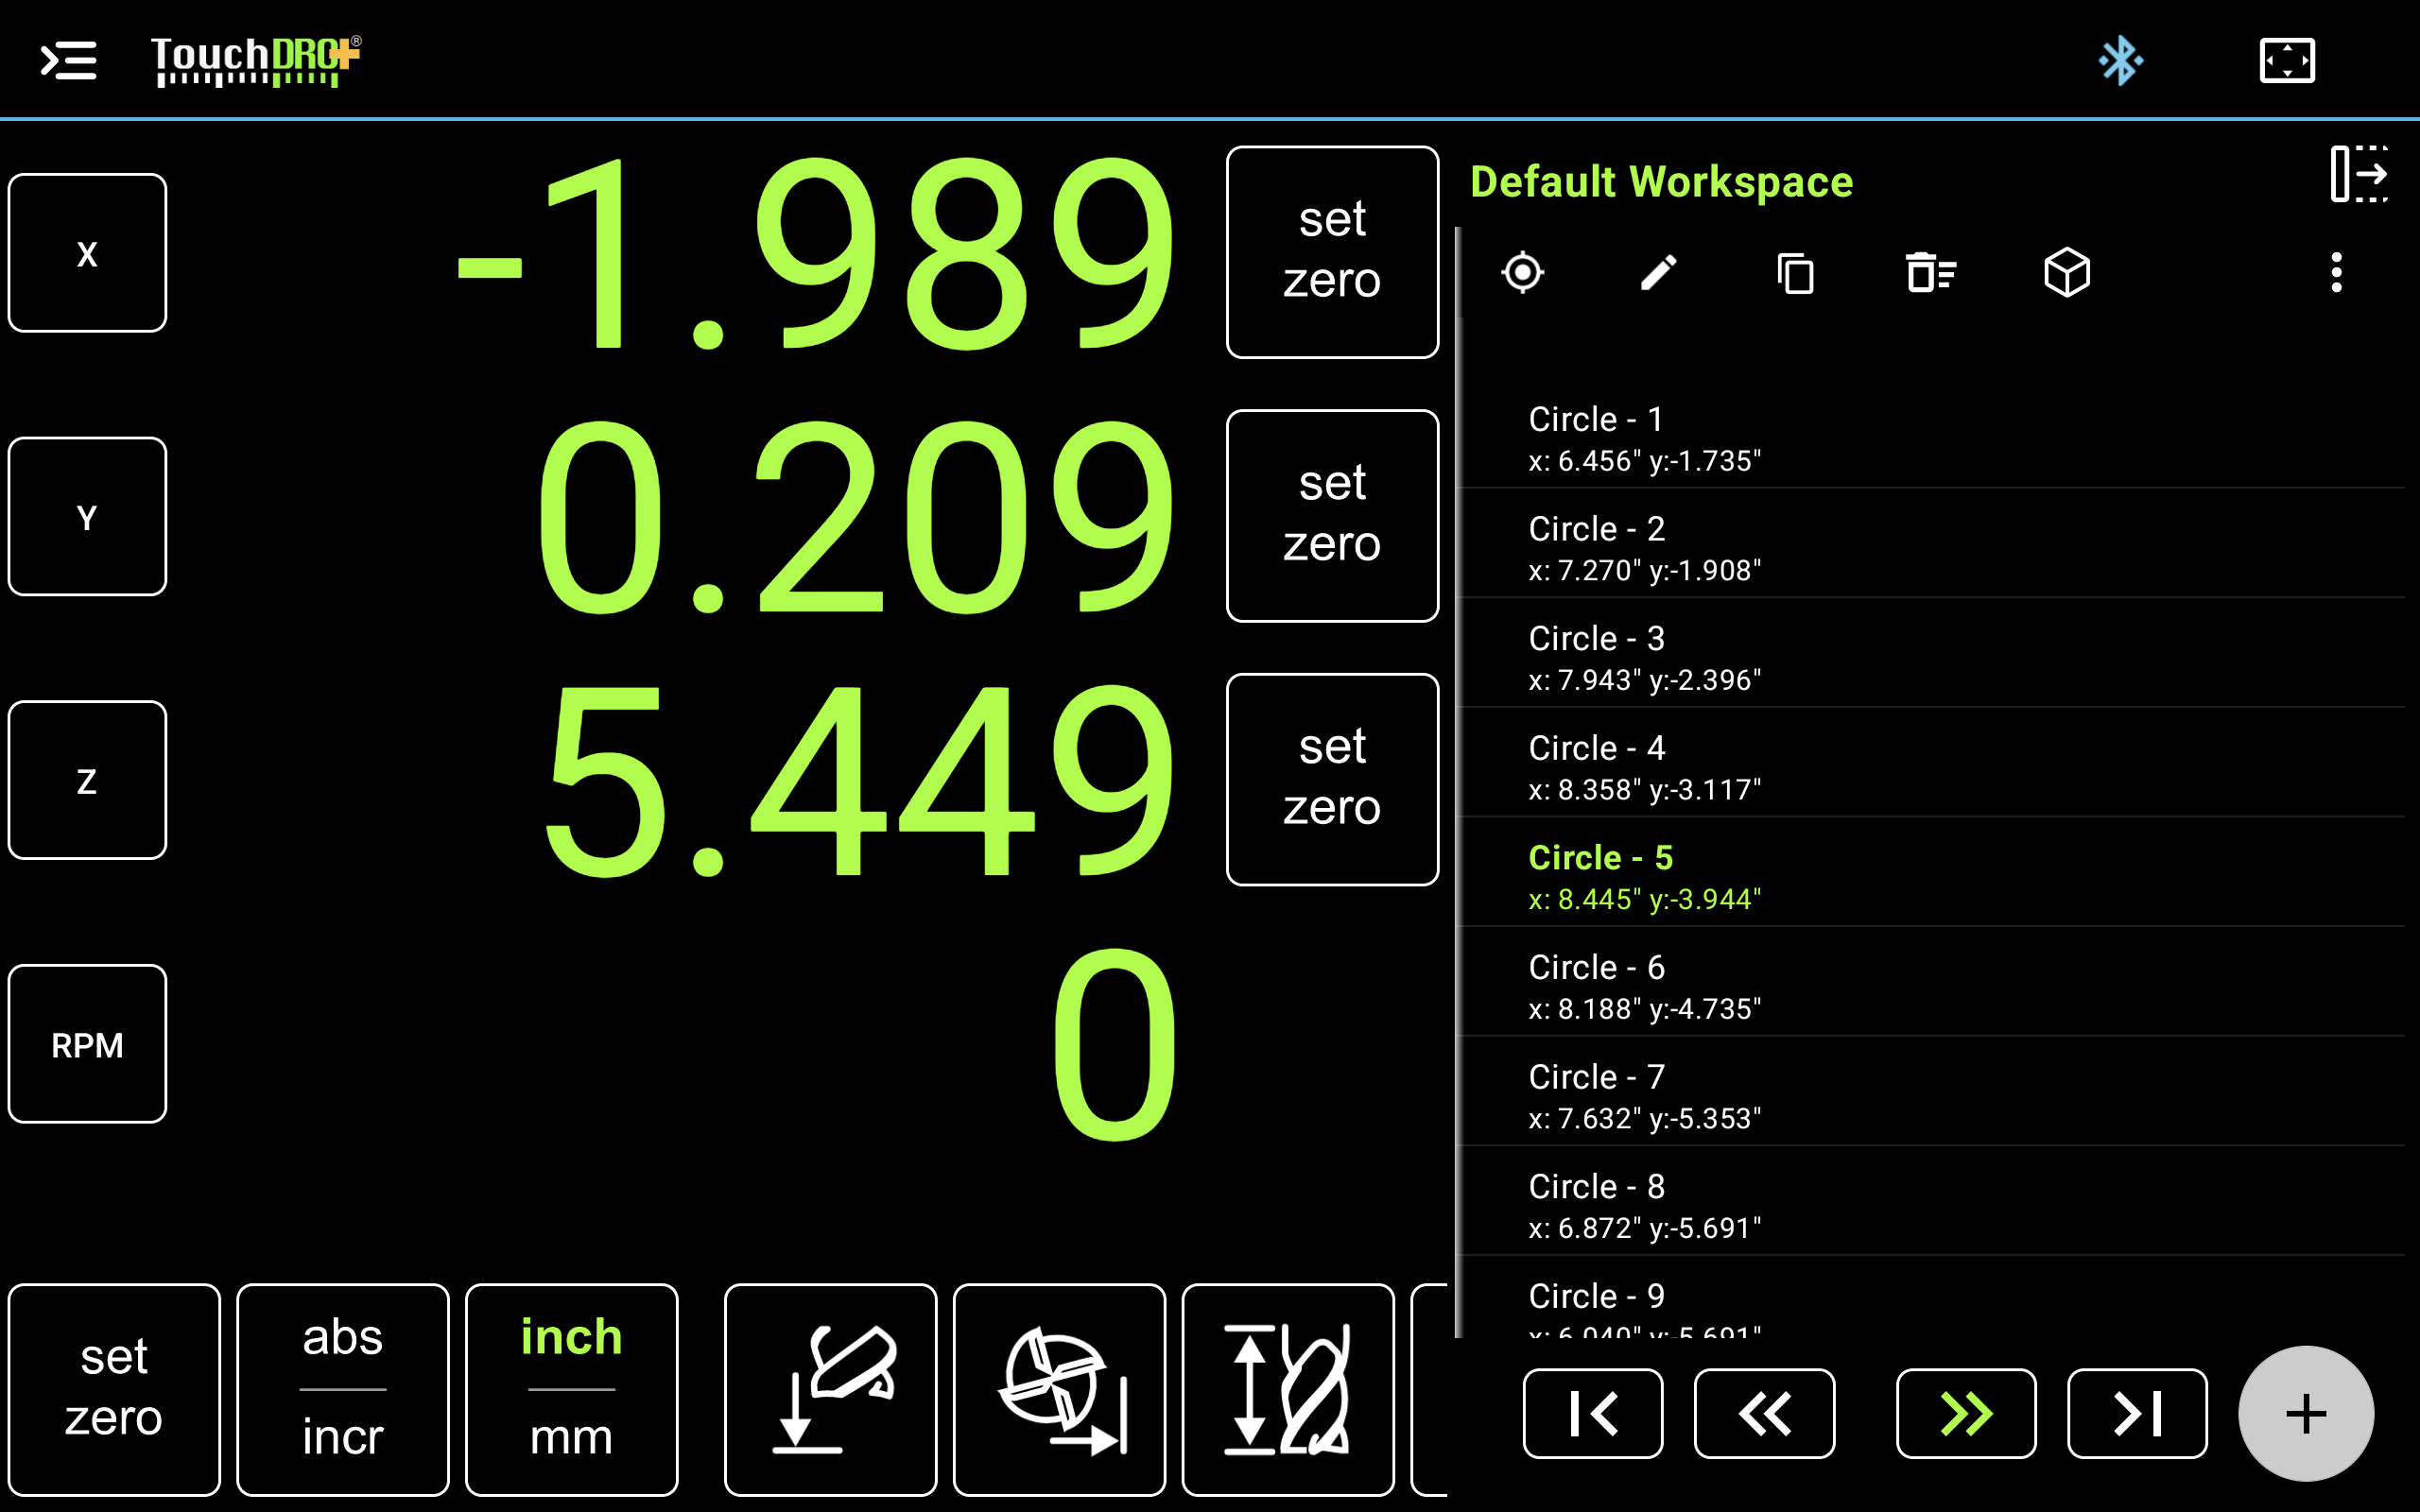
You will know this step worked when the application plays a chime, the Bluetooth icon turns solid blue, and the readout digits turn from gray to green. On the adapter, the blue "Data" light changes from a flash every two seconds to a flash every half second. From now on, tapping the Bluetooth icon reconnects to the adapter in one tap.
If "TouchDRO" never appears in the tablet's Bluetooth list, if the "Select a Device" dialog is empty, or if the connection fails or times out, the "Connecting To Scale Adapter" guide has a section for each of these cases; most come down to the adapter not being powered or the wrong device being selected.
Step 6: Set Up TouchDRO for Your Machine
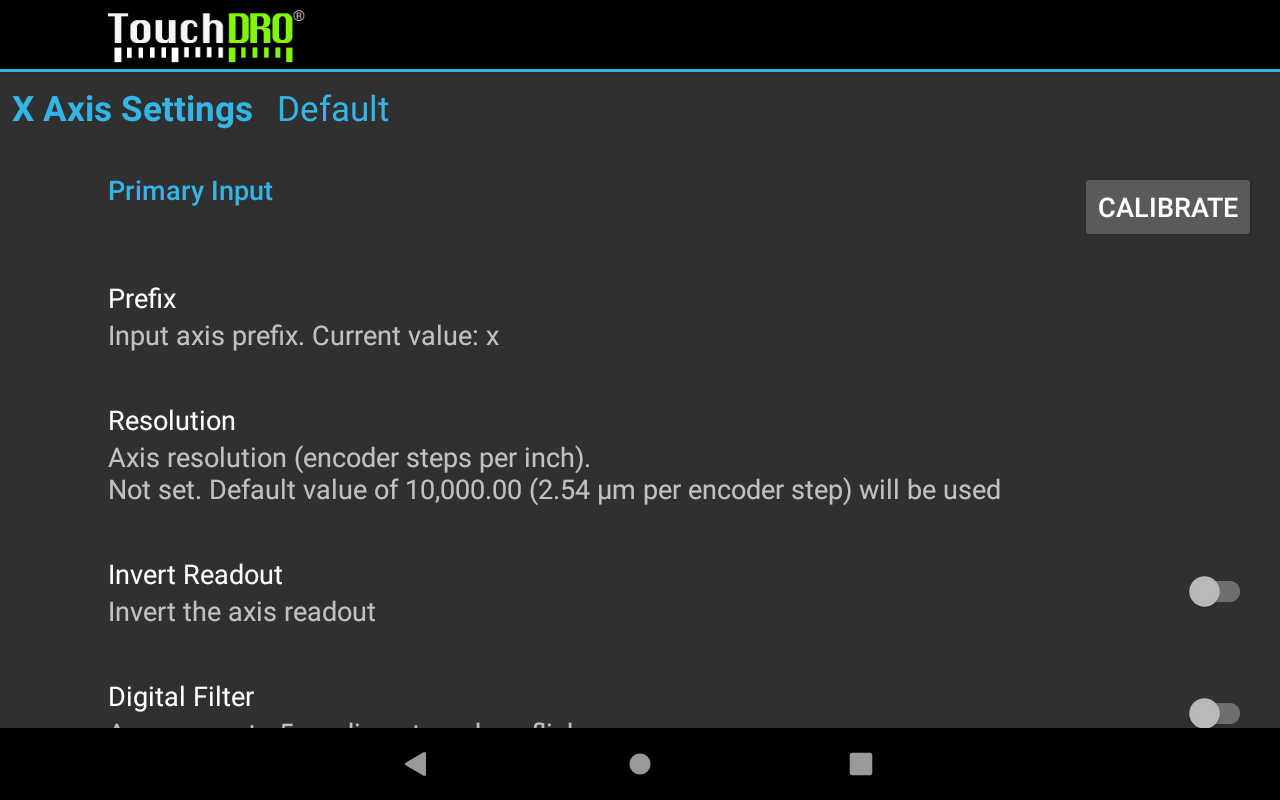
The machine type from Step 4 covers the machine. What remains is describing the scales, and there is only one setting per axis that has to be right before you can trust the numbers. Open the application menu, tap "Settings", and tap "X Axis Settings". Under "Primary Input" you will find:
- Resolution, the scale's count density in encoder steps per inch. The default of 10,000 is almost certainly wrong for your scales. As a starting point, enter 5080 for 5-micron glass and magnetic scales, 25400 for 1-micron scales, 2540 for capacitive scales through a converter, or 2650 for iGaging EZ-View and DigiMag scales. Calibration, below, replaces this guess with the measured value.
- Invert Readout, which flips the direction the number counts. Leave it off for now; the verification loop below tells you if it needs to be on.
Repeat for "Y Axis Settings" and "Z Axis Settings". The "TouchDRO Initial Configuration" guide covers the rest of the settings screen, none of which is needed to get a machine running.
Serial Scales: Set the Input Mode
Glass and magnetic scales need nothing more. If any of your scales connects through a converter (iGaging, Shahe, and Mitutoyo SPC scales do), there is one more setting, and it lives on the adapter rather than in the application. The adapter ships with every input set to "Quadrature A/B", which is wrong for a serial scale. Until the mode matches the converter, that readout will not follow the scale, no matter what the resolution says.
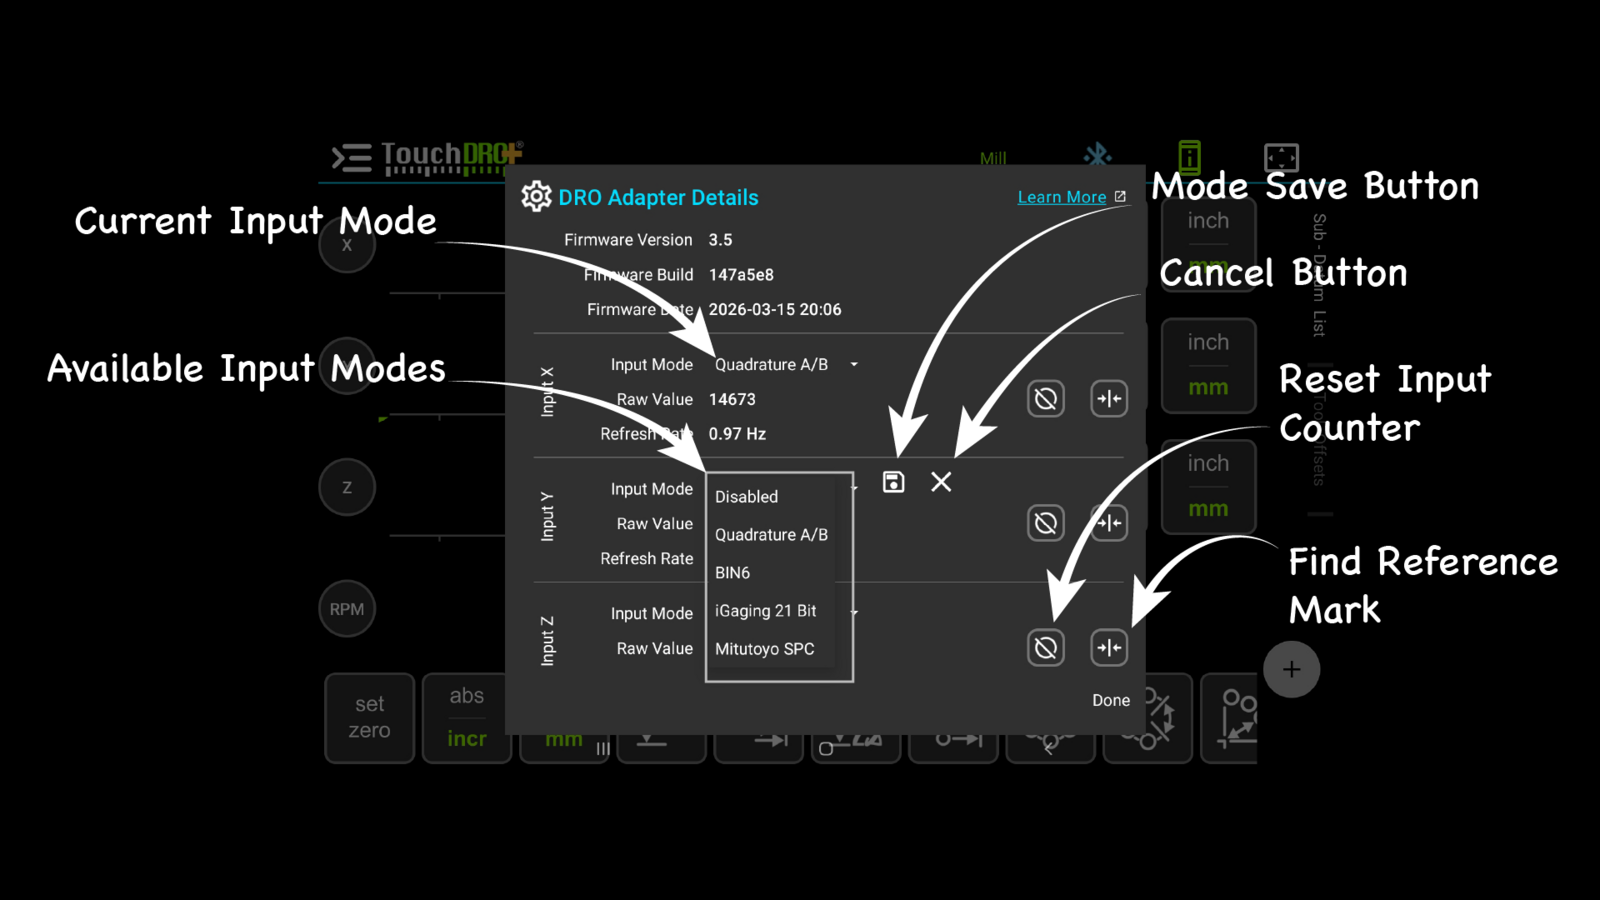
- With the application connected, wait for the device-status button next to the Bluetooth icon to turn green, then tap it. The "DRO Adapter Details" dialog will open, with a block for each scale input showing its "Input Mode" and a live "Raw Value".
- Find the input the converter is plugged into and tap its "Input Mode" dropdown. Pick the protocol that matches the converter: "iGaging 21 Bit" for iGaging EZ-View and DigiMag scales, "BIN6" for Shahe scales, or "Mitutoyo SPC" for Mitutoyo Digimatic instruments and iGaging AbsoluteDRO Plus scales, which speak the same protocol.
- Tap the save button that appears beside the dropdown. An orange banner will appear at the top of the dialog saying the change will not take effect until the adapter is restarted.
- Tap "Restart Now". The application will lose the connection while the adapter restarts, then reconnect on its own after 20 to 30 seconds.
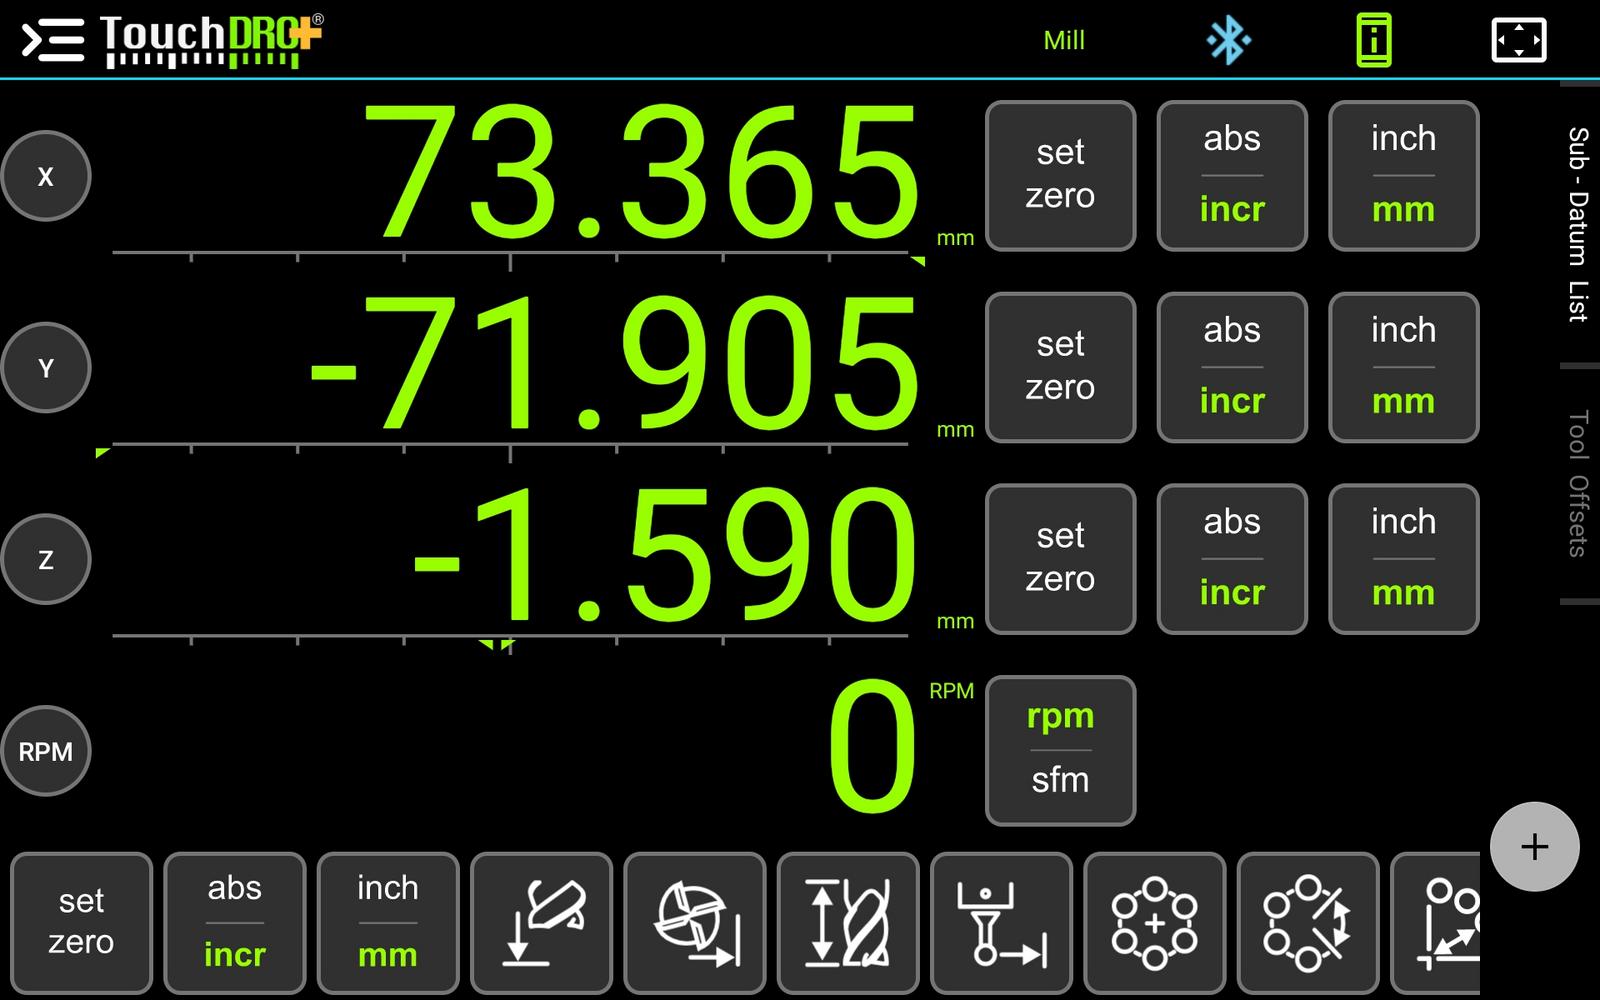
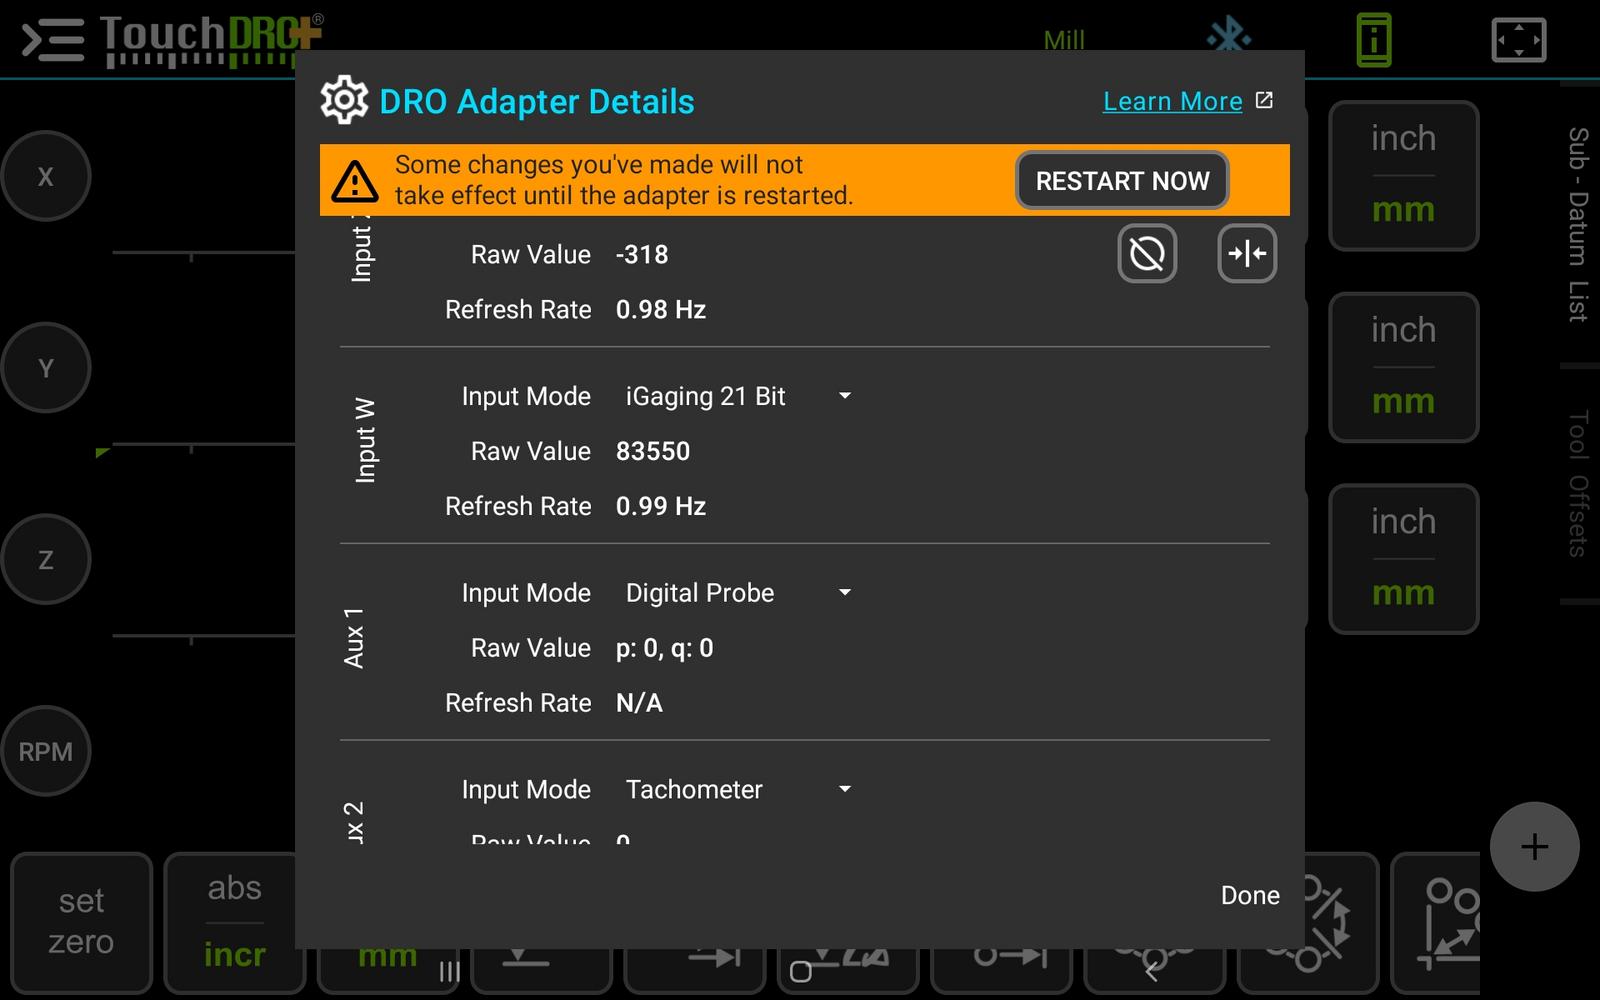
You will know this step worked when, after the adapter reconnects, the "Raw Value" for that input changes as you move the scale. The "Adapter Details Dialog" manual page covers the rest of the dialog.
The verification loop is the important part. With the application connected, crank each handle on the machine and watch the screen:
- The matching readout should change. If a different readout moves, two scale plugs are swapped at the adapter; swap them back, or change the "Prefix" under that axis's "Primary Input" to the letter of the input the scale is actually plugged into.
- A readout that does not move at all, on a scale that connects through a converter, almost always means that input is still in "Quadrature A/B" mode. Set the mode to match the converter and restart the adapter.
- The number should count the right way for your machine's convention. If it counts backward, turn on "Invert Readout" for that axis; no rewiring is involved.
- The distance will be close but not exact. The resolution is still the starting guess, and calibration is what sets it.
Calibration takes about ten minutes per axis with a gauge block or a known-size workpiece, and it starts from the "Calibrate" button on the same axis settings screen. Follow the "DRO Scale Calibration" guide before making any real parts.
You will know this step worked when each handle moves its own readout in the right direction, and a measured move matches the screen. The settings are saved on the tablet, so this is a one-time job.
Coming from a Traditional DRO
If you have run an Acu-Rite, Sino, or similar console for years, your hands already know a set of buttons that TouchDRO doesn't have. The table below maps the old habits to their TouchDRO equivalents; everything else about how you work stays the same.
| On a traditional DRO | In TouchDRO |
|---|---|
| ABS/INC key | To switch one axis between absolute and incremental, tap the mode button next to its readout. Each axis switches independently. |
| Zero an axis | To zero one axis in incremental mode, long-press its mode button. |
| Preset a dimension | To preset an axis, long-press its readout. The "Preset Dimension" dialog will open, and the input accepts arithmetic, so "1/2 + 0.015" works. |
| 1/2 (centerline) key | To halve a reading, tap the axis readout and press the "1/2" button in the "Axis Details" dialog. |
| SDM / zero memory | The Sub-Datum Panel beside the readouts. Sub-datums are saved per part in named workspaces, and there is no practical limit on how many you can store. |
| inch/mm key | To toggle all axes at once, use the "Units Toggle" button; to toggle one axis, use the "Inch/mm" button in its "Axis Details" dialog. |
Common DRO Jobs
TouchDRO is built around working to zero: set a zero point somewhere useful, then move to a number. Most of its functions exist to place that zero with less effort, and the "DRO Coordinate System and Datums" page covers the underlying model. The five jobs below cover the functions most people reach for first; each links to the full instructions.
Mill a Slot to Length
- Plunge the cutter at the start of the slot.
- Long-press the axis mode button to zero it there.
- Cut until the readout shows the slot length minus the cutter diameter. The "Axis Details" dialog, opened by tapping the readout, has the per-axis zero, preset, and centerline functions in one place.
Drill a Bolt-Hole Circle
- Position the spindle over the center of the circle.
- Open the "Hole Circle" function and enter the circle diameter and the number of holes.
- TouchDRO will place a zero at each hole in turn; crank both axes to 0.0000 and drill, then step to the next hole. Rows and columns of holes work the same way with the "Hole Grid" function.
Find the Center of a Part
- Touch the cutter to one side of the part and long-press the axis mode button to zero.
- Move to the opposite side and touch again.
- Tap the axis readout and press "1/2" in the "Axis Details" dialog, then crank back to 0.0000. The spindle is now on the centerline. The "Edge Finder" function refines this with probing and accounts for the tool diameter.
Turn a Shoulder to a Diameter (Lathe)
- Take a light skim cut and measure the resulting diameter with a micrometer.
- Without moving the cross slide, long-press the X readout and preset it to the measured diameter. In lathe mode, X reads in diameter, so the screen now matches your micrometer.
- Feed in until the readout shows the target diameter and turn to the shoulder.
Presetting X after every tool change gets old fast. Storing an offset for each tool once, following "Programming Lathe Tool Offsets", lets you switch tools and keep reading the true diameter.
Come Back to a Position Later
- Move to the position you will want again: a hole center, a datum corner, the start of a feature.
- Press the "Add" button on the Sub-Datum Panel beside the readouts. TouchDRO will store the current position in the list.
- To return to it, tap the entry in the list. The readouts will show the distance to that point, so crank all axes to 0.0000 and you are back on it. The "Sub-Datum Memory" page covers naming, editing, and organizing saved positions by part.