
Connecting To TouchDRO Scale Adapter
TouchDRO reads position data from a scale adapter over Bluetooth, USB, or WiFi. The adapters we sell use Bluetooth. A DIY adapter can be built around a Bluetooth transceiver, a USB-to-serial bridge, or a WiFi module, and once the connection is up, the application treats all three the same way.
A Bluetooth adapter involves two separate steps, and most connection problems come from treating them as one. Pairing is done once, in the tablet's Bluetooth settings, and tells Android that the adapter exists. Connecting is done inside TouchDRO, every time you want position data, by picking the adapter from a list. The tablet's Bluetooth settings can't open that connection. Tapping the paired "TouchDRO" entry there will not connect the adapter to TouchDRO, and on many tablets Android will report that it couldn't connect. That message is not a fault with the adapter. To connect, open TouchDRO and tap the connect button.
Two TouchDRO builds are in use at the moment and they connect differently, so this page has a section for each. The Play Store release, version 3.26.06, connects through a dialog called "Select a Device". The open beta, version 3.30.00 and later, connects through a dialog called "Select a TouchDRO Adapter". If you are not sure which build you have, tap the connect button and read the title of the dialog that opens.
TouchDRO 3.26.06 and Earlier
Connect Button and Connection Type
The connect button is in the upper right corner of the main screen. It shows a Bluetooth symbol or a USB symbol, depending on the "Use USB Connection" setting on the "Application Settings" screen. The setting is off by default, which means that the application uses Bluetooth.
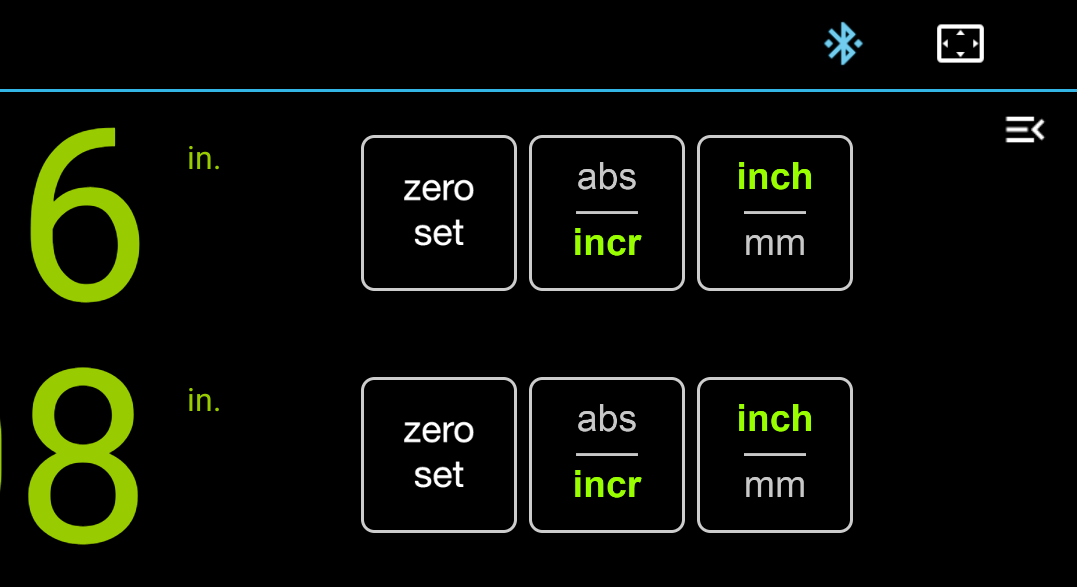
The icon is white while disconnected, animates while connecting, and turns solid blue (Bluetooth) or green (USB) once the application is receiving position data. The readout digits follow it: gray while disconnected, green or amber while connected. To open the "Select a Device" dialog, tap the button while it is white. To close the connection, tap it while it is connecting or connected. The application will beep four times and the icon will return to white.
Pairing the Adapter
Before TouchDRO can connect to a Bluetooth adapter, the tablet has to be paired with it. Pairing is done once, in the tablet's own Bluetooth settings, with the adapter powered up and within a few meters of the tablet. The exact screens vary between Android versions and tablet makers, but the steps are the same:
- Swipe down from the top of the screen and press and hold the Bluetooth button. The tablet's Bluetooth settings page will open.
- If needed, turn Bluetooth on and tap "Scan". Most tablets start scanning as soon as the page opens.
- Wait for the adapter to appear under "Available devices" and tap it. TDA adapters and other ESP32-based boards appear as "TouchDRO". Older boards and DIY kits built around an HC-05 module appear as "HC-05".
- If a pass code dialog appears, enter "1234" (without the quotes) and confirm.
If the pairing is successful, the adapter will move to the list of paired devices at the top of the page. If it fails, make sure that you selected the correct device and that the adapter is powered from a correct power supply.
Connecting to the Adapter
- Press the tablet's "Back" button to leave the Bluetooth settings, and open TouchDRO.
- Tap the white Bluetooth icon in the upper right corner. The "Select a Device" dialog will open and list the adapter you paired.
- Tap the adapter's name. If Android asks for permission to use Bluetooth, allow it. Without the permission, TouchDRO can't talk to the adapter.
The icon will animate while the application establishes the connection. Once the adapter starts sending position data, the icon will turn solid blue, the readouts will turn green, and the application will play a chime.
USB Setup
To connect over USB, turn on "Use USB Connection" on the "Application Settings" screen and set "USB Baud Rate" to the rate defined in the adapter firmware. Back on the main screen, the connect button will show a white USB symbol.
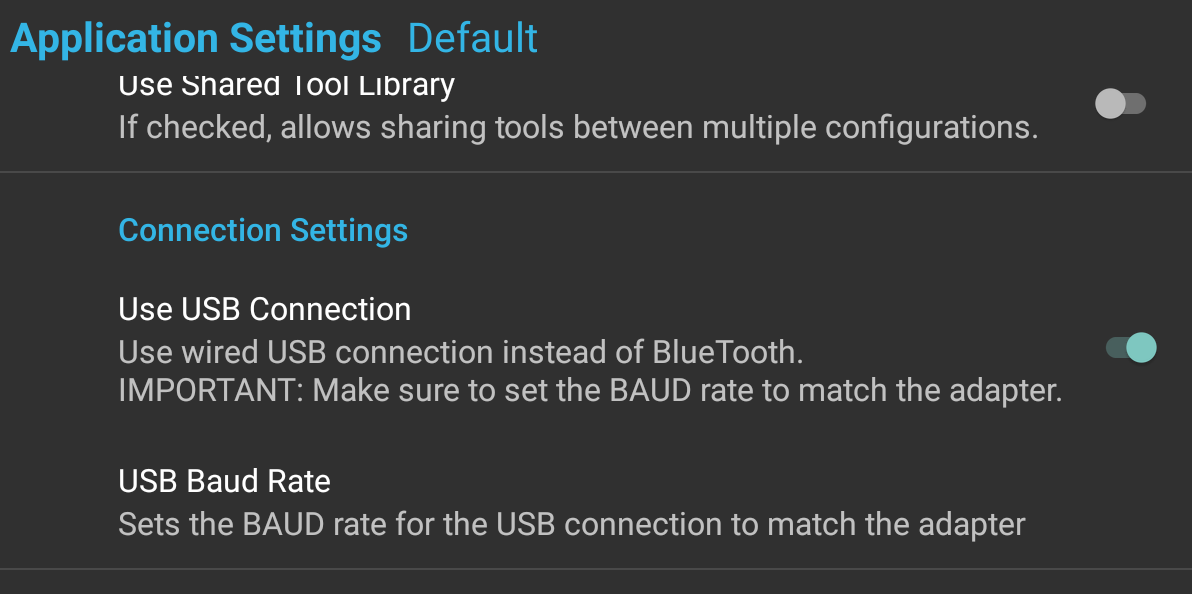
Plug the adapter into the tablet with a compatible USB cable and tap the USB icon. The "Select a Device" dialog will list the compatible USB devices that are plugged in. Tap the adapter, and grant the USB permission if Android asks for it. Once the connection is up, the icon will turn green and the application will play a chime. The supported USB bridges are listed under "Supported USB Adapters" below.
TouchDRO 3.30.00 and Later
The Connect Button
The connect button is in the upper right corner of the main screen. It has three states:
| State | Description |
|---|---|
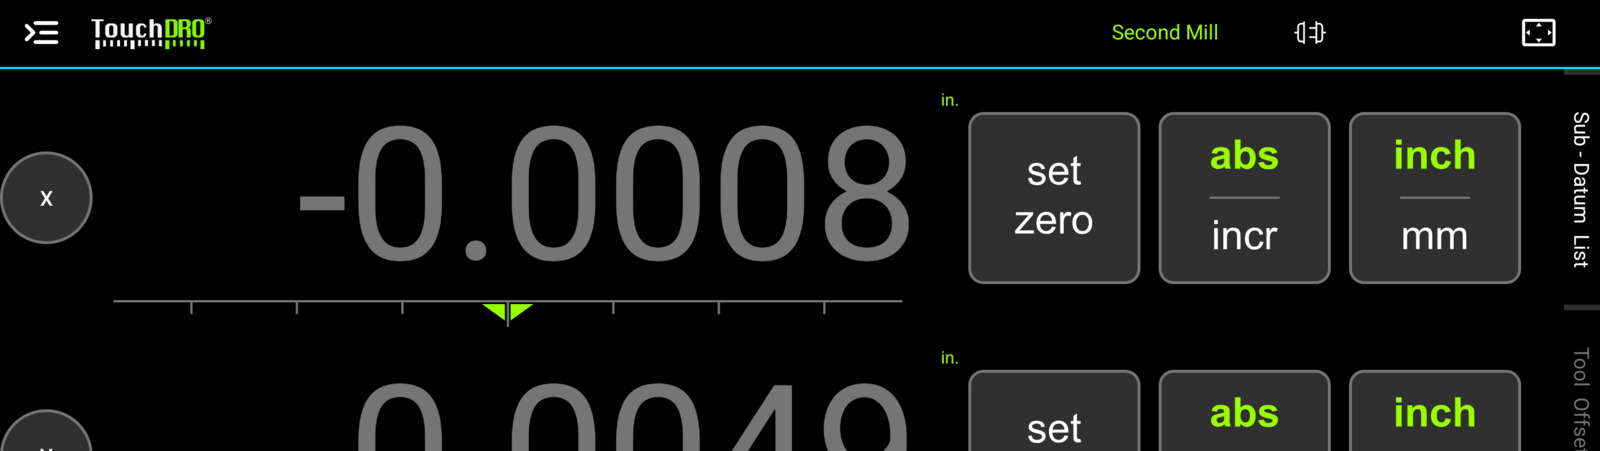
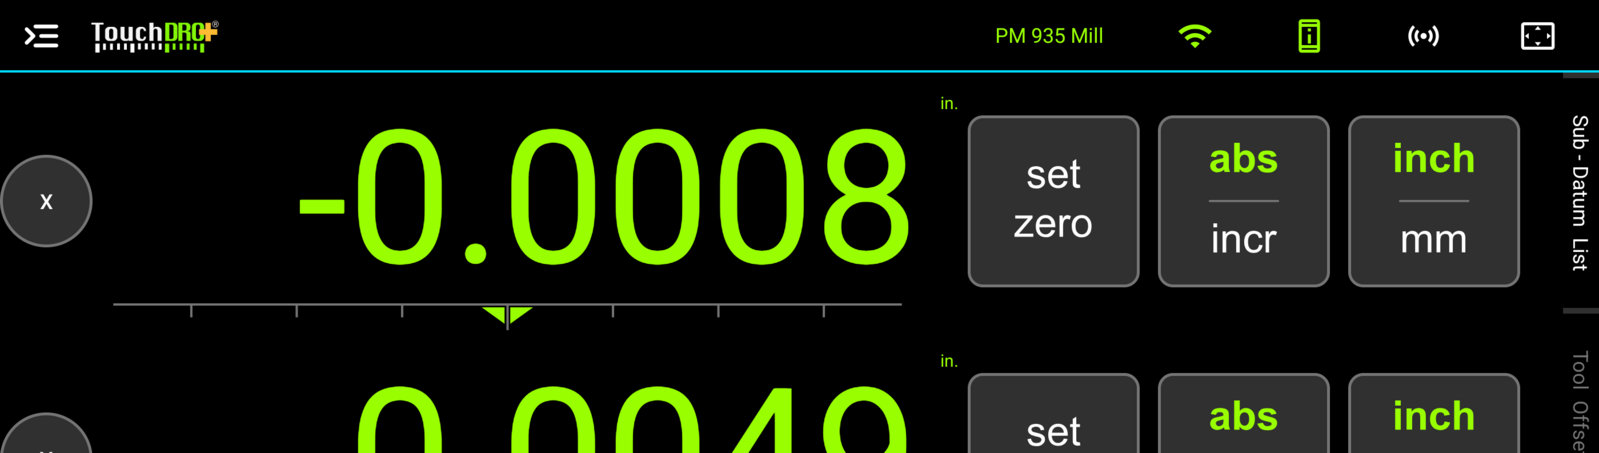
| Disconnected | The application is not connected to the scale adapter. The readout digits are gray. |
| Connecting | The application is trying to establish a connection to the scale adapter. The icon animates. |
| Connected | A connection has been established and the application is receiving position data. The readout digits turn green, or amber for an axis with a tool offset applied. |
What the button shows while disconnected depends on how much TouchDRO can work out about the connection you are about to make. When it can name that connection, it shows the icon for it. When it can't, it shows a generic plug.
| While disconnected | Icon |
|---|---|
| An adapter has been connected before | The connection type that adapter was using |
| Nothing connected yet, one connection type enabled | That connection type |
| Nothing connected yet, several types enabled | A generic plug |
A remembered adapter whose connection type has since been switched off is ignored, since offering it would be a dead end, and the button falls back to the plug.
To open the "Select a TouchDRO Adapter" dialog, tap the button while it is disconnected. To reconnect to the last adapter you used without going through the dialog, press and hold the button. If nothing is remembered, or the connection type it was using has since been switched off, the dialog will open. To close an open connection, tap the button while it is connecting or connected.
Connection Settings
Bluetooth, USB, and WiFi each have their own switch on the "Connection Settings" screen, which opens from the "Application Settings" screen. Any combination of them can be turned on, and the connect button offers everything that is enabled at the moment you press it. The switches belong to the machine profile that is loaded, so a shop with a mill and a lathe can point each machine at its own adapter.
Each connection type gets a section of its own, and the settings belonging to a type appear only while its switch is on. Bluetooth doesn't have any settings of its own, since pairing is handled by Android and the choice of adapter is made when you connect. USB adds "USB Baud Rate", which has to match the rate defined in the adapter firmware. WiFi adds "WiFi Adapter IP Address" and "WiFi Adapter Port", which is 8080 by default, because a WiFi adapter waits for a TCP connection and doesn't announce itself the way a Bluetooth or USB device does.
The same screen holds the "Live Data Streaming" section, which publishes readout data to other software on your network. It is covered in "Live Data Streaming".
Pairing a Bluetooth Adapter
Before TouchDRO can connect to a Bluetooth adapter, the tablet has to be paired with it. Pairing is an Android function, done once per adapter, and it needs the adapter powered up and within a few meters of the tablet. The quickest route to the tablet's pairing screen is from inside TouchDRO:
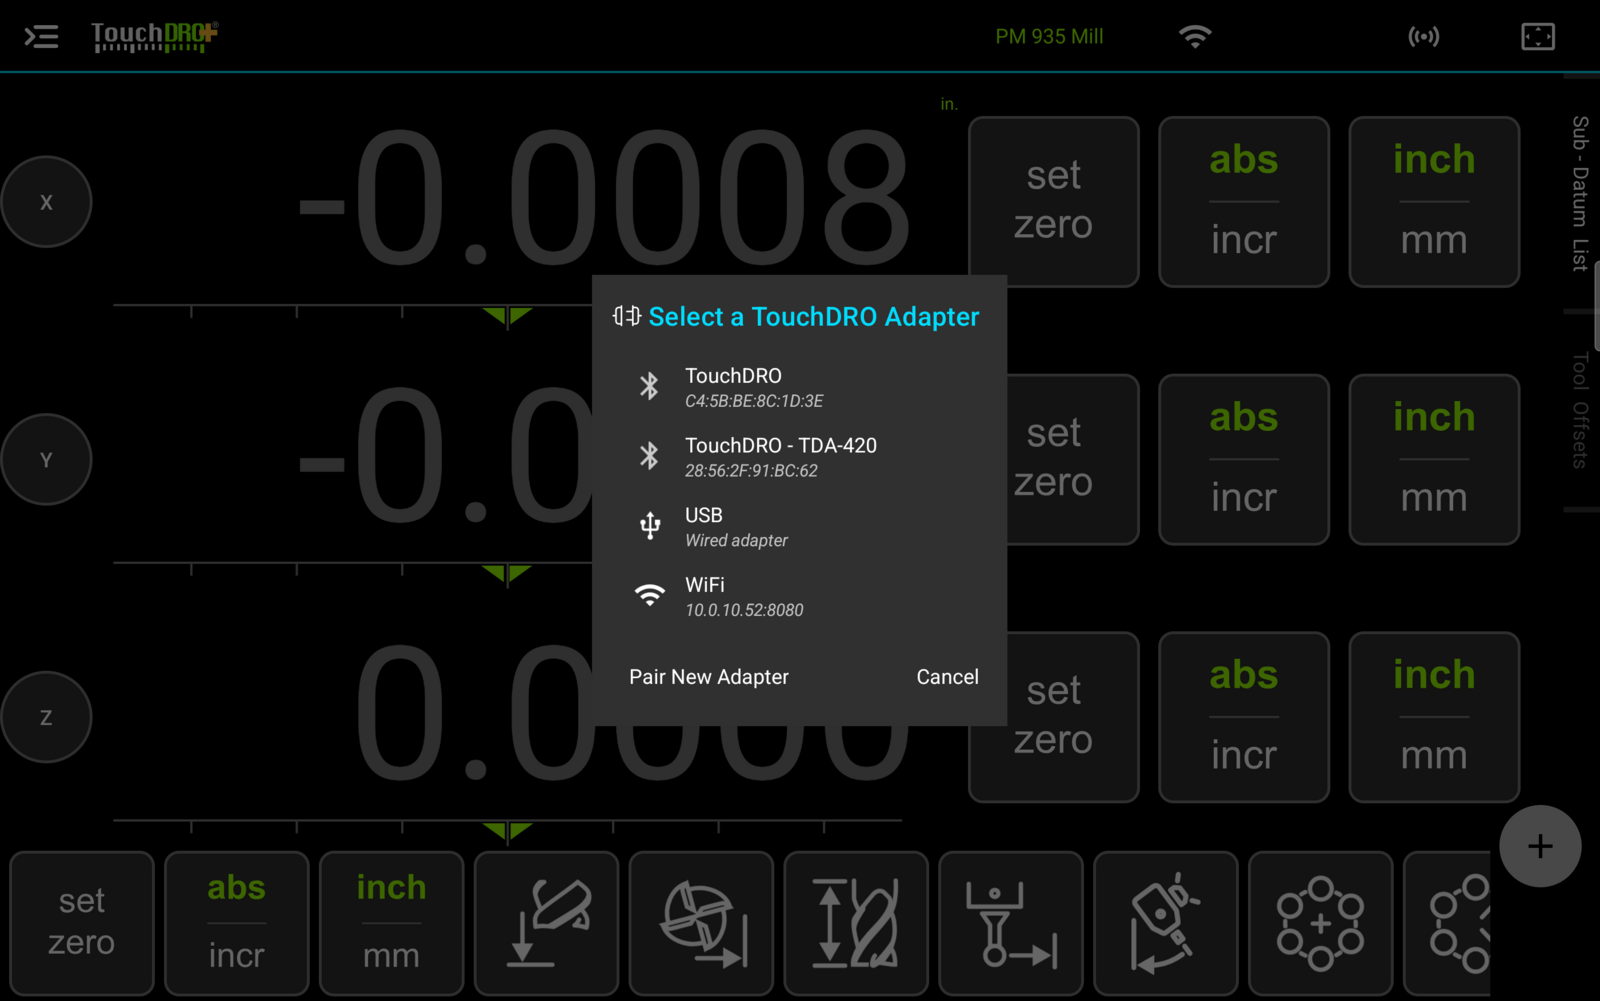
- Tap the connect button. The "Select a TouchDRO Adapter" dialog will open.
- If Android asks for permission to use Bluetooth or to find nearby devices, allow it. Until the permission is granted, TouchDRO can't see paired adapters, and the Bluetooth part of the dialog will show a single row inviting you to allow it.
- Tap "Pair New Adapter". The tablet's own "Pair new device" screen will open and start scanning.
- Wait for the adapter to appear under "Available devices" and tap it. TDA adapters and other ESP32-based boards appear as "TouchDRO". Older boards and DIY kits built around an HC-05 module appear as "HC-05".
- If a pass code dialog appears, enter "1234" (without the quotes) and confirm.
- Return to TouchDRO. The "Select a TouchDRO Adapter" dialog will now list the adapter.
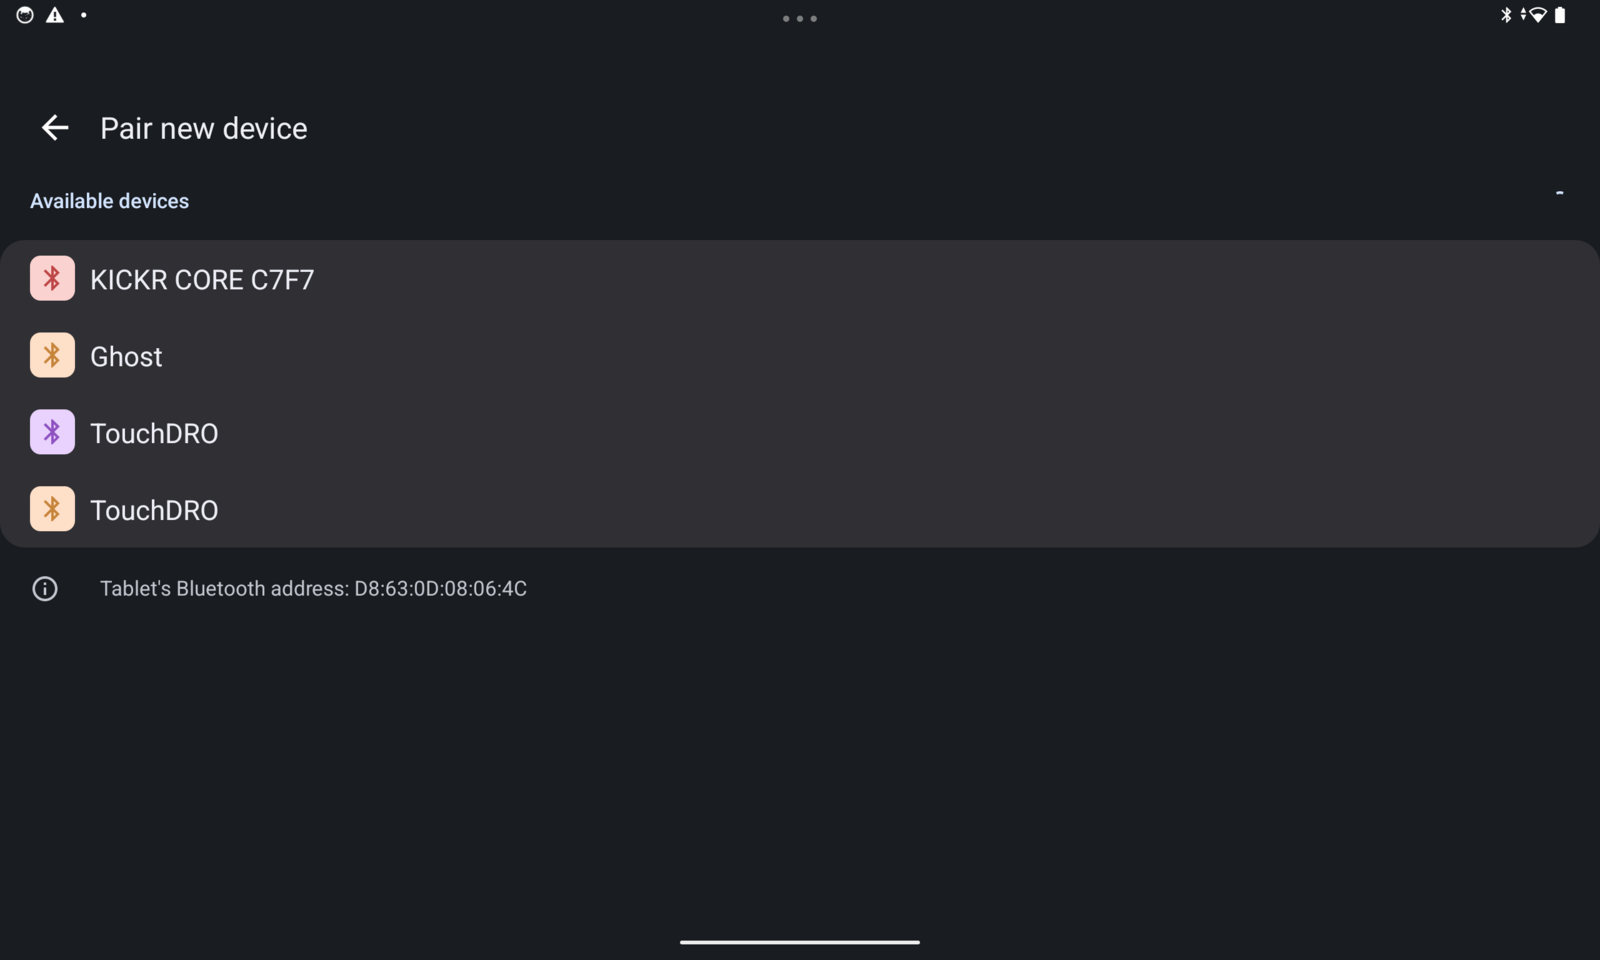
If pairing fails, make sure that you selected the correct device and that the adapter is powered from a correct power supply. If more than one "TouchDRO" appears in the list, as happens in a shop with several adapters, power off the ones you are not pairing so there is only one to choose from.
Selecting an Adapter
The "Select a TouchDRO Adapter" dialog lists everything you can connect to right now. Paired Bluetooth adapters come first, since those rows name actual devices, followed by single rows for USB and WiFi.
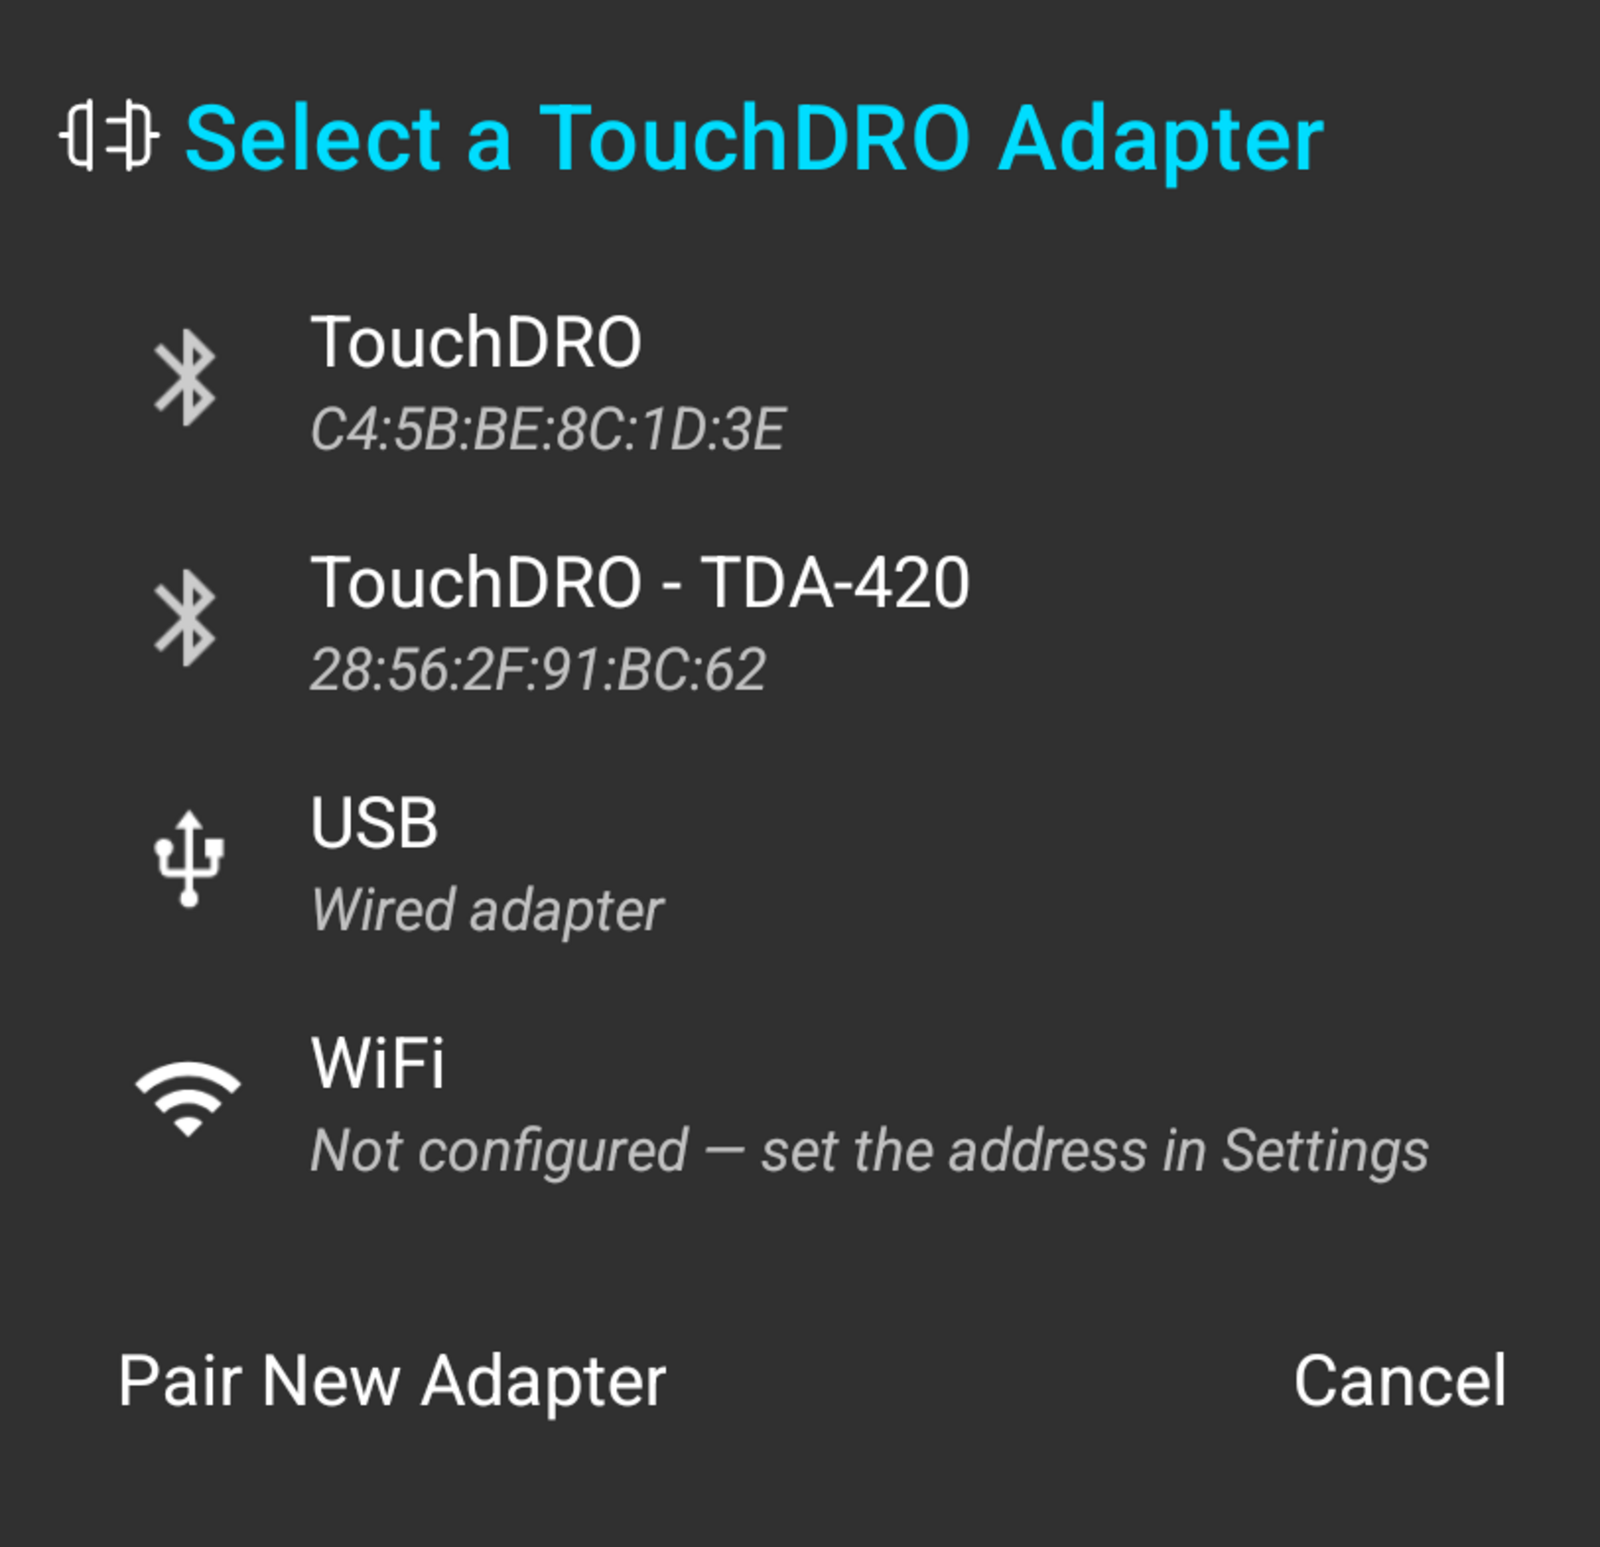
Each Bluetooth row shows the paired name of the device and its Bluetooth address. For an adapter you have connected to before, TouchDRO adds what it worked out about it, so the row reads "TouchDRO - TDA-420" for a recognized board or "TouchDRO - Legacy" for an older one. The USB row is a single entry marked "Wired adapter", and the WiFi row shows the address and port from the connection settings, or says that no address has been set.
To connect, tap a row. The connect button will switch to the "Connecting" animation while TouchDRO establishes the connection. Once the adapter starts sending position data, the icon will switch to the "Connected" state, the readouts will turn green, and the application will play a chime. "Pair New Adapter" opens the Android Bluetooth settings, which saves a trip through the system menus, and is offered whenever Bluetooth is enabled.
USB Connection
Supported USB Adapters
TouchDRO can connect to a scale adapter through a USB-to-serial bridge. Most Android devices lack standard drivers for the "USB communication device class" (USB CDC), so the support has to be built into the application, and the list of bridges TouchDRO works with is limited to the following:
- FTDI FT232R, FT232H, FT2232H, FT4232H, FT230X, FT231X, FT234XD
- Prolific PL2303
- Silabs CP210x devices
- Arduino devices that use the ATmega32U4 MCU for the USB-to-serial bridge (with CDC/ACM protocol)
Connecting over USB
On the "Connection Settings" screen, turn on the USB switch and set "USB Baud Rate" to the rate defined in the adapter firmware. Then plug the adapter into the tablet with a compatible USB cable and connect:
- Tap the connect button. The "Select a TouchDRO Adapter" dialog will open.
- Tap the "USB" row, marked "Wired adapter".
- If Android asks for permission to access the USB device, grant it. Without the permission, TouchDRO will not be able to establish a connection.
The connect button will switch to the "Connecting" animation while the application establishes the connection. Once the connection is successful, the icon will switch to the "Connected" state and the application will play a chime.
WiFi Connection
A WiFi adapter waits for a TCP connection at a fixed address, so TouchDRO needs to know where to find it. On the "Connection Settings" screen, turn on the WiFi switch and enter the adapter's address in "WiFi Adapter IP Address". "WiFi Adapter Port" is 8080 by default and only needs changing if the adapter firmware uses a different port.
To connect, tap the connect button and then tap the "WiFi" row, which shows the address and port you entered. The tablet and the adapter have to be on the same network.
Disconnecting
To disconnect from the adapter, tap the connect button while it is connected. The application will close the connection, beep four times, and switch the icon back to the "Disconnected" state. Unplugging a USB adapter or powering an adapter down without disconnecting first will produce the "Connection Lost" dialog described below.
When Things Go Wrong
Android Says It Couldn't Connect
The tablet's Bluetooth settings list "TouchDRO" as a paired device, but tapping it does nothing, or Android reports that it couldn't connect.
This is the expected behavior, and the adapter is fine. Android's Bluetooth settings can pair the adapter but can't open a connection to it, because the adapter speaks to TouchDRO alone. Leave the settings screen, open TouchDRO, tap the connect button, and tap the adapter in the "Select a TouchDRO Adapter" dialog.
No Bluetooth Adapters in the List
The adapter selection dialog shows no Bluetooth adapters, or a single row saying that there are none paired.
This happens when the adapter is not paired with the tablet, or when TouchDRO has not been granted the Bluetooth permission. Follow the pairing steps in the section for your version above. If the dialog shows a row inviting you to allow Bluetooth access, tap it and grant the permission first.
No USB Devices
TouchDRO supports only a limited number of USB bridges. If the application can't find any compatible USB devices, it will show an error dialog similar to the one below.
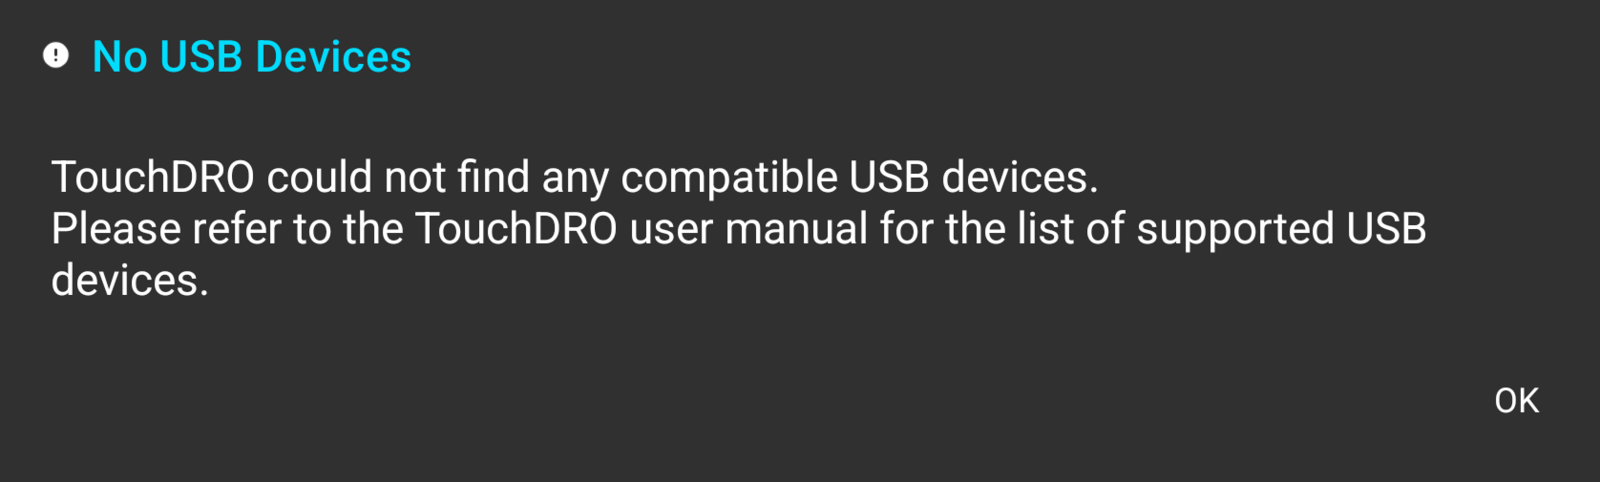
If your device is plugged in and is working correctly but TouchDRO can't find it, it usually means that the device is not compatible. It could be using a different USB device driver or the vendor/device IDs are not allowlisted.
Connection Failed
The application shows the "Connecting" animation for several seconds but then drops the connection and shows the dialog below.
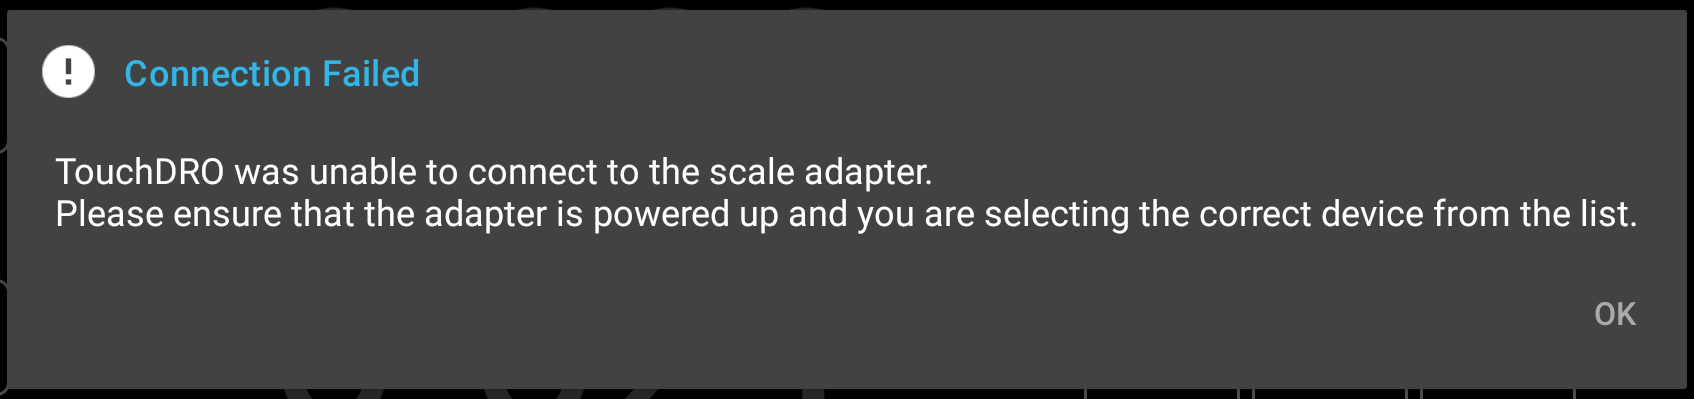
This occurs when TouchDRO is unable to establish even a low level connection to the adapter. There are a few possible reasons:
- The adapter is turned off. Please ensure that it's plugged in and running. On a TDA adapter, the green "Power" light is on and the blue "Data" light gives one brief flash every two seconds while it waits for a connection; the "Status Lights" section of the adapter manual lists the other patterns.
- The Bluetooth transceiver is not powered up or is faulty. This applies only to adapters that use a separate HC-05 module. ESP32-based adapters use an integrated Bluetooth transceiver.
- The adapter is too far from the tablet (Bluetooth has an effective range of about 30 feet, or 10 meters) or is behind a metal object that is blocking line of sight to the tablet.
Connection Timed Out
The application shows the "Connecting" animation for several seconds but then drops the connection and shows a dialog similar to the one below.
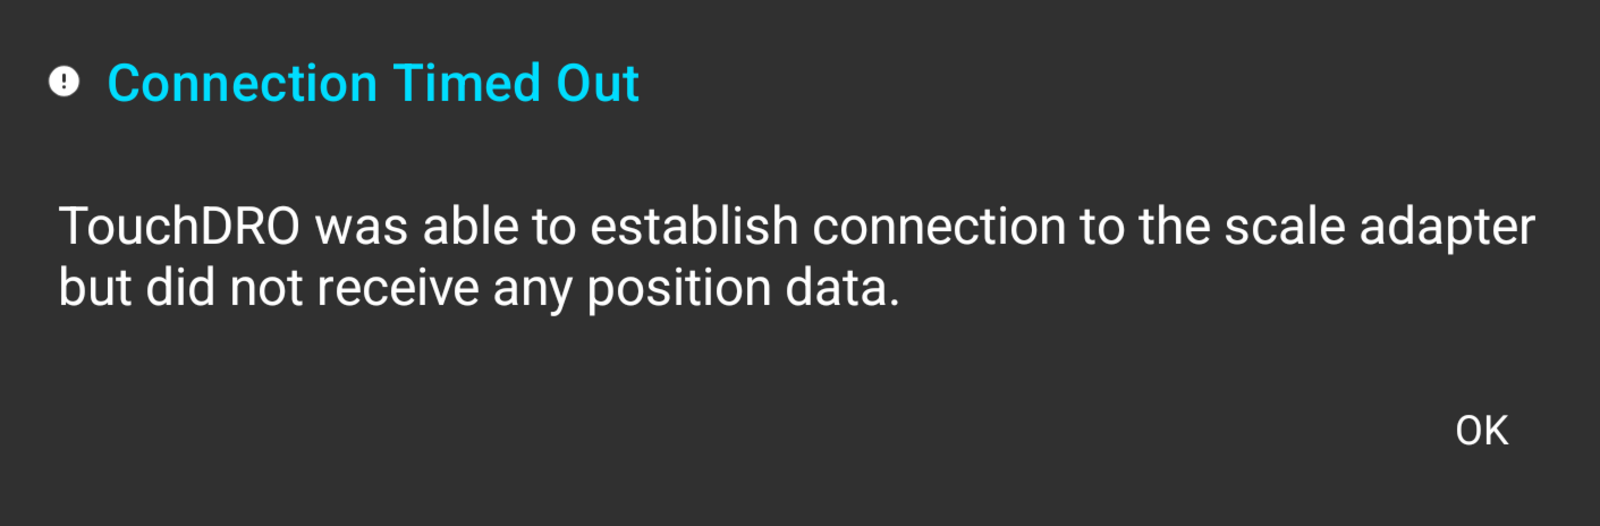
This usually means that the application was able to establish a low level connection with the Bluetooth transceiver or USB bridge, but did not receive any position data. The two main causes are:
- The main microcontroller is not running. On a TDA adapter, the blue "Data" light should be flashing; a light that is off while "Power" is on, or one that toggles only every five seconds, means the adapter has stopped.
- Incorrect wiring between the microcontroller and the communication chip. Please note that the Rx line should connect to the Tx line and vice versa, not Tx-to-Tx, Rx-to-Rx.
This should not happen with ESP32-based boards, since they use an integrated Bluetooth chip that can't run independently of the main code.
Data Stream Stopped
The readouts switch to gray and after a few seconds the application closes the connection, beeps four times, and shows a dialog similar to the one below.
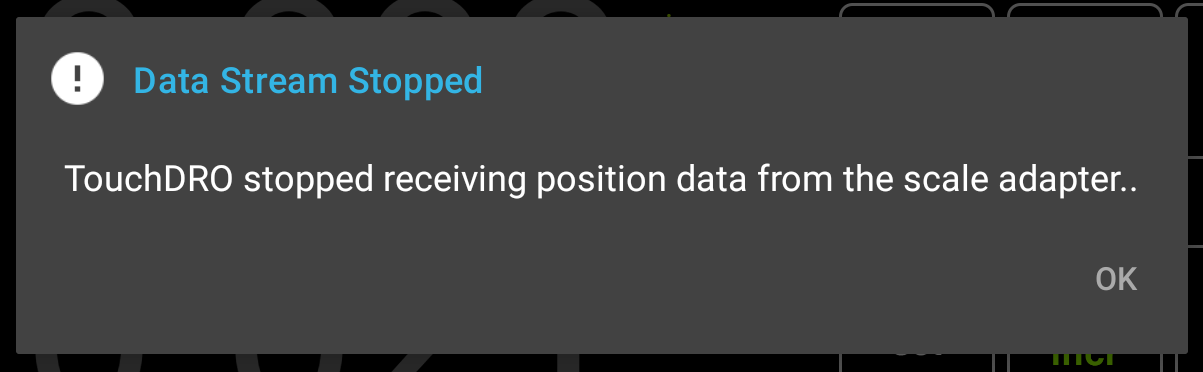
There are two common causes for this error:
- The adapter loses power or is reset, leading to a dropped connection. Ensure that the adapter is plugged in securely and the power supply is rated for the correct voltage and current.
- The microcontroller stopped communicating with the discrete USB bridge or Bluetooth transceiver. This can be either due to a loss of physical connection or a problem with the main processor. It can't occur with ESP32-based adapters, since they use an integrated transceiver.
Connection Lost
The application abruptly switches from "Connected" to "Disconnected" and shows the dialog below.
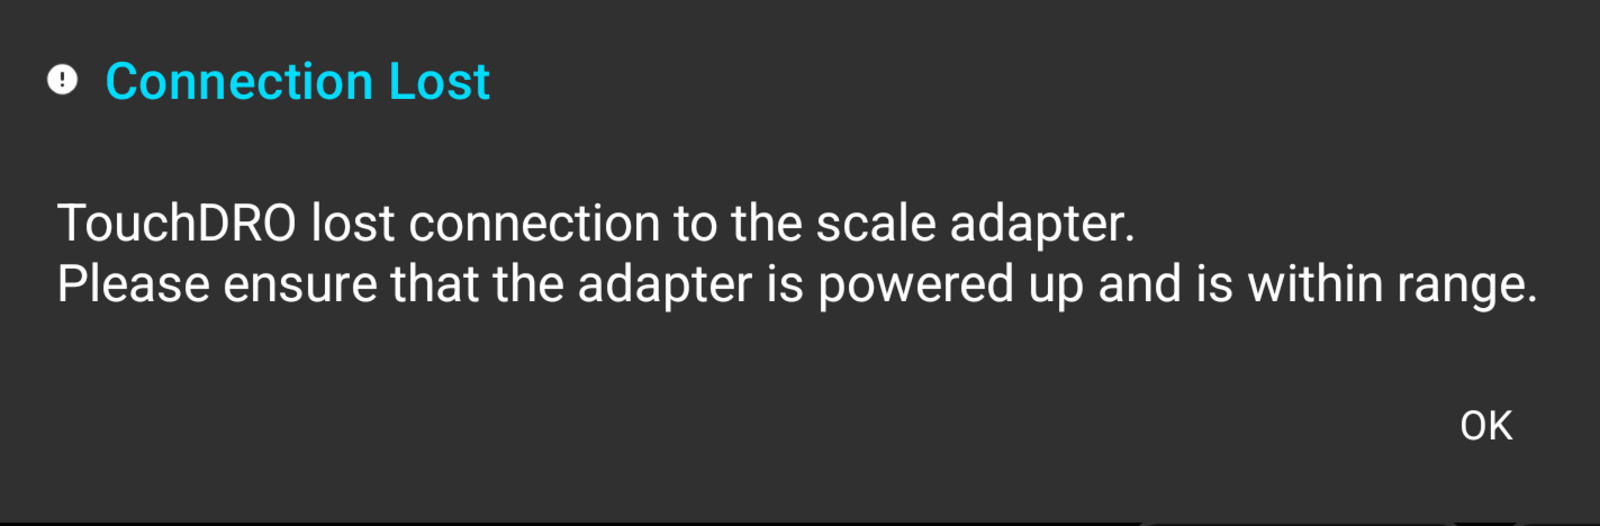
This happens when the connection to the scale adapter is lost without warning. Most commonly the USB device was unplugged, or the adapter was powered down, without first disconnecting in TouchDRO.