
Radius and Arc Cutting
A manual mill has no way to feed two axes along a curve at once, so an outside radius or an inside fillet is usually roughed by nibbling: take a cut, move both handwheels a little, take another. The radius/arc cutting function calculates that sequence for you. Enter the finished radius, the cutter diameter, and how far apart the cuts should be. TouchDRO will save a series of cutter positions into sub-datum memory, each one placing the edge of the cutter exactly on the finished radius.
Working the positions in order leaves a scalloped approximation of the arc, with the scallop height set by the stepover. A finer stepover leaves less material for the finish pass; a coarser one gets through the roughing faster.
This function suits the single, dimensioned arc: a corner round-over, a fillet between two faces, a partial radius on a boss. For a profile that strings several arcs and lines together, it is usually quicker to draw the part in CAD and bring it in through drawing import. TouchDRO shows the drawing at true scale with the cutter drawn against it, so a complex outline can be nibbled against the crosshairs instead of being programmed one arc at a time.
Opening the Dialog
To open the "Radius/Arc Cutting" dialog, press the "Radius/Arc Cutting" button in the function strip, or select "Arc/Radius" from the "Add Sub-Datum" menu in the sub-datum panel.
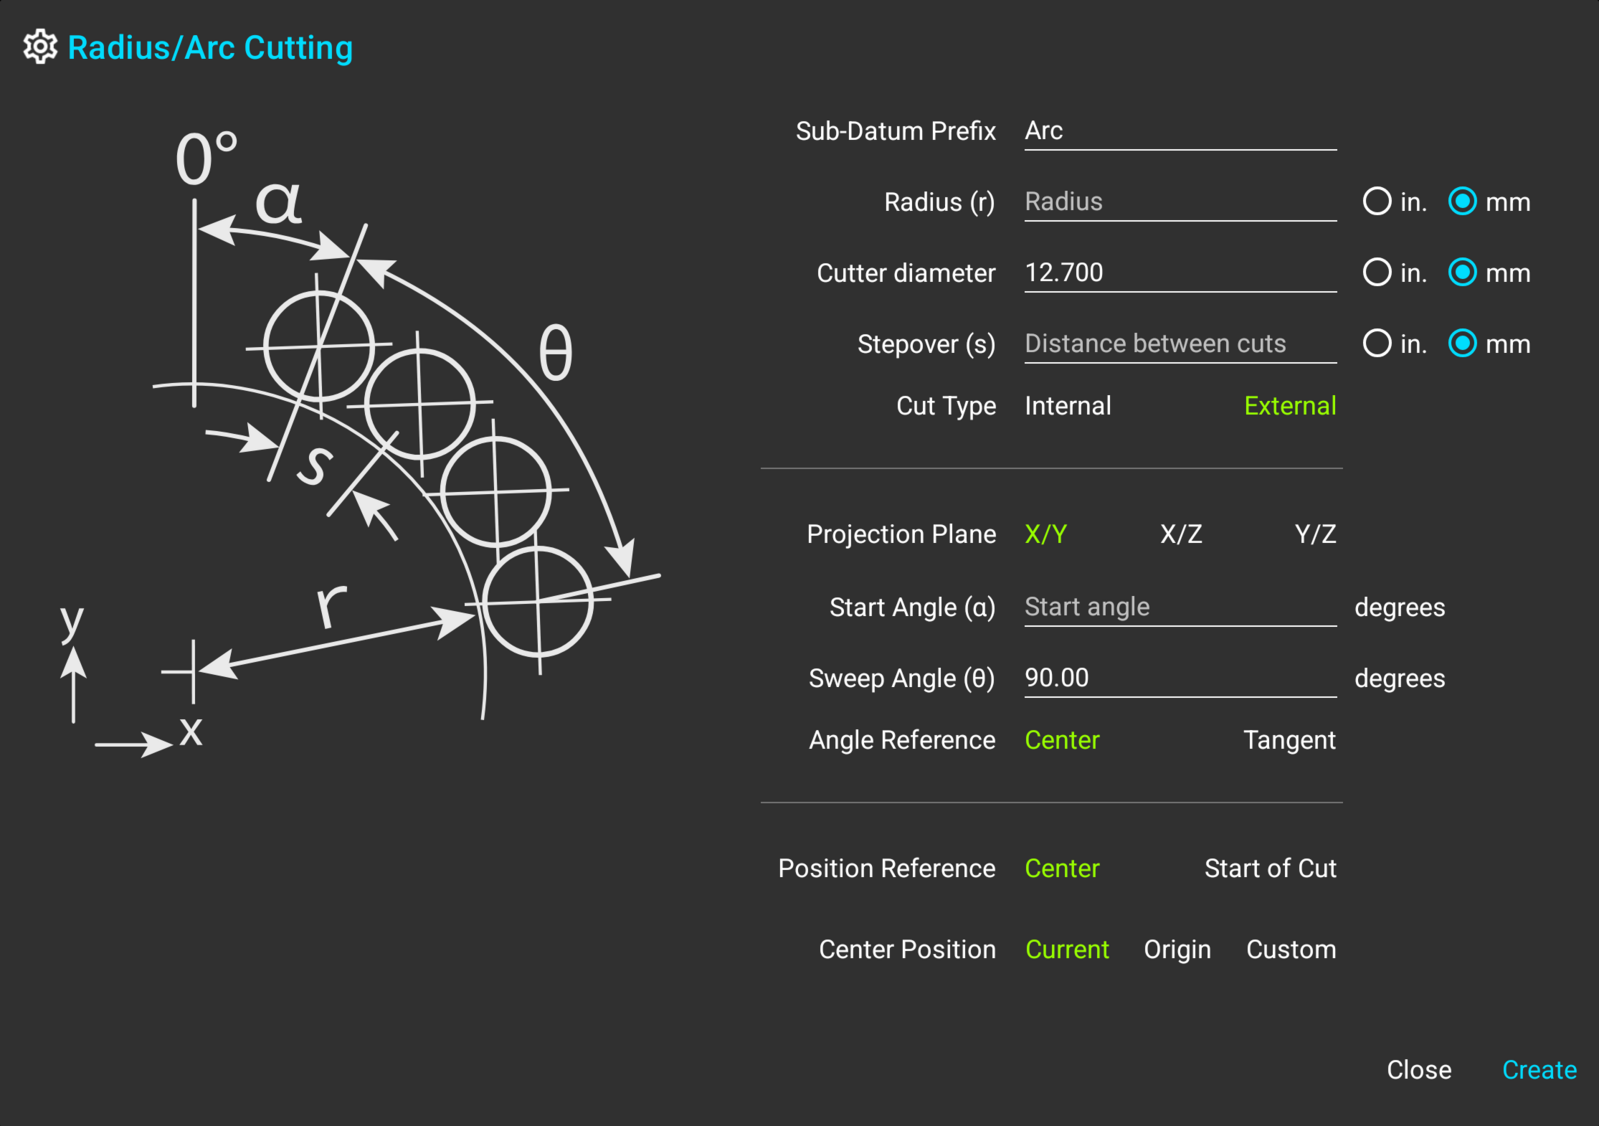
Cut Parameters
Sub-Datum Prefix
The prefix names the created positions ("Arc - 1", "Arc - 2", and so on) and becomes a tag on every one of them, so the whole sequence can be filtered, hidden, or deleted as a group later.
Radius and Cut Type
The "Radius" field takes the finished radius of the part, not a cutter path. The "Cut Type" selection tells TouchDRO which side of that radius the cutter works from. "External" is for an outside radius (a boss or a corner round-over); "Internal" is for an inside one (a fillet or a concave pocket wall).
TouchDRO offsets the stored positions by half the cutter diameter in the right direction, so the edge of the cutter lands on the finished radius at every position: outside it for an external cut, inside it for an internal one.
Cutter Diameter
The cutter diameter is required, since the position arithmetic depends on it. If a cutter is already applied through cutter radius compensation or the tool library, the field is pre-filled with its diameter.
Stepover
The stepover is the distance between neighboring cut positions, measured along the finished radius. TouchDRO divides the arc into equal steps no larger than this figure, so the entered value is the worst case rather than the exact spacing.
Each of the three dimension fields carries its own "in."/"mm" selection and accepts arithmetic, so a 1/2" endmill can be entered as "1/2" on a metric readout.
The Arc
Start and Sweep Angles
The start angle α places one end of the arc, and the sweep angle θ sets how far around it runs, with 90 degrees as the default. The 0° mark points along the vertical axis of the drawing, and positive angles run clockwise. A negative sweep runs the arc the other way from the start angle.
Angle Reference
The "Angle Reference" selection decides what the entered angles bound:
- "Center" - the angles locate the center of the cutter at the first and last positions
- "Tangent" - the angles bound the finished cut. TouchDRO pulls the first and last positions in by the angular width of the cutter, so the edge of the cutter, rather than its center, starts and stops exactly on the entered angles
"Tangent" is the choice when the arc has to blend into faces at its ends, since the cutter must not run past them. The drawing in the dialog changes to show the selected convention.
Positioning the Arc
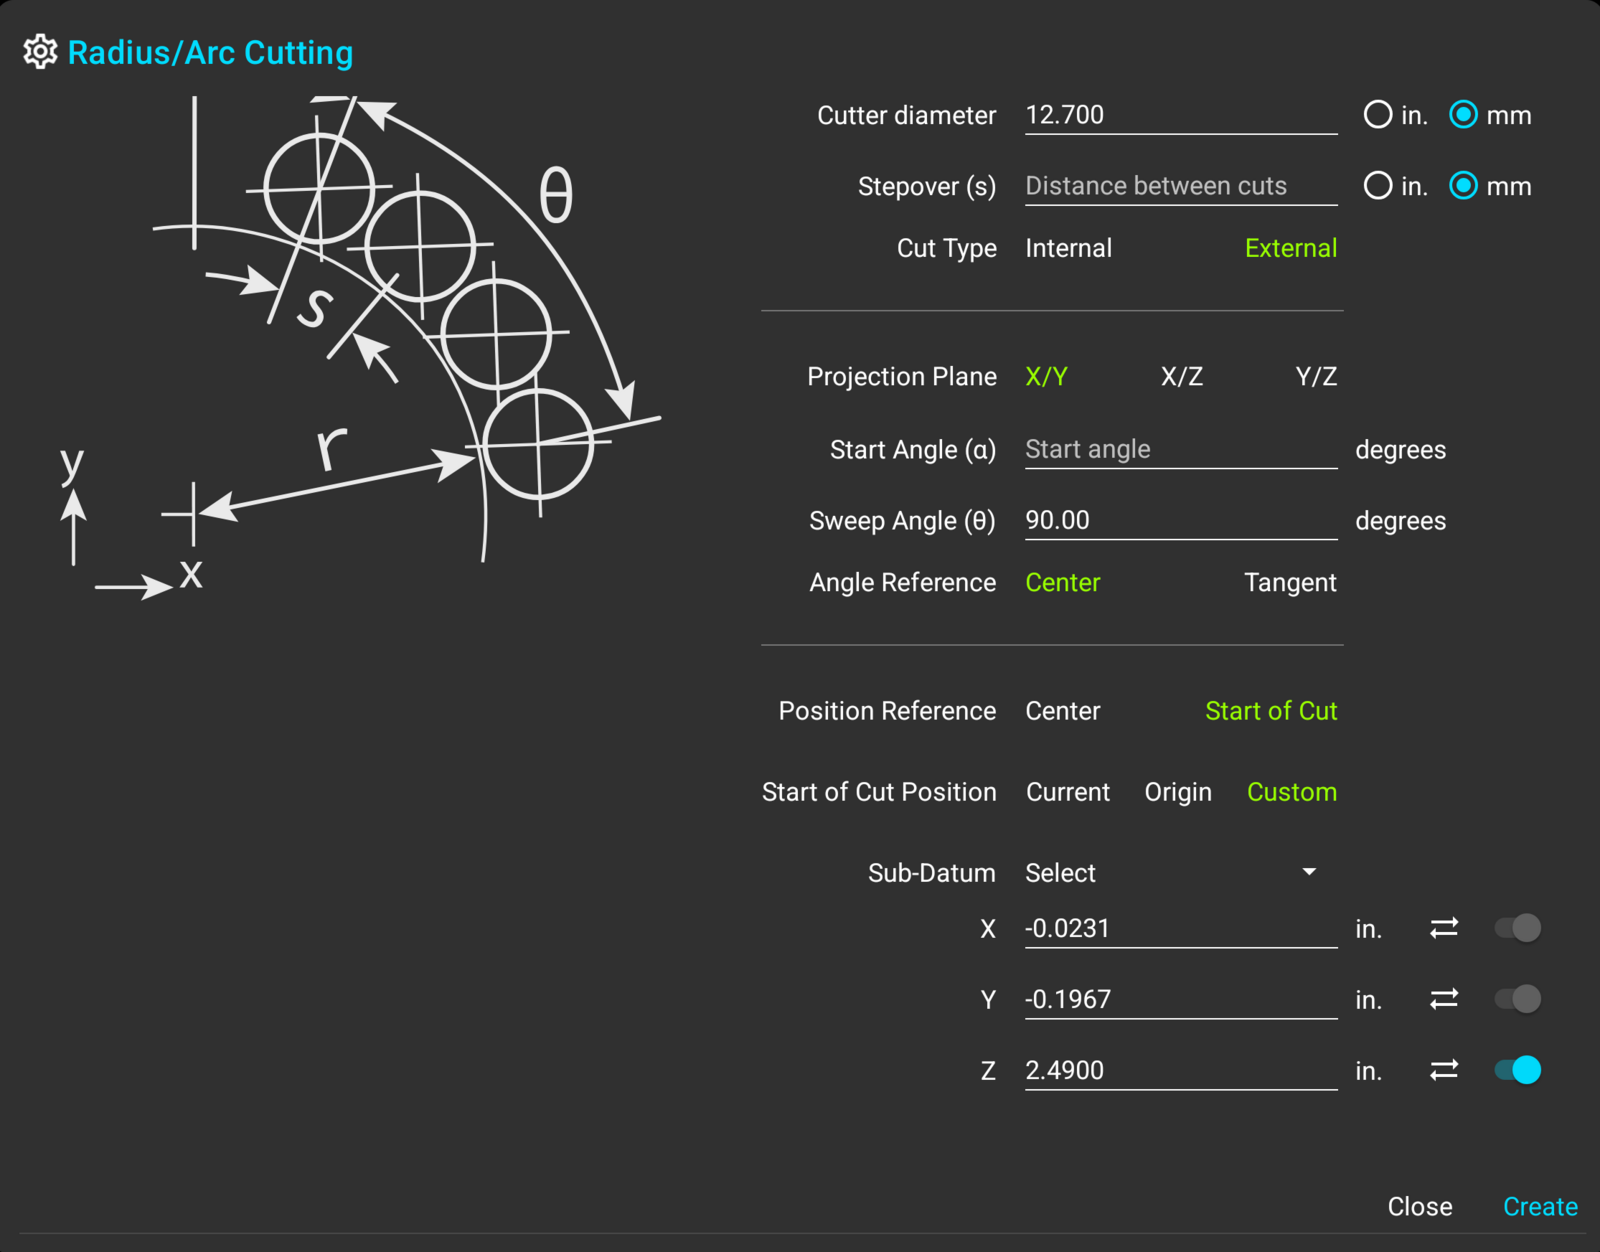
The "Position Reference" selection places the pattern by its center or by the first cut position. The position itself comes from the current machine position, the workspace origin, or typed-in coordinates. With "Start of Cut" selected, TouchDRO calculates where the center falls, which suits the common case where the cut has to begin at a known point on the part. The shared position controls, including the stored sub-datum dropdown and the optional third axis, are covered in "Hole Circle".
The Created Positions
Press "Create" and TouchDRO will write the positions into the current workspace as ordinary sub-datums: they appear in the sub-datum list named by the prefix, and are drawn in the Graphical View display, where the arc they trace is visible at a glance and tapping a position activates it.
To machine the radius, work the positions in order: activate the first, drive both readouts to zero, take the cut, and step to the next with the navigation buttons. Once the radius is done, the whole sequence can be hidden by its tag, or deleted as a group.