
TouchDRO TDA Adapter Quick Start
The TDA-410 and TDA-420 arrive assembled and configured for the scale pinout you chose at checkout, so there is nothing to build. This page is the web version of the quick start card in the box: what came with the adapter, what its ports and lights do, and the three connections between unboxing and a live readout.
The "TouchDRO Quick Start Guide" covers the whole system, including the tablet side. This page is the adapter half of its Steps 3 and 5. The full pinout tables, touch probe wiring, and specifications are in the "TDA-410/420 Adapter Manual".
What Is in the Box
- The adapter module, with the scale inputs already pinned for the scales you ordered it for.
- A USB-A to USB-C cable for power.
- One Mini-DIN 4 connector (TDA-410) or two (TDA-420), for wiring a tachometer or a touch probe.
- A quick start card.
You supply the USB power source (a common phone charger works), the scales, and an Android tablet. The "Recommended Tablets" guide covers the tablet choice.
Ports and Lights
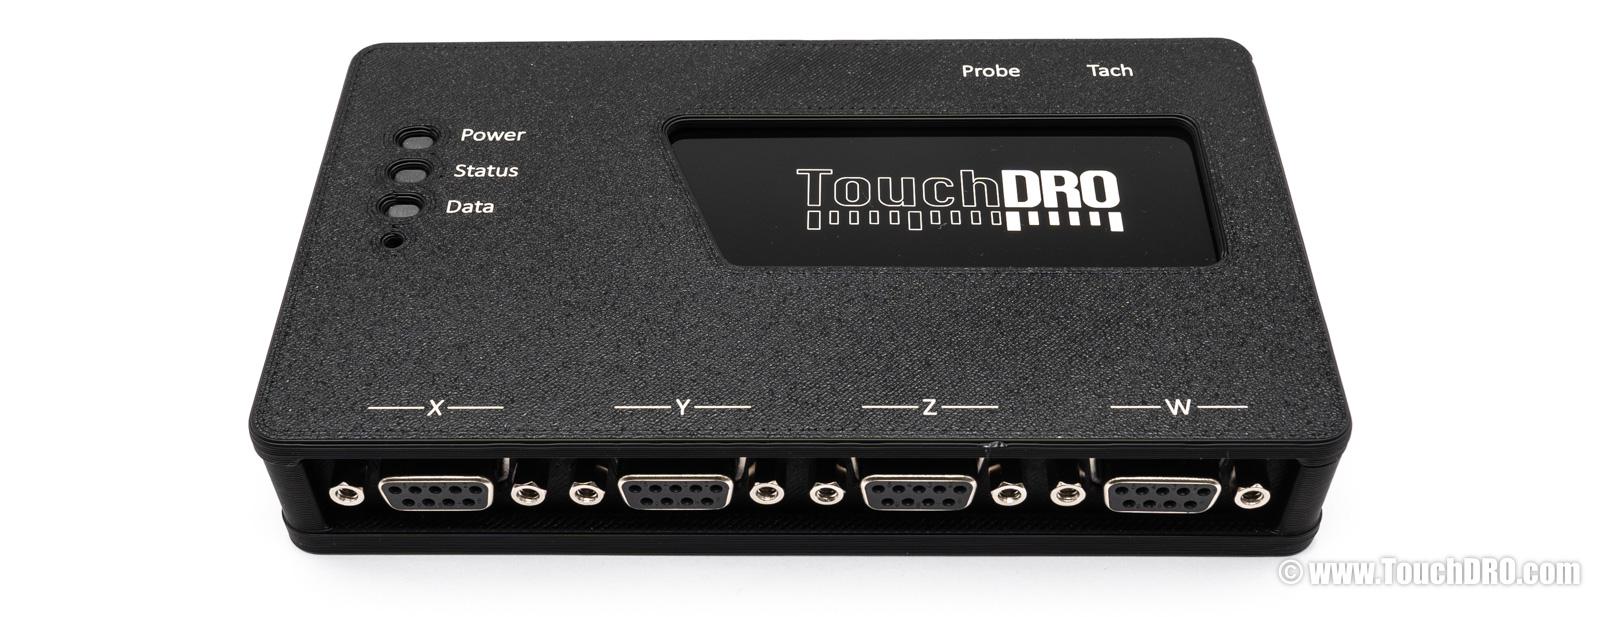
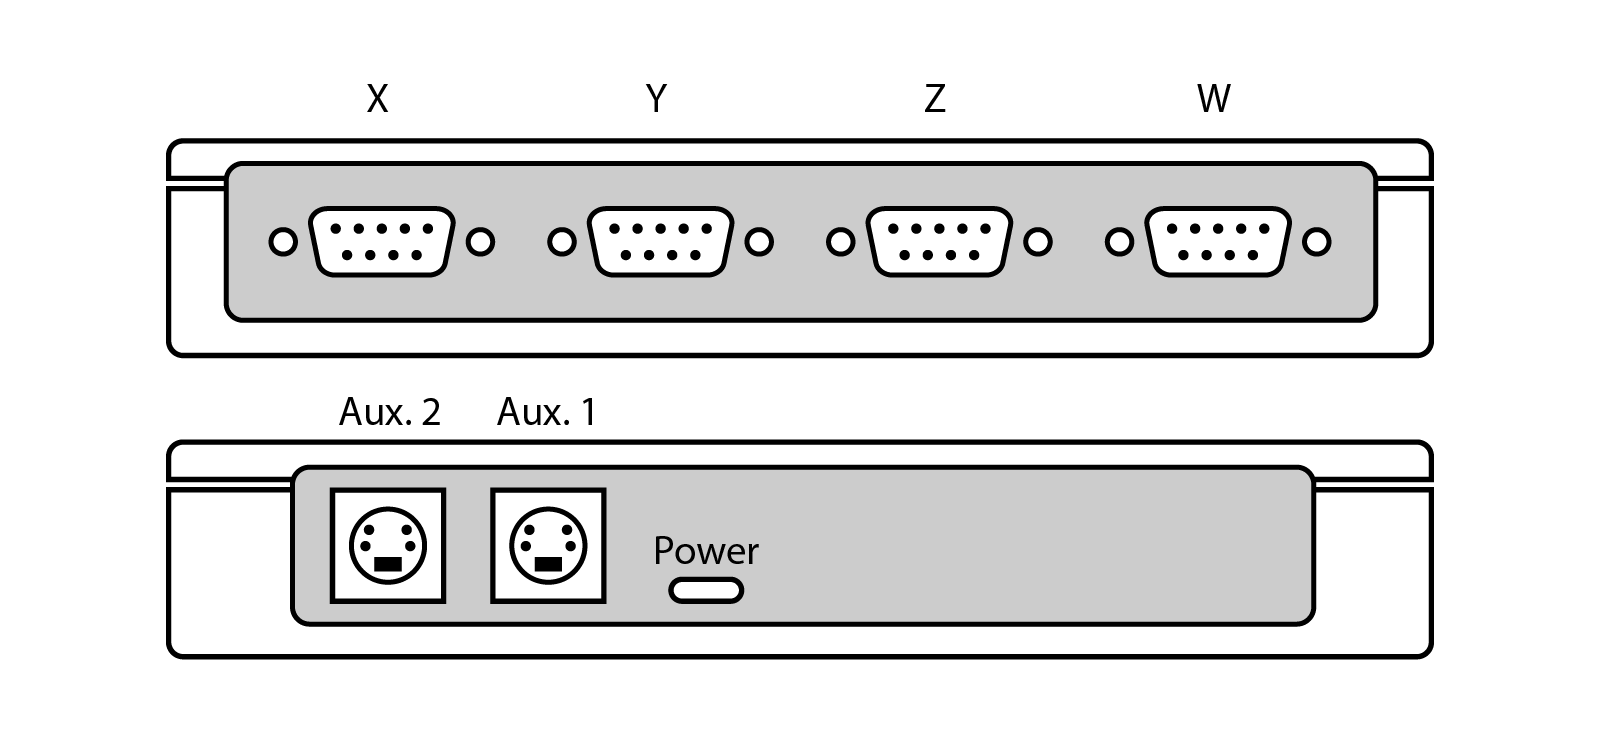
The four DB-9 connectors along the front are the scale inputs, labeled X, Y, Z, and W. Each has a pair of threaded posts for the plug's retaining screws. Which input a scale goes into decides which readout it drives on the screen, so the labels are the whole mapping.
On the back are the USB-C power socket and the round Mini-DIN auxiliary ports for the optional extras: a tachometer on both models, and touch probes or a tool height setter on the TDA-420. Neither is needed to get the readout working.
The three lights on top tell you what the adapter is doing. The green "Power" light is on whenever the adapter has power. The blue "Data" light is the adapter's heartbeat: one brief flash every two seconds while it waits for the tablet, one flash every half second once TouchDRO is connected, and a flicker of double flashes while position data flows. The red "Status" light stays off in normal use and comes on only for events such as a touch probe contact or a firmware update. The "Status Lights" section of the manual lists every pattern.
Plug In the Scales
Plug each scale into the input for its axis and tighten the two retaining screws so vibration cannot work the plug loose. On a mill, that is table left-right on X, table in-out on Y, and knee or spindle travel on Z, with a quill scale on W. On a lathe, the cross slide goes on X and the carriage on Z.
The inputs are pinned for the scale brand you chose when ordering, so a matching scale plugs straight in. If a plug doesn't fit, or you are adding a scale with a different pinout, the fix is a cable or a pin change, not a new adapter:
- Scales with a different connector use an adapter cable from the adapter cables collection.
- Scales with the same connector but different pin functions are handled by swapping the adapter's internal pin mapping boards, which we exchange for free.
- Capacitive scales (iGaging, Shahe, Mitutoyo SPC) connect through a converter, and the input they use has to be switched to the converter's protocol. The "Serial Scales" section of the quick start covers that setting.
"Connecting DRO Scales to TouchDRO" goes into the hookup in more detail, including the quill and tachometer connections.
Power Up
Plug the USB cable into the adapter and then into the power source, after the scales are connected. There is no power switch. The green "Power" light comes on at once. About a second later, the blue "Data" light gives three quick blinks to say the firmware has booted, then settles into one brief flash every two seconds.
You will know the adapter is ready when the "Data" light is doing that slow flash. Leave the adapter powered; it records the scale positions when power drops and restores them when it comes back, so an evening shutdown does not cost you your setup.
Connect the Tablet
The tablet talks to the adapter over Bluetooth, and getting them talking is two separate jobs. Pairing is done once, in the tablet's Bluetooth settings, where the adapter appears as "TouchDRO". Connecting is done inside the TouchDRO application, every time, by tapping the Bluetooth icon and picking the adapter from the list. Tapping "TouchDRO" in the tablet's settings after pairing will not connect it. Step 5 of the "Quick Start Guide" walks through both, screen by screen.
The first time the application connects to the adapter, it will ask "Activate TouchDRO Plus?". Answer "Yes". The adapter includes the license, and the prompt appears once.
First Check
You will know the adapter is working when the application plays a chime, the readout digits turn from gray to green, and the blue "Data" light speeds up to a flash every half second. Crank each handle on the machine: the matching readout should move, and the "Data" light will flicker as the position updates go out. If a different readout moves, two plugs are swapped at the adapter.
A few seconds after connecting, the device-status button next to the Bluetooth icon turns green. To see the adapter's model, firmware version, and the raw count from each input, tap it. The "DRO Adapter Details" dialog will open, and a raw value that changes as you move a scale is proof that the input is alive, before any other setting is touched.
Next: Step 6 of the "Quick Start Guide", setting the scale resolution and direction, then calibration.