TouchDRO Hole Grid Function
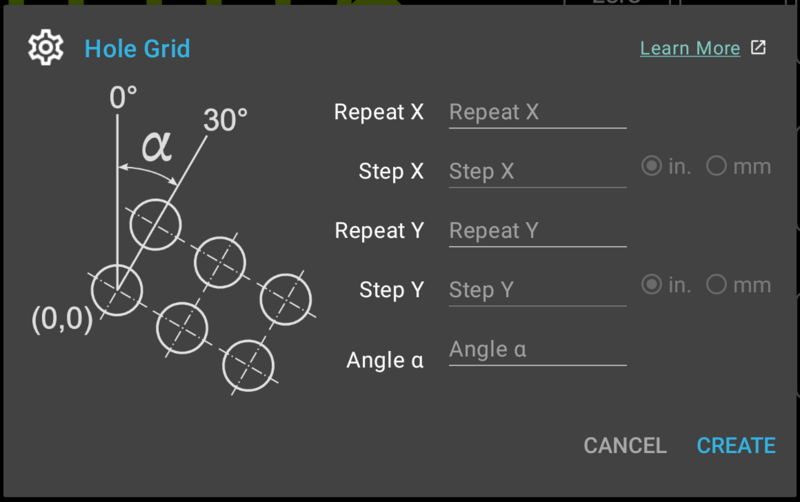
Hole Grid function allows creation of a grid of holes that starts at the starting point. The grind can be one-dimensional, i.e. repeat along the line at an arbitrary angle, or two dimensional. In TouchDRO the function has two modes - Basic and Advanced:
Basic mode can be accessed by pressing the "Hole Grid" function button in the function strip or "Hole Grid" on the "Add Sub-Datum(s)" menu
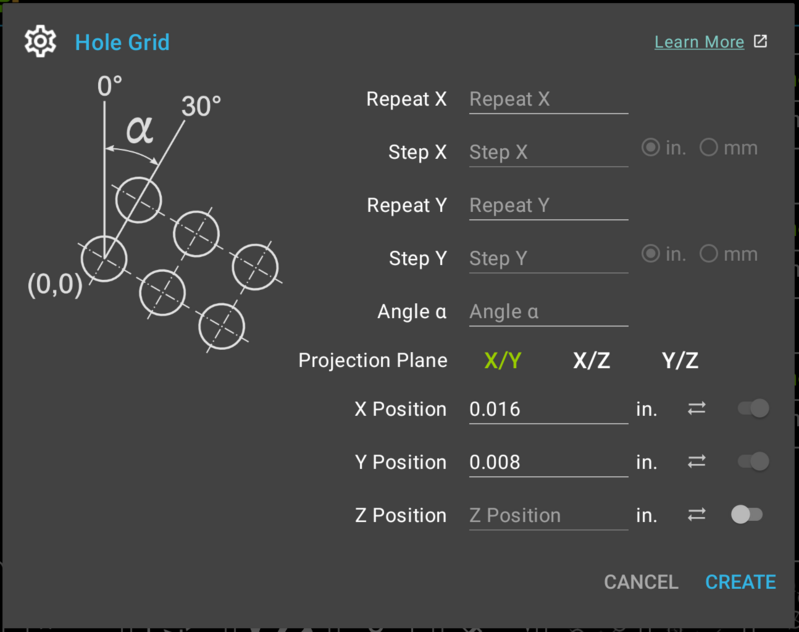
Advanced mode can be accessed by long-pressing the "Hole Circle Function" button in the function strip or "Hole Grid" on the "Add Sub-Datum(s)" menu
This function is primarily intended for use on a milling machine, but can be used on a lathe for roughing out conical shapes.
Basic Mode
In basic mode the function will create a grid in the machine's default projection plane with the starting point located at the current spindle/cutter position (current absolute position for the relevant axes).

The function accepts the following parameters:
Repeat
Determines the number of holes along the given axis; a value is required for at least one axis.
Step
This is the distance between the holes along the given axis. If the Repeat value is entered for an axis, step value is required; otherwise it can be omitted.
Angle (α)
Angle is an optional parameter. If entered, the whole grid will be generated at an angle.
Default Projection Planes
The project plane is set as follows:
- Milling machine - XY, 0.0 degrees parallel to positive X direction
- Lathe - XZ, 0.0 degrees parallel to positive X direction
Please note: in basic mode the third axis dimension is omitted. For example, milling machine sub-datums will not have Z set to any value.
Advanced Mode
In advanced mode, the Hole Grid function offers more control over the projection plane of the Hole Grid, position of the starting point, and the value of the third axis.

In advanced mode the function accepts the following additional parameters:
Projection Plane
Machine plane on which the circle will be created. Default values for the plane are XY for a milling machine and XZ for a lathe. Starting angles are set as follows:
- XY - 0.0 is parallel to the positive X direction
- XZ - 0.0 is parallel to the positive X direction
- YZ - 0.0 is parallel to the positive Y direction
X/Y/Z Positions
X, Y, and Z Position fields define the location of the Hole Grid in two or three dimensions. Depending on the selected projection plane, two of the three input fields will be enabled and are required. The third field is optional and can be enabled if desired.
By default, enabled fields are pre-filled with the current readings for the relevant axes. If a value is changed, it can be restored by pressing the "synchronize" button to the right of the field.
Units for each field are set to the current units for each individual axis.
How To UseBasic Hole Grid
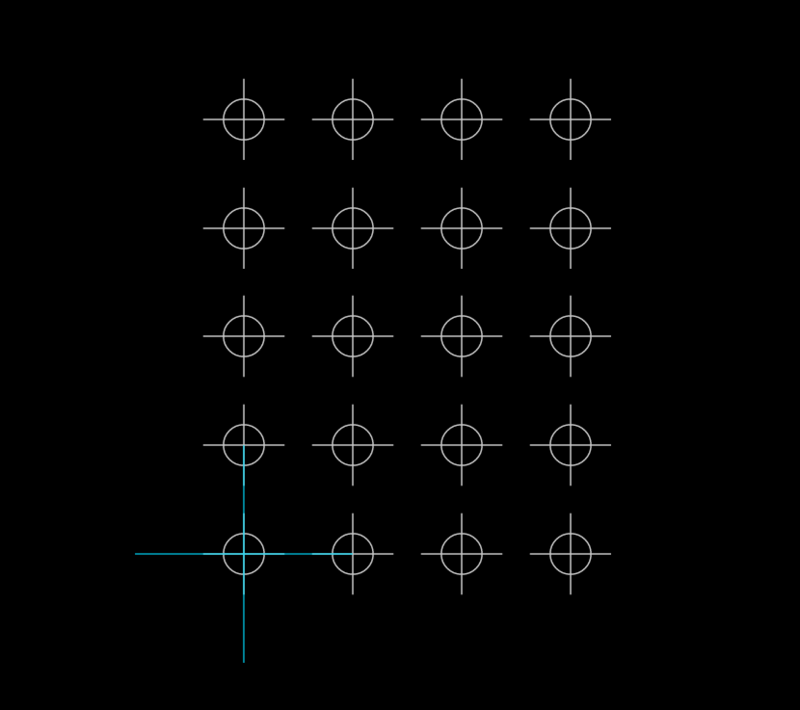
Goal: Create a square 4 x 5 hole grid with 0.5" spacing between holes in both directions
- Bring up the Basic Hole Grid Dialog
- Enter "4" in the Repeat X field
- Enter ".5" into the Step X field
- Enter "5" in the Repeat X field
- Enter ".5" into the Step X field
- Press the "Create Grid" button
The result should look similar to the screenshot below:

