
Sub-Datum Tags and Filtering
From time to time you might get a job with dozens of holes that need different operations: some reamed to different diameters, some tapped, some left as clearance holes. With 50 or 100 sub-datums in TouchDRO, it's really easy to lose track and drill the wrong holes. To help with this, TouchDRO can tag the sub-datums during a "CAD Drawing Import" or directly in the app.
Once the sub-datums are tagged, you can show and hide whole groups, both in the list and in the graphical view. This way you can spot drill all of the hole locations, then hide everything but one tag and drill those holes with the correct drill. Switch the drill, show the next tag, and so on.
Tags and filtering are a TouchDRO Plus feature. Without Plus, the filter button and the "Tag" field are dimmed, and the dimmed filter button responds with a short explanation rather than the filter panel.
Tags and Tag Marks
A tag is a short label attached to a sub-datum, and each sub-datum carries one tag. Every point sharing a tag is marked with a small colored tag mark on its row in the "sub-datum panel", one color per tag, and the same color marks the tag's row in the filter panel. A point without a tag is treated as "Untagged".
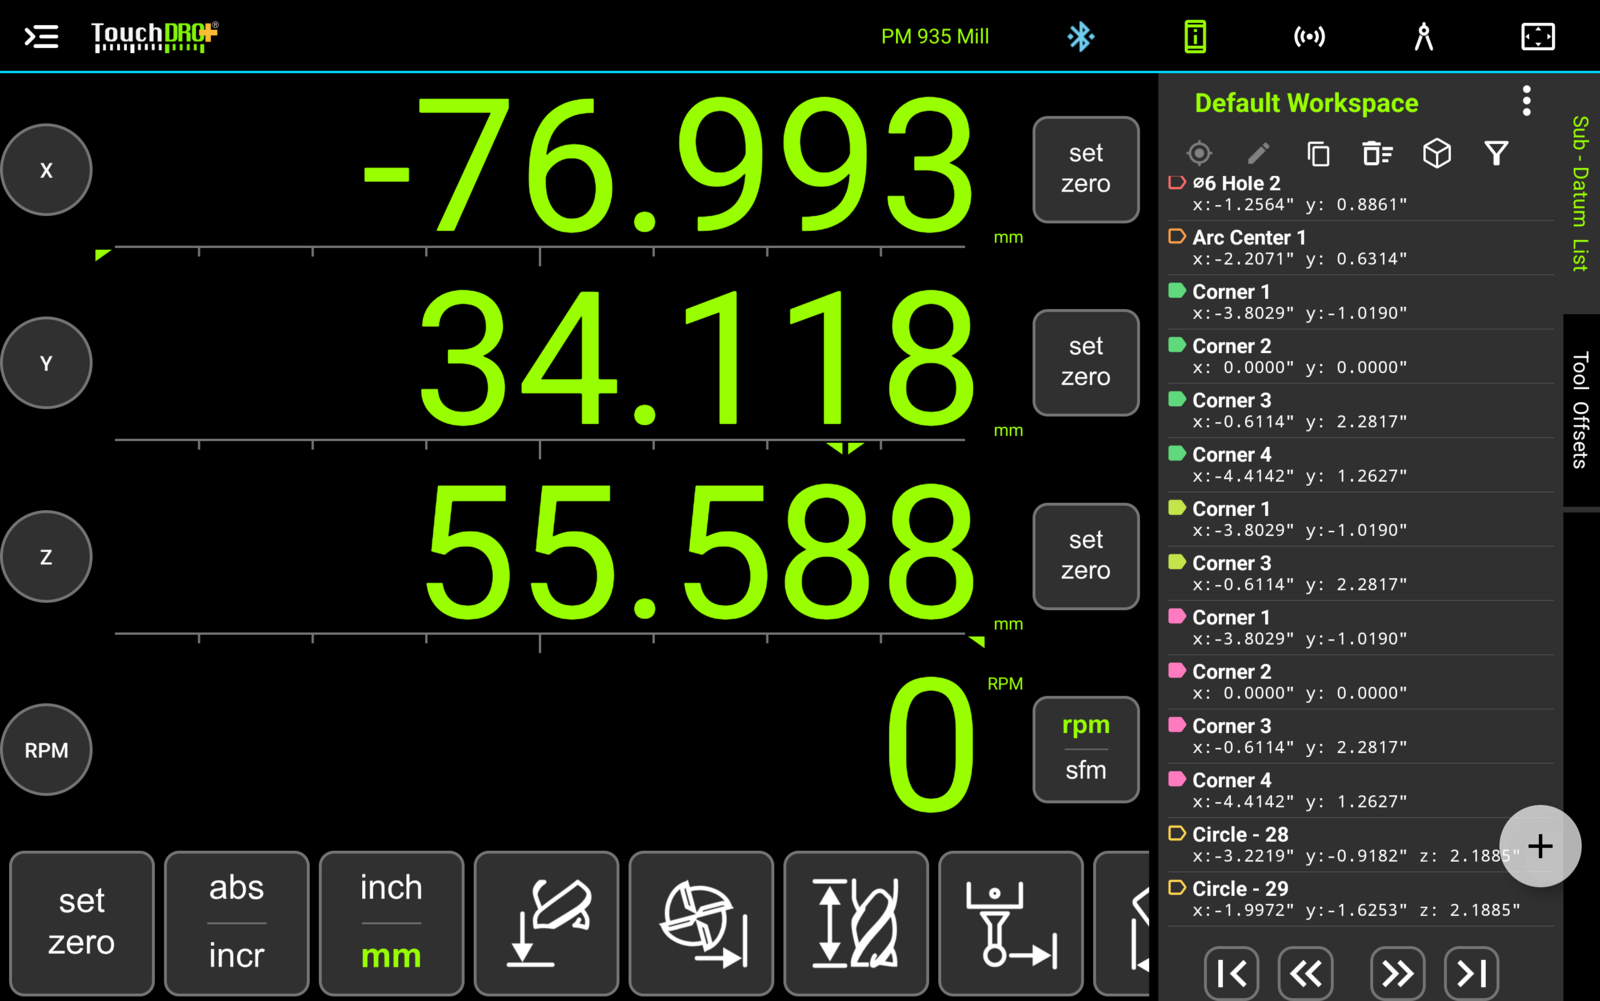
A tag can't contain a space, so spaces become underscores as you type. Tags match without regard to case, meaning "Circle" and "circle" are one tag, displayed with whichever spelling was used first.
Setting a Tag
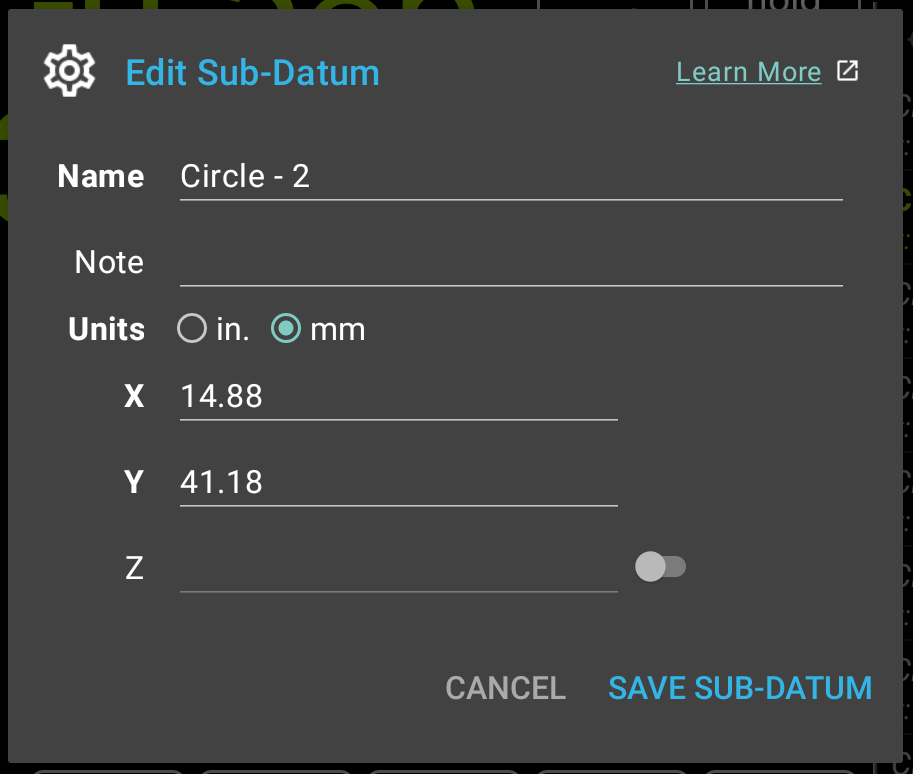
To set or change a point's tag, use the "Tag" field in the "Edit Sub-Datum" dialog, described in the "Workspaces and Coordinate Entry" guide. As you type, the field suggests the tags already used in the workspace, and it accepts anything you type. The "Add Custom Sub-Datum" dialog has the same field, so a point can be tagged as it is entered; when pre-entering a layout, tagging as you go is much easier than sorting the points out later.
Tagging Several Points at Once
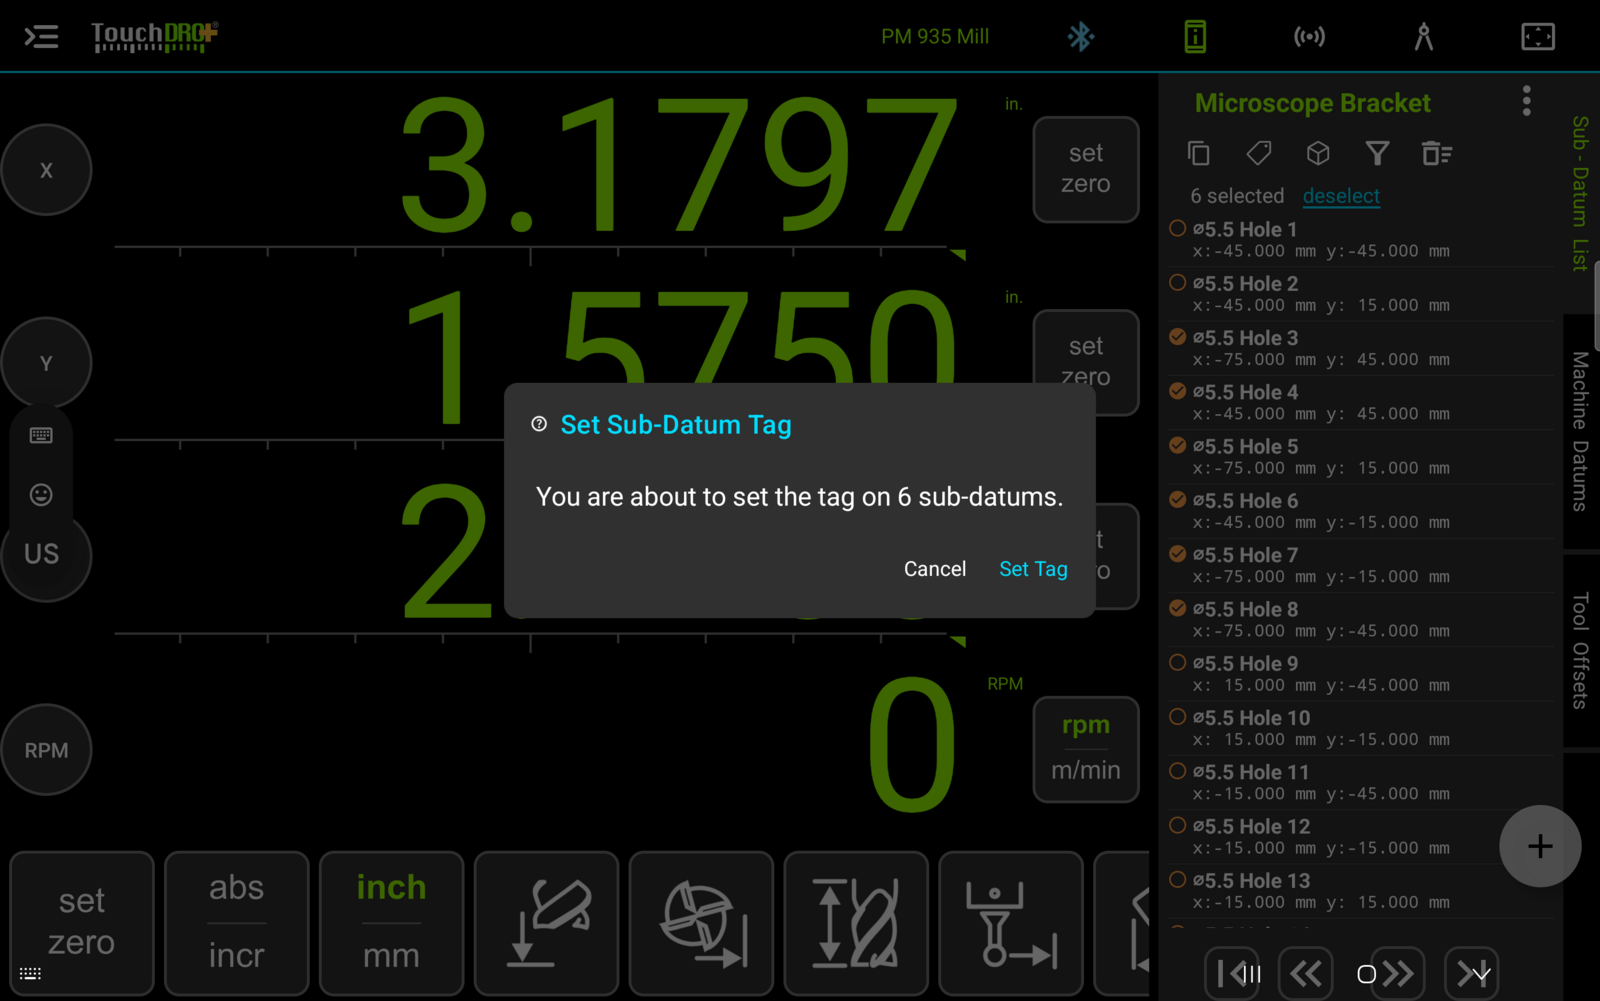
Tagging a whole group, such as the forty points of a digitized contour, doesn't have to happen one dialog at a time. Select the points in the sub-datum list, and a tag button will appear in the panel's action row while more than one point is selected. Selection itself is covered in the "The Sub-Datum Panel" guide.
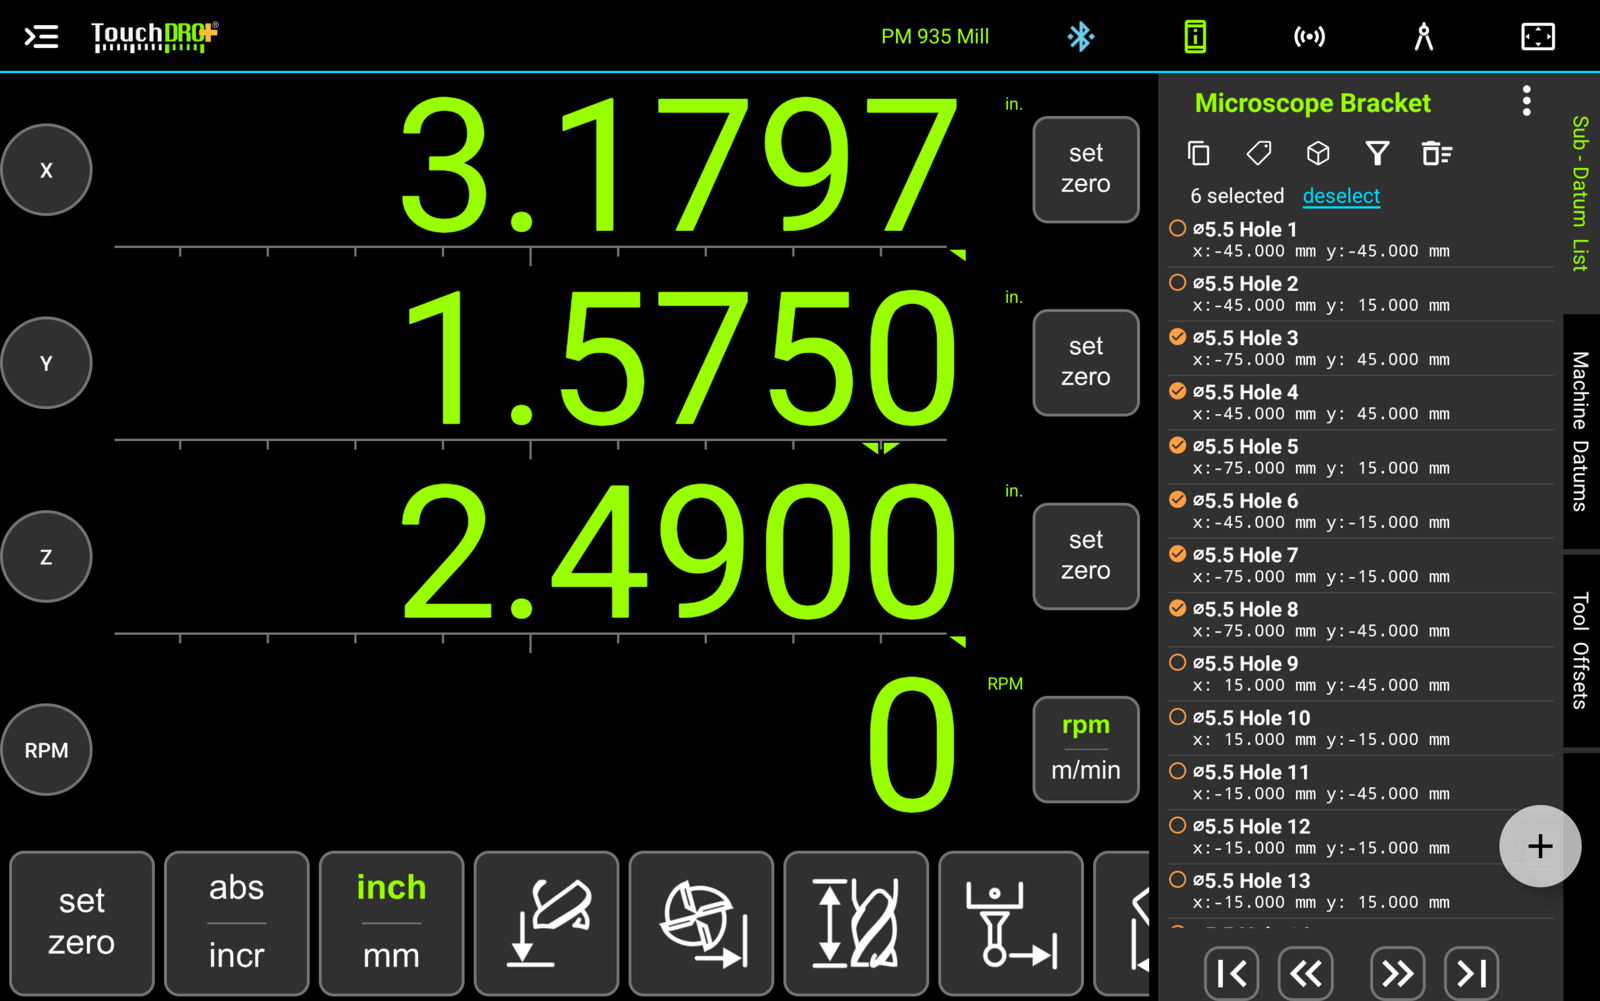
To tag the selection, press the tag button; this will open the "Set Sub-Datum Tag" dialog. Type a new tag into the "New Tag Name" field, or pick one of the workspace's existing tags from the suggestions, and press "Set Tag".
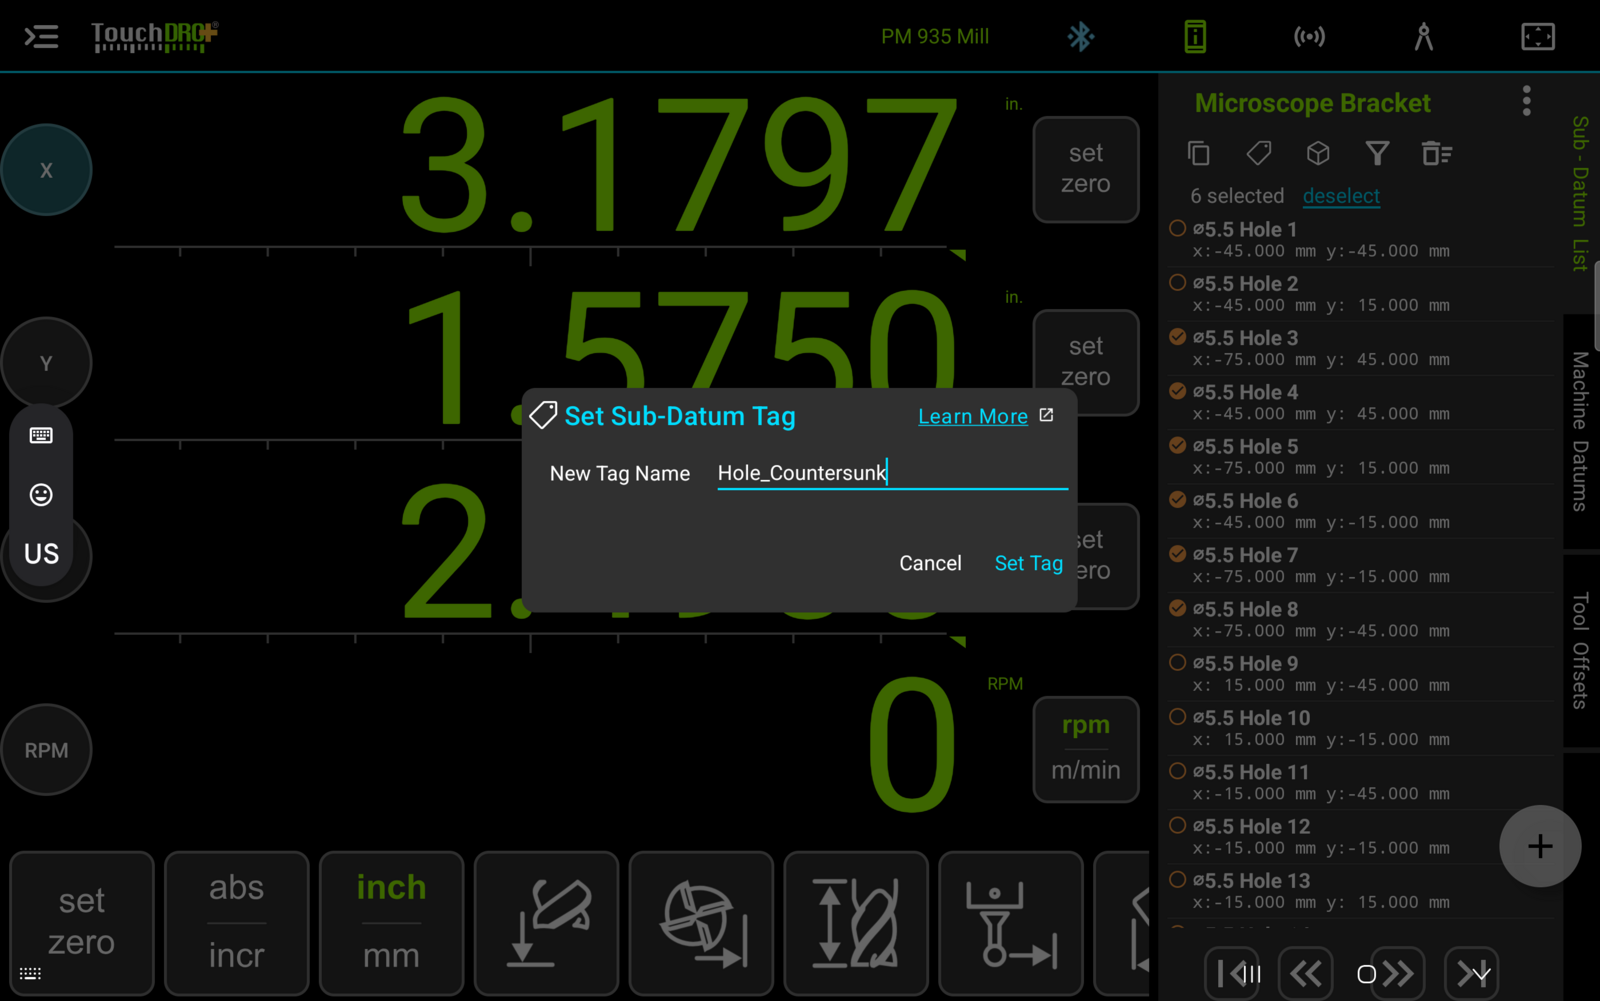
TouchDRO will ask for a confirmation that names the number of points before anything is written. Whatever is in the field is what every selected point ends up with: the field starts pre-filled when all of the selected points already carry the same tag, blank when they differ, and leaving it blank clears the tag from the whole selection, with the confirmation worded accordingly.
Setting a tag that is currently hidden by the filter also switches that tag back to visible, so the points don't vanish from the list at the moment they are being organized.
Automatic Tags
The pattern functions apply tags on their own. Bolt hole circle, arbitrary hole circle, hole grid, and step and repeat each tag the points they create with the pattern name, and a second run of the same function gets a tag of its own: the first bolt circle is tagged "Circle", the next one "Circle_2", then "Circle_3", and so on. As a result, two bolt circles in one workspace stay separately filterable, with no bookkeeping on your part.
Extracting sub-datums from an imported drawing tags them the same way, one tag per group (hole centers by diameter, arc centers, corners, named points), so a drawing full of different hole sizes comes in already sorted for the filter below. The full extraction process is covered in the "CAD Drawing Import" guide.
The Tag Filter Panel
The filter is what turns tags into time saved: it reduces the list, and the graphical view with it, to just the group being worked on. To open the filter panel, press the filter button at the right end of the panel's action button row. The panel opens below the button row and lists every tag in the current workspace, plus an "Untagged" row when there are untagged points. Each row shows the tag's colored mark and an eye icon.

To hide a tag's points, switch its eye off. The hidden points are removed from the graphical view as well as from the list, not just from the list.

While the panel is open, the filter button is shown in green. To close the panel, press the green button; this will also switch every eye back on. Long-pressing the button instead rotates every eye between fully shown and fully hidden, without closing the panel, which is a quick way to blank the whole workspace and bring it back without switching each tag by hand. In other words, there is no state in which points are hidden while the control that hid them is off screen.
The graphical view's Display panel offers the same eyes under its own "Sub-Datums" row, one per tag, so a tag can be shown or hidden without opening this panel at all; long-pressing that row's eye rotates between shown and hidden the same way. That control is covered in the "Graphical View Display" guide.
The filter is not saved. It applies to the current session and clears when a different workspace is loaded. In a workspace with no tags at all, the panel explains itself: "No tags in this workspace yet. Patterns you create are tagged automatically."
Tags in CSV Files
Tags travel with the coordinates in CSV files: the export writes a tags column, and the import reads one. A point can carry only one tag, so an imported cell that holds several keeps the first one and reports the rest. The details are covered in the "Importing and Exporting Sub-Datum Coordinates" guide.